Is there anything better than fried chicken? I think not. Well, maybe new wall art but that’s a story for another day. When you guys asked about my fried chicken recipe I knew you were in for a treat.
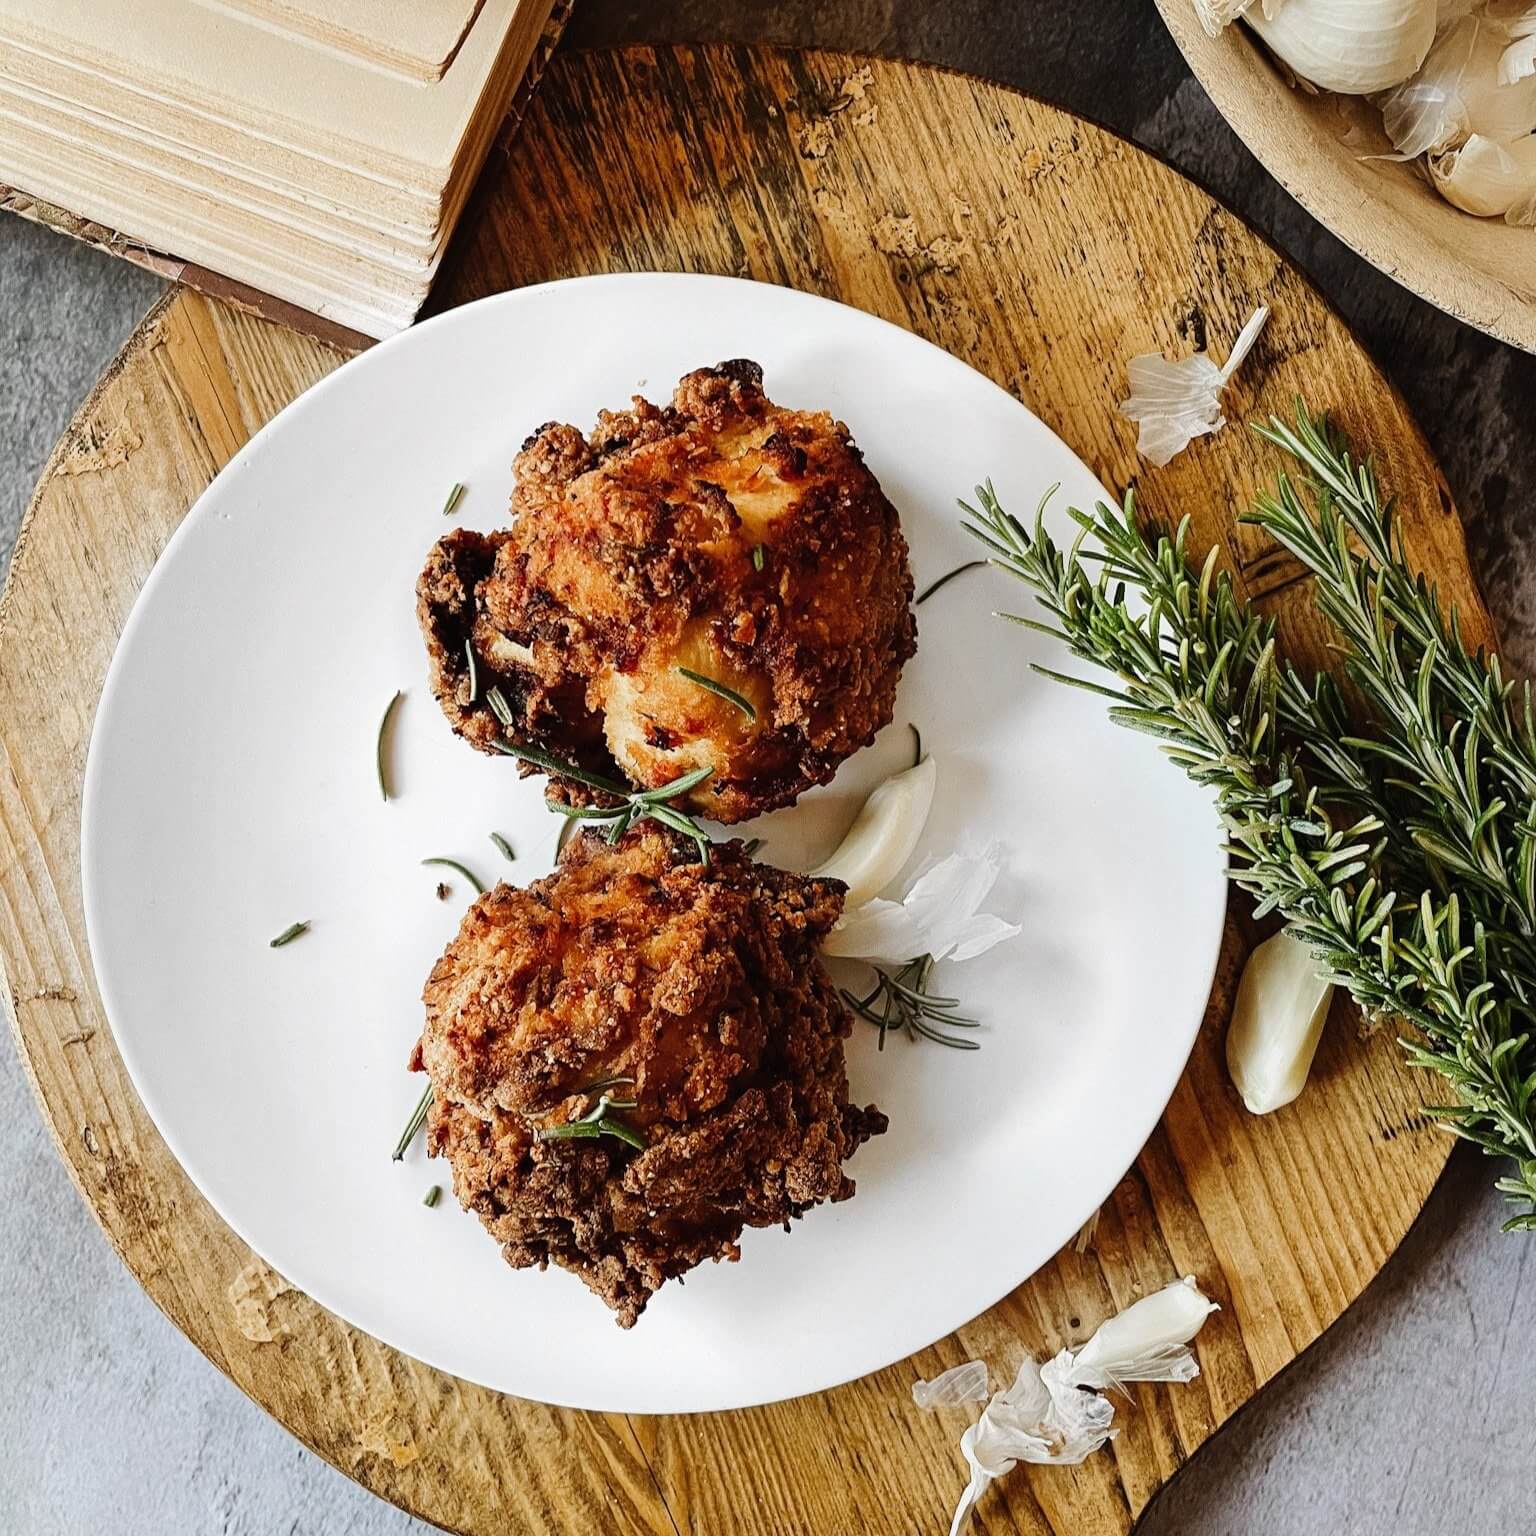
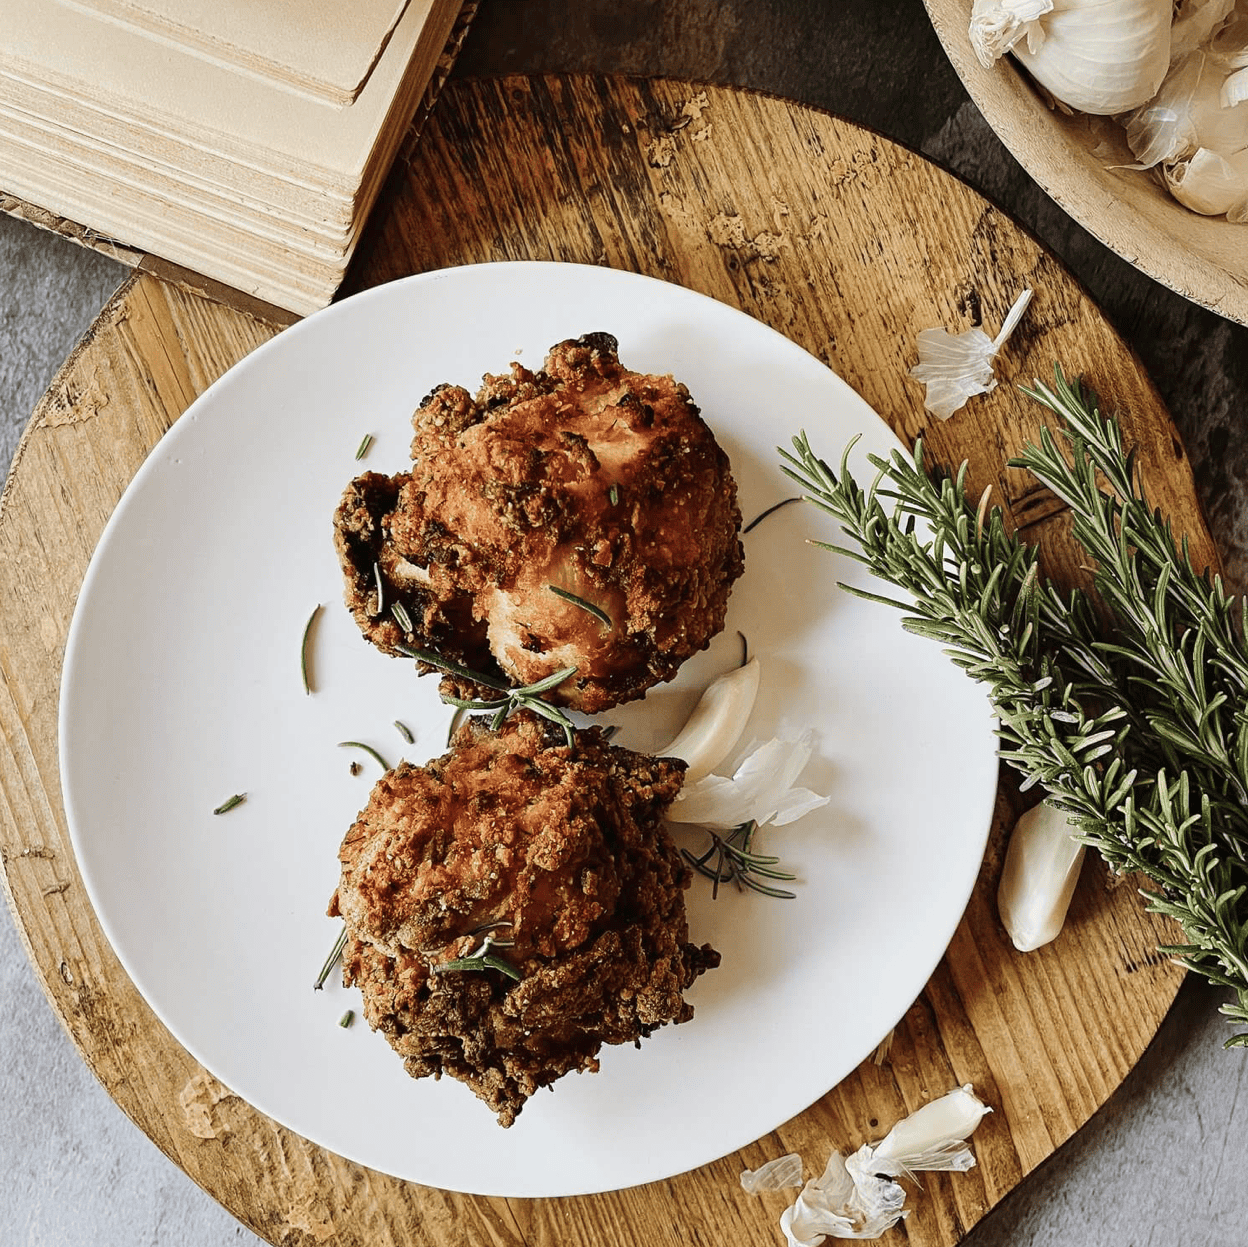
This version used buttermilk, herbs, rosemary, and crunched-up cornflakes to deliver a super moist, crackly crusted chicken that explodes with flavor. I make this often, usually in the summer, but in the winter too. You can either use store-bought buttermilk, or make your own homemade buttermilk!
The trick to getting the perfect fry is soaking the broken-down chicken in buttermilk overnight. But, even just milk to plain yogurt will do.
The added crackle of corn flakes, sizzled herbs, and the hint of garlic in the frying batter seals the deal-making this fried chicken officially even better than your mom’s. Just don’t tell her I said so okay.
Wanna fry some up? Good, you will love it. Plus, since you’re making it yourself, you can choose your favorite pieces of chicken to make (chicken breasts, chicken drumsticks, chicken thighs, etc.). Here’s how to do it:
How to Make Cornflake and Rosemary Buttermilk Fried Chicken

Cornflake and Rosemary Buttermilk Fried Chicken
Ingredients
- 1 count 3 pound chicken, broken down into as many pieces as you like. I have the butcher do this at the grocery store. Tell them it’s for fried chicken!
- 2 cups flour
- 2 cups buttermilk
- 2 count eggs
- 1/2 cup crushed corn flakes
- 1/2 tsp garlic salt
- 1 count large onion sliced
- 1/2 tsp onion salt,
- 1/4 cup chopped mixed herbs of parsley, tarragon, thyme, Or a tsp each of the dried herbs.
- 2 cupos canola oil, peanut oil, or other high smoke point oil
- 1/2 tsp paprika
- 1 dashes Salt and Peeter to taste
- 1/2 tsp cayenne pepper
Instructions
Prepare Buttermilk Chicken Bath
- Soak chicken overnight (at least 8 hours and up to two days) in buttermilk with onions, herbs, (but not the Lawrey’s seasoning) paprika, and cayenne pepper. I throw the diced chicken in with the buttermilk and herbs in a freezer bag and call it a day.
- When you are about ready to cook, remove chicken from the buttermilk mixture by straining in a colander, leaving some of the herbs on the chicken. be sure to let chicken rest for 30 minutes and come to room temperature before frying. This helps for a more tender meat.
Coat Chicken
- Beat 2 eggs and coat each piece of chicken in egg wash and place on a paper plate
- In a large paper or plastic ziplock (sturdy) bag, mix flour with seasonings to make the flour mixture.
Fry Chicken
- Meanwhile, heat 2 cups of oil in a large, heavy-bottomed deep skillet (cast iron, stainless steel, or anodized aluminum – something that can take the heat) on medium-high heat until a pinch of flour starts to sizzle when dropped in the hot oil (but don’t get the oil temperature get so hot that the deep skillet is smoking).
- Remember when working with hot oil, always have a pan lid close by.
- Drop chicken pieces in a bag with flour, crushed cornflakes, and Lawrey’s seasoning.
- Then shake until thoroughly coated then shake off any excess flour…
- Add the seasoned chicken pieces to the hot pan and fry on 1 side for 12-15 minutes, until golden brown, and then use tongs to turn the pieces over and fry for an additional cooking time of 10-12 minutes, again until golden brown.
- Be careful to keep the oil hot enough to fry the chicken, but not so high as it burns the chicken. I use a deep-fry thermometer and check the oil making sure it stays at 325′ degrees. Be sure to temp the chicken pieces too using an instant-read thermometer. It’s done when the meat thermometer shows an internal temperature of 165’
- If frying in batches, warm up your oven to medium heat (325’ F) to maintain the internal temperature of the chicken. First, let chicken rest on a paper plate lined with paper towels. Then, after letting them drain onto paper towels, you can place them in a single layer on a wire rack in the oven until ready to serve.
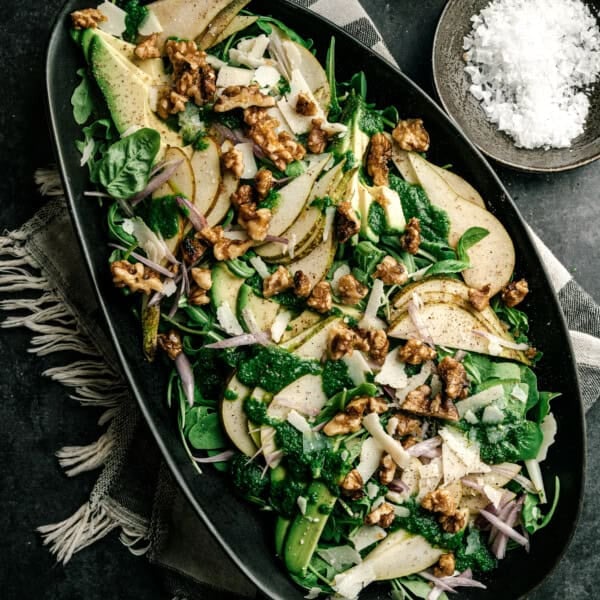
- When ready to eat, serve with a Strawberry Caprese Salad, Mashed potatoes, or corn on the cob. Add additional salt and black pepper to taste (if desired), and serve with plates or in a shallow dish.
Notes
- Marinate for Maximum Flavor – The buttermilk soak isn’t just for tenderness—it infuses the chicken with flavor. For the best results, let it marinate for at least 8 hours, but 24 hours is even better. The acid in the buttermilk helps break down proteins, making the meat ultra-juicy.
- Room Temperature is Key – Cold chicken straight from the fridge will lower the oil temperature and result in uneven cooking. Let it rest at room temperature for 30 minutes before frying to ensure a crispy, golden crust and a perfectly cooked interior.
- Crush Cornflakes Finely, but Not Too Fine – The crushed cornflakes add crunch, but if they’re too coarse, they may not stick well to the chicken. Aim for a texture similar to panko breadcrumbs—small, flaky, and crispy.
- Layer the Coating for Maximum Crispiness – After dipping in the egg wash, firmly press the chicken into the flour and cornflake mixture. Then, let it rest for 10 minutes before frying—this helps the coating adhere, preventing it from falling off in the oil.
- Oil Temperature Control – Maintain the oil at 325°F for perfectly crisp chicken without burning. A deep-fry thermometer is your best friend. Too low, and the chicken absorbs oil and turns greasy. Too high, and the outside burns before the inside cooks through.
- Don’t Overcrowd the Pan – Fry in batches to keep the oil temperature steady. Overcrowding lowers the heat, leading to soggy chicken instead of crispy, golden perfection.
- Drain & Keep Warm Properly – Skip the paper towels after frying! Instead, let the chicken rest on a wire rack set over a baking sheet. This prevents steaming and keeps the crust crispy. If cooking in batches, hold the finished pieces in a 325°F oven until ready to serve.
- Season Immediately – While the chicken is still hot, sprinkle a touch of extra salt and black pepper. This enhances the flavor and makes sure every bite is perfectly seasoned.
Nutrition
Nutrition information is automatically calculated, so should only be used as an approximation.
Ingredients:
- 1 (3 pounds) chicken, broken down into as many pieces as you like. I have the butcher do this at the grocery store. Tell them it’s for fried chicken!
- 2 cups flour
- 2 cups buttermilk
- 2 eggs
- 1/2 cup crushed corn flakes
- 1/2 teaspoon garlic salt
- 1 large onion, sliced
- 1/2 teaspoon onion salt, 1/4 cup chopped mixed fresh herbs (parsley, tarragon, thyme) or a tsp each of the dried herbs.
- 2 cups canola oil, peanut oil, or other high smoke point oil
- 1/2 teaspoon paprika
- 1 tablespoon of Lawrey’s season salt
- Salt and black pepper
- 1/2 teaspoon cayenne pepper
Recipe Card Directions:
- Soak chicken overnight (at least 8 hours and up to two days) in buttermilk with onions, herbs, (but not the Lawrey’s seasoning) paprika, and cayenne pepper. I throw the diced chicken in with the buttermilk and herbs in a freezer bag and call it a day.
- When ready to cook, remove chicken from the buttermilk mixture by straining in a colander, leaving some of the herbs on the chicken. be sure to let chicken rest and come to room temperature before frying.
- Beat 2 eggs and coat each piece of chicken in egg wash and place on a paper plate
- In a large paper or plastic ziplock (sturdy) bag, mix flour with seasonings to make the flour mixture.
- Meanwhile, heat 2 cups of oil in a large, heavy-bottomed deep skillet (cast iron, stainless steel, or anodized aluminum – something that can take the heat) on medium-high heat until a pinch of flour starts to sizzle when dropped in the hot oil (but don’t get the oil temperature get so hot that the deep skillet is smoking).
- Remember when working with hot oil, always have a pan lid close by.
- Drop chicken pieces in a bag with flour, crushed cornflakes, and Lawrey’s seasoning.
- Then shake until thoroughly coated then shake off any excess flour…
- Add the seasoned chicken pieces to the hot pan and fry on 1 side for 12-15 minutes, until golden brown, and then use tongs to turn the pieces over and fry for an additional cooking time of 10-12 minutes, again until golden brown.
- Be careful to keep the oil hot enough to fry the chicken, but not so high as it burns the chicken. I use a deep-fry thermometer and check the oil making sure it stays at 325′ degrees. Be sure to temp the chicken pieces too using an instant-read thermometer. It’s done when the meat thermometer shows an internal temperature of 165’
- If frying in batches, warm up your oven to medium heat (325’ F) to maintain the internal temperature of the chicken. First, let chicken rest on a paper plate lined with paper towels. Then, after letting them drain onto paper towels, you can place them in a single layer on a wire rack in the oven until ready to serve.
- When ready to eat, serve with a Strawberry Caprese Salad, Mashed potatoes, or corn on the cob. Add additional salt and black pepper to taste (if desired), and serve with plates or in a shallow dish.
Commonly Asked Questions about Fried Chicken Recipes
In addition to making more flavorful chicken, placing cold chicken in buttermilk also helps tenderize the chicken breasts, drumsticks, or whatever type of chicken you’re preparing!
Yes, but for the better! Placing the chicken in a buttermilk mixture to marinate it breaks down the proteins in the chicken. This results in tastier, juicy chicken!
Some people swear that a single hour is enough. I’m not one of those people: I recommend marinating your chicken for 12 to 24 hours if you want truly juicy meat!
If your seasoned flour mixture keeps falling off every piece of chicken, it’s hard to get the crispy chicken pieces you want! Fortunately, there’s usually an easy solution. Are you drying off your chicken before applying the spice mixture? If not, the breading won’t stick very well, making it hard to get the crunchy chicken you want.
Yes, it can! While marinating does help you get tender chicken, you can still overdo it (although smaller pieces are more susceptible that larger pieces). I recommend marinating for no more than 24 hours before transferring your chicken to a shallow bowl to make buttermilk fried chicken.That said, the official USDA recommendation is no more than 48 hours!
That’s it guys! I simply love fried chicken – especially this buttermilk chicken recipe because it’s super juicy, crunchy on the outside, and has an extra kick of garlic and rosemary. I even like a bit of Franks hot sauce with it too (after I’ve given it a quick drain on paper towels, of course!).
Will you give this recipe a try? Your family thanks you for it I promise. It’s literally the best ever and bursting with deliciousness.
Of course, deep-frying isn’t as healthy as oven-fried chicken or cooking chicken in an air fryer. Balance your weekly meal plan with one of my air fryer zucchini chips to make it a bit healthier.


For perfect fried chicken texture, dont forget to Maintain the oil at 325°F for perfectly crisp chicken without burning. A deep-fry thermometer is your best friend. Too low, and the chicken absorbs oil and turns greasy. Too high, and the outside burns before the inside cooks through.
Also, be sure to double fry for the perfect crisp.