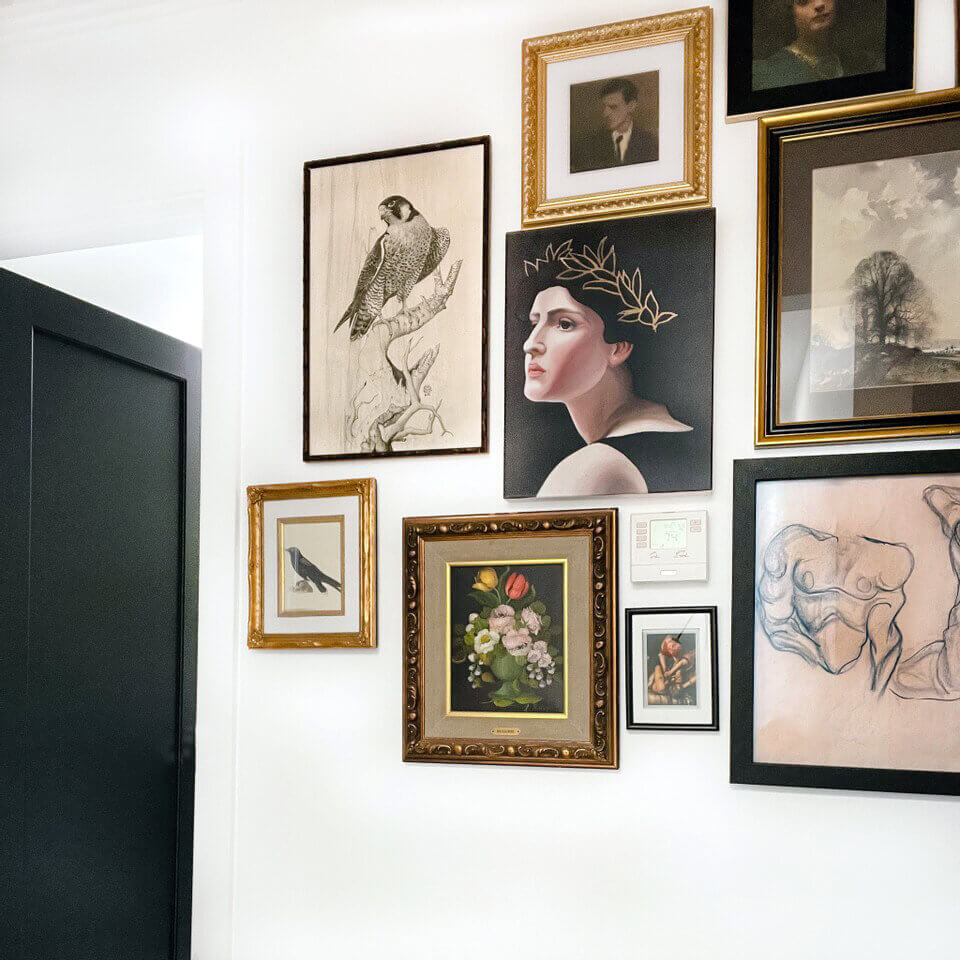
What’s better than a perfectly curated DIY gallery wall? Not much, if you ask me. So, I’m sharing all of my favorite DIY Gallery Wall Ideas and Pro tips to get the wall of your dreams.
Art has always played a critical role in the overall success of any room in my spaces. That’s why it was surprising—even to me—that I had yet to share with y’all the process by which I layout, hang and style my gallery walls. How could I be so rude?
So today, I want to make it up to ya and explain how in just a single afternoon anyone can transform any empty wall in their home into a jaw-dropping moment.
If you are just starting out or looking to save on budget I am first sharing one of my favorite DIY’s so that you can print your very own art at home for a fraction of the cost. Nope, you don’t actually need to already own an entire collection of canvas prints!
All you need is a printer, thrift store frames, tape, and canvas printer paper. I have everything you need linked here. If you already have all your art prints go ahead and jump down to the Layout and Placement section. Otherwise, let’s get started on our DIY gallery wall with my favorite DIY Gallery Wall Ideas.
The Purpose of Your DIY Gallery Wall
When you’re trying to find the best way to fill in a blank wall in your own home, it can be helpful to start with the purpose (rather than the art displays themselves).
Of course, the face-value purpose of adding photo frames to a room is obvious: you want to add some visual flair! However, that doesn’t really define a “purpose.” What do I mean by purpose? Well, here’s what I mean.
Obviously, your room is missing something. For a dining room, it could be missing that sense of watch. A living room could be missing the feeling of family. A bedroom could be lacking a sense of personality. These are all problems you can easily solve with a gallery wall!
Changing the “room feel” is easy to do with art. However, if you don’t have a goal in mind, the change you end up with may not be the change you were after. That’s why it’s so important to have a specific purpose or goal in mind.
Common Reasons you should create a DIY Gallery Wall
There are many different goals you can have when designing a gallery wall, but here are a few of the most common reasons I’ve personally added wall art to a room:
- To add character to the room. Nobody likes a room that reminds them of a hospital. It’s neutral, it’s uninspiring. Gallery wall art allows you to interject your personality into the space, turning a “living space” into a “lived-in home.”
- To fill in a blank space. Having a large space on your wall with nothing in it just makes it feel like something is missing: I don’t like it! Sure, you could always just fill in the space with one large photo, but I feel like creating a gallery wall that’s specifically curated for that space alone feels much more special.
- To give the room a specific theme. Love birds? Space? The ocean? If so, creating a themed gallery wall is the perfect way to show your appreciation for a particular thing. Since tastes, hobbies, and passions vary widely, curating your gallery wall to fit with the larger theme of a room is one of the most unique ways to decorate!
Family Photos: Yay or Nay?
I love having family photos in my house, but let’s face it: the vibe they give off is a bit different from most pieces of art! This can make it challenging to incorporate some of your favorite photos into your gallery wall ideas.
Photos of family members often involve similar poses, which is great if you’re trying to create a symmetrical gallery wall. However, the lack of variety often makes it hard to incorporate these photos into your larger gallery wall look.
What’s the Solution?
Fortunately, there are alternatives to creating a dedicated family photo wall! Here are a few ways to add family photos to your DIY photo wall without them looking out of place.
- Frame multiple photos together. Whether you want to leave the photos intact or create a hand-crafted collage, framing family photos together helps prevent them from standing out in the gallery.
- Give them a thick frame. Alternatively, you can make them stand out a bit more by giving your favorite family photos a wider mat. This extra space between the photo and the wall helps the eyes transition from one surface to the other, while also making the photos look at home on the wall.
- Opt for candids instead. As previously mentioned, posed photos stick out. Like, a lot! If possible, you should go for candid photos. These are great because they showcase the personalities of the people in the photos, while also offering a wider range of settings to work with.
- Stick to your color theme. To really help your family blend into your photo gallery walls, it’s usually best to select photos with the same color theme as the gallery itself.
- When in doubt, go black & white. B&W is a classic option. While it may not be the most visually daring choice, that doesn’t really matter (as long as it looks good!).
Alright, with those thoughts out of the way (but still in the back of your mind), let’s get started with the actual creation process!)
Start Curating Frames
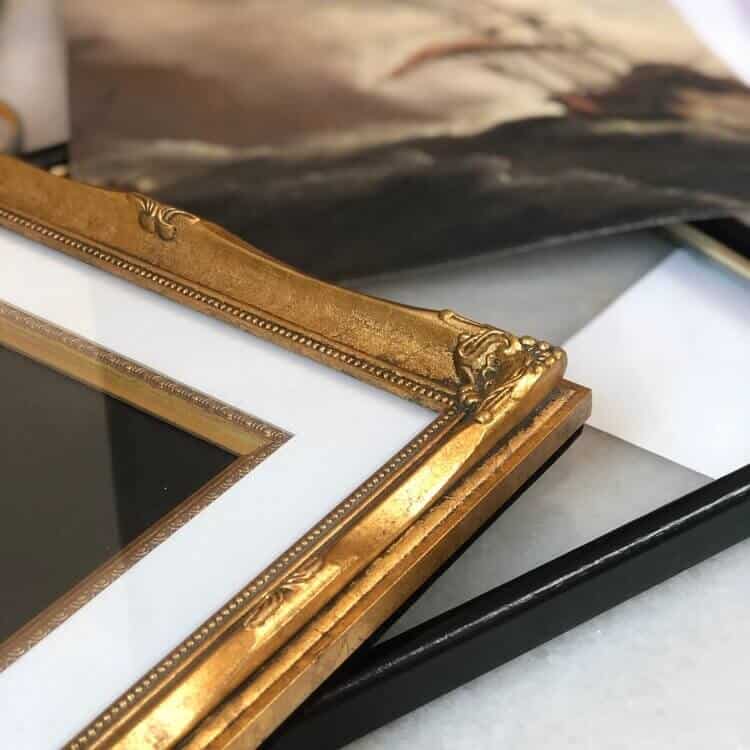
Never pay full price for a picture frame. I get almost the majority of my frames from either Goodwill, a local thrift store, flea markets, or a swap meet. If safety is a concern there are amazing and affordable options online via Amazon, Etsy, eBay, and Facebook Marketplace. Just type vintage or antique frames into the search bar and start scrolling.’ You should aim to vary in sizes, textures, and materials. I go for brass, walnut, and aged woods. Here are some pro-tips on how to thrift store like a boss and score big.
Download a Print to make a DIY Gallery Wall
Head to some of my favorite online vendors for hi-res art that will print beautifully for use in your DIY gallery wall. You can’t beat the prices. My Favorite Sources are:
- North + Finch Art (Check my curated collection and get 15% OFF with code: 136home)
- BFF Print Shop
- Juniper Print Shop
- Framebridge
- Shop Vintage Supply
- Etsy
Get the Right Paper for Your DIY Gallery Wall
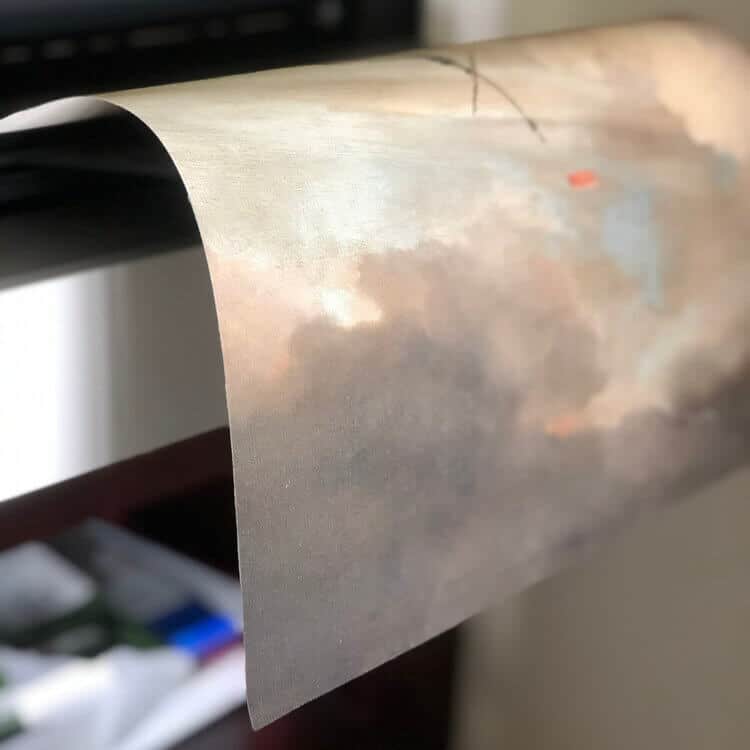
First, you’ll need to order canvas paper (this is where the magic happens!). This awesome paper allows you to get an authentic look because the weight and texture of the canvas look and feels just like a real painting. Just be sure to print on the correct side. Otherwise, your DIY gallery wall might take a bit longer than originally anticipated!
Measure and Print on Canvas Paper
Be sure to measure the size you need using a measuring tape and make sure your printer can handle the paper source. I would suggest not going above 11” x 14” unless your printer has the ability to produce a jumbo image. Print at the best quality you can. Need a printer upgrade? I suggest this one!
Consider Frame Sizing
You’ll also need to decide whether you want to use uniform or different sizes of frames. Even with uniformly-sized photos, you can still add some visual flair with how you arrange the photos, so don’t instantly write off that option!
On the other hand, using a variety of different sizes will really open up a lot of options for you. You’ll have hundreds of more choices, both for frames and for photos. Let’s face it: some photos don’t look great when they’re small (and others look horrible when they’re blown up!).
Crop
Once printed use a straight edge and sharp scissors or an x-acto blade to make precise cuts based on the frame you are using. Make sure the scissors are sharp so that you don’t bend or fray the paper. This paper is a lot denser than traditional paper, you will want to be careful here.
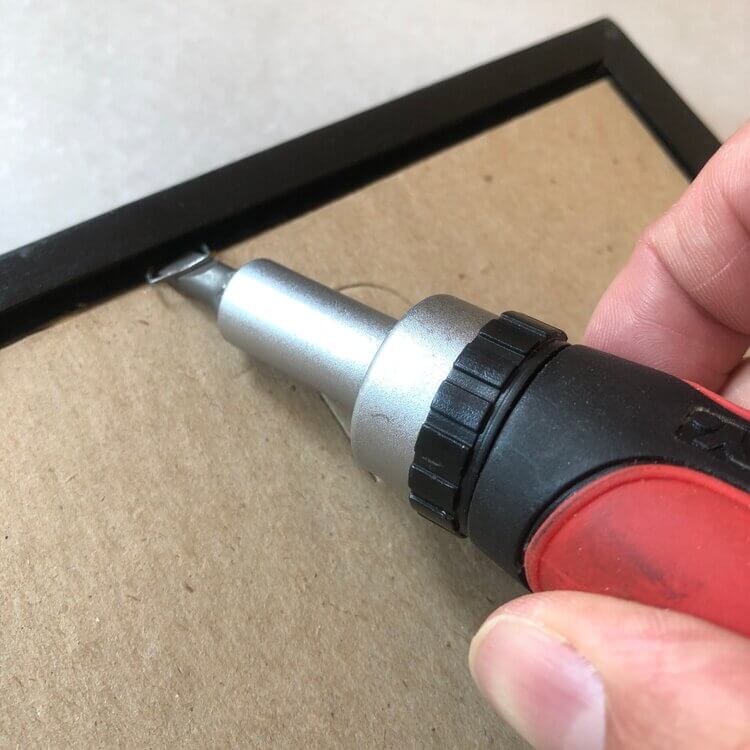
Open up the Frame
At this point go ahead and loosen any clips/pegs on the back and remove any paper from the frame so that you can access the old art and display glass. Depending on the frame you got, you will want to dispose of any loose paper and potentially remove the inside art etc. I always use a flathead screwdriver to bend up the metal pegs.
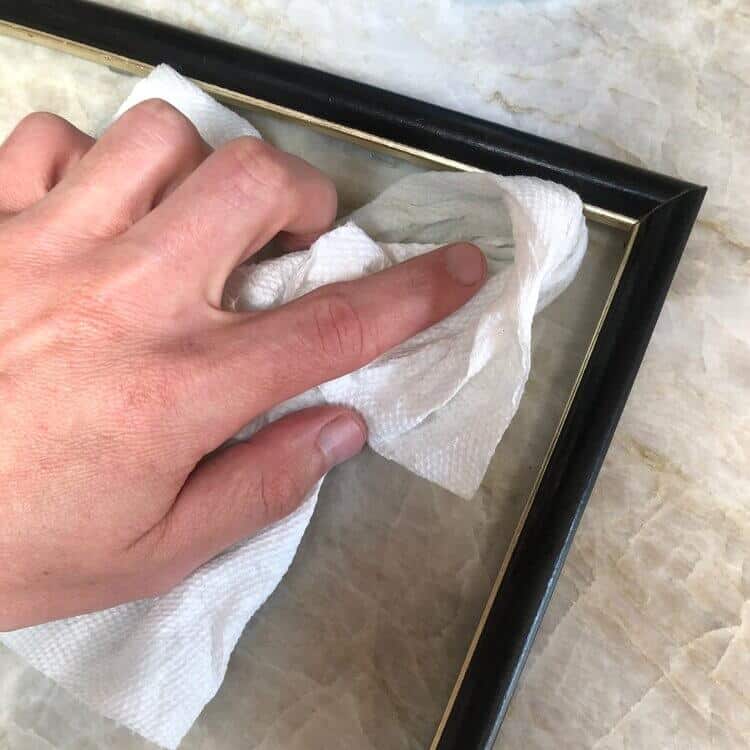
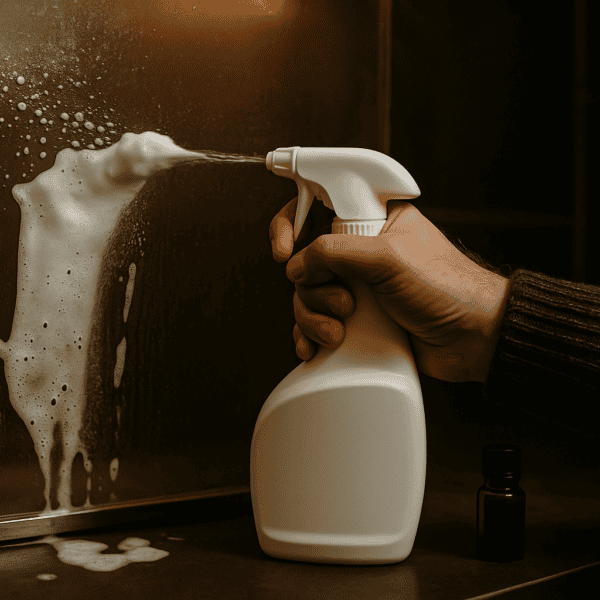
Clean your Frame
Wipe with a damp cloth and consider Windex to get the frame and glass as clean as possible. You don’t need the glass, but I do think it takes the quality of the final piece up a notch if you do. I also use a feather duster once the frame has been wiped clean. This is the perfect way to avoid having any pesky dust or debris stuck to the glass that could show once framed.
Place and Set Art for Your DIY Gallery Wall
Once the frame is open, place your art in the desired location and use frog tape (my preferred painter’s tape) on the four corners to hold your art in place. I prefer this over adhesives. The tape can be removed at any time and won’t damage the print or frame. Also, if you want to swap art out you can do so easily.
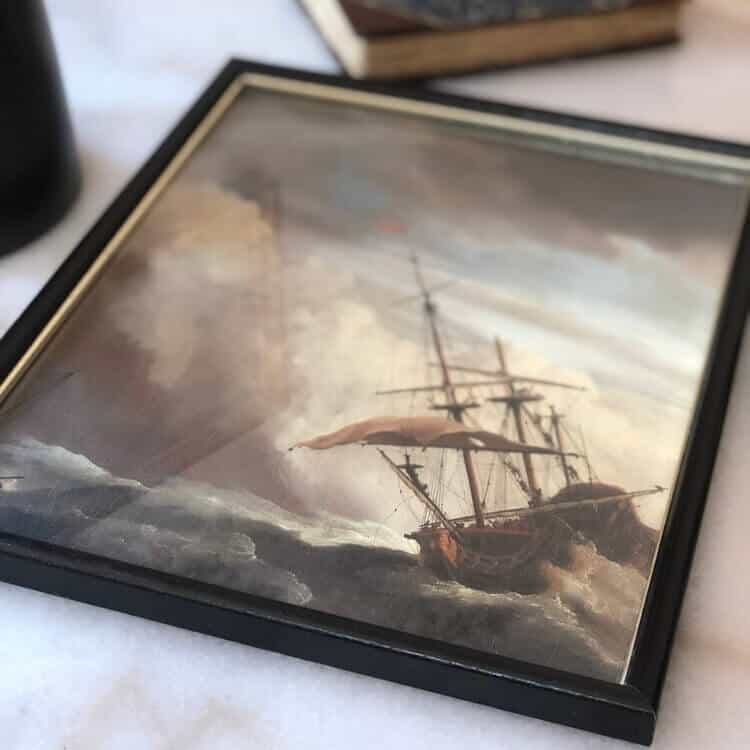
Assemble
Once you have your art firmly in place proceed to simply re-assemble your frame back together. Be careful to bend back into place any cardboard backing and pegs to seal your picture uptight. Before you tighten all the pegs take a quick peek at your art from the front to see if you got everything in the right place. There is nothing worse than tightening all the pegs only to realize your DIY gallery wall art looks wonky. But, if things are looking great then flip it over and enjoy your new piece of art! I hope it looks great and you had a good time doing it.
Layout and Placement for a Perfect DIY Gallerywall
Okay, now that you have your stunning artwork gathered and framed, let’s talk about the process of deciding where to place your art and how. Here’s is what to keep in mind:
Measure Your Wall of Choice
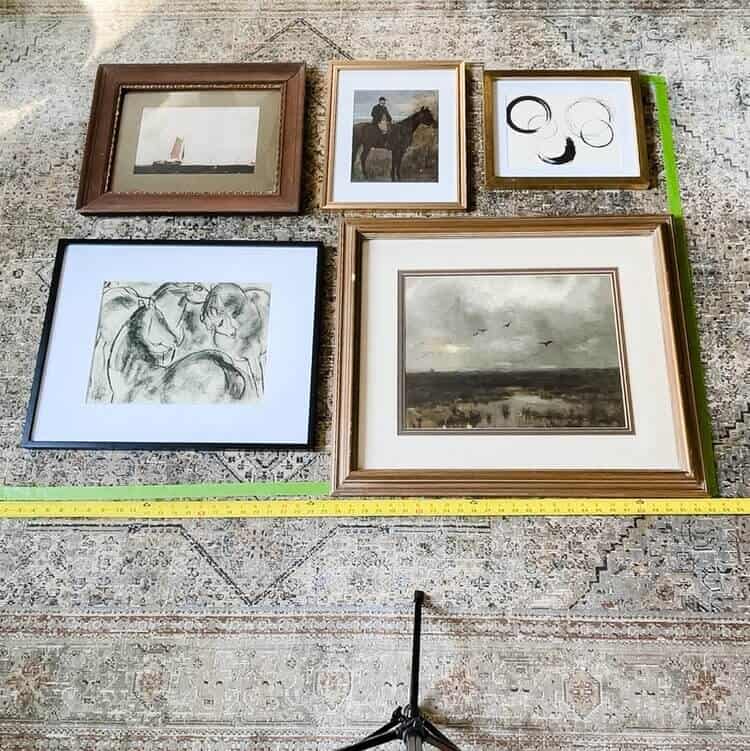
You’ll need to measure both the length and height in which you would like all your art contained. You will want to use Green Frogtape afterward to mark these dimensions on the floor, ideally in front of it – but I have don’t it in completely different rooms so that you know what space you have to move your “pieces” together to make the final composition
Take a Closer Look at Your Art
Fan out your framed and/or printed art pieces of choice in front of you on the floor. I like to be able to see all pieces so I can consider size, color, frame style, and proportions all at once. It’s best to take a moment to look at all your pieces together versus hanging them directly onto the wall one by one. I promise you will get a stronger more cohesive result this way.
It’s Time to Tape!
Tape your workable area after you have measured and gathered all your art. I use this Frogtape. It doesn’t leave behind any residue on your floor. Be sure to tape out both the length and height from your wall. This is an important step so you know the boundaries by which you can arrange your pieces ever so precisely.

Begin arranging art in an aesthetically pleasing manner. Pro Tip: Try to use odd numbers like 5,7, or 11. This tends to net a result that looks more organic and intentional. How you arrange your pieces is completely a design preference choice. But I get asked a lot what I consider when placing art. Here is what I suggest.
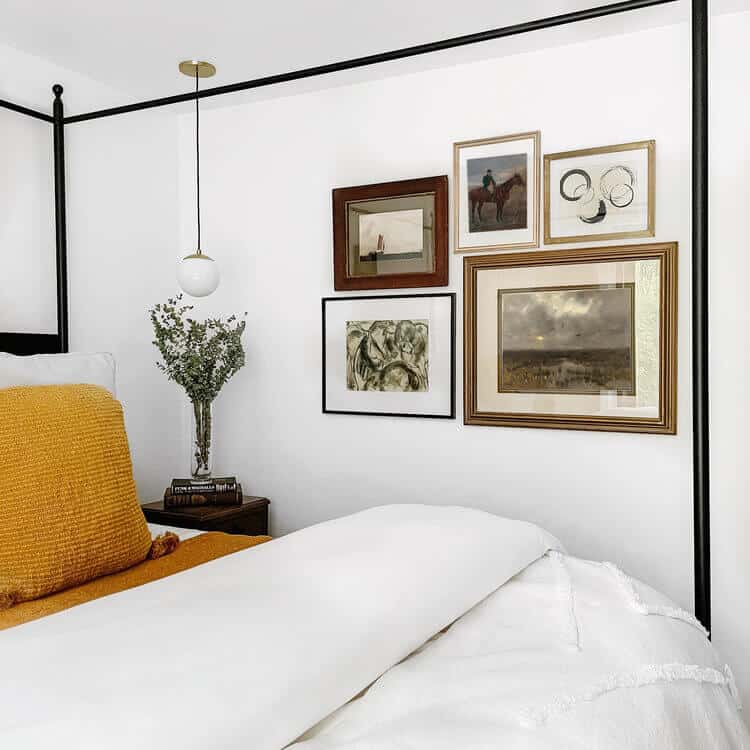
Start Big
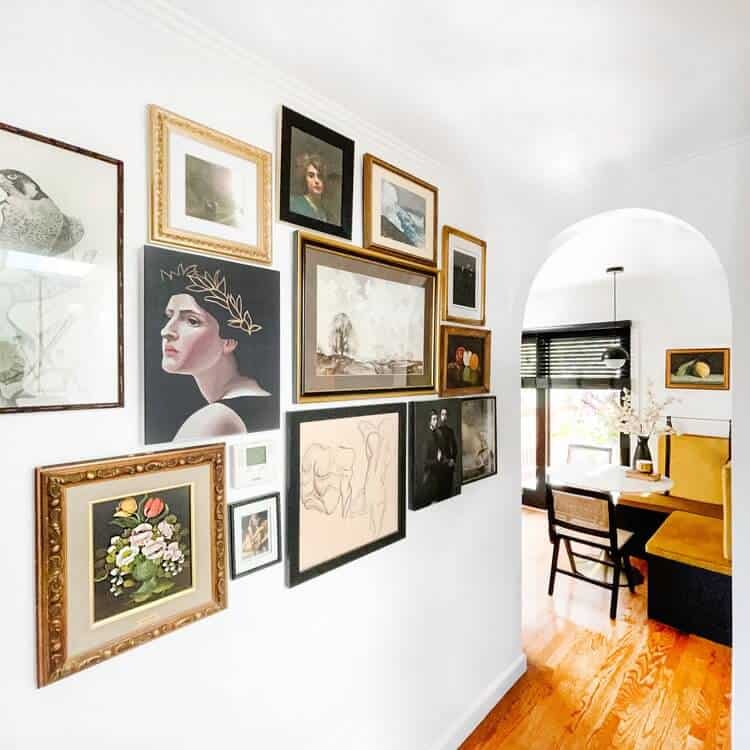
Start with the most contrasting, largest piece of art first. This will be where the eye goes immediately. It’s the welcome to your gallery wall so make sure this piece packs a punch. Note that I tend to avoid having this anchor piece centered at eye level. Rather, I place it in the bottom third of the space either right to left-justified (and never at the top!). It’s usually somewhere in the bottom right or left. I just think it looks more interesting this way and avoiding the top makes sure the gallery wall doesn’t read as too heavy.
Maintain Spacing
Keep the space between frames generally evenly spaced. This will help the design feel more tied together and prevent a piece from looking like it’s floating off by itself. The spacing doesn’t have to be perfect, in fact, it shouldn’t be. You want the vibe to feel lived in. Just try where possible and this will help the entire wall read as one giant piece of art. That’s the magic guys!
Approach It Like a Puzzle
Lock your pieces together like a puzzle. I personally prefer to avoid having the edge of each frame exactly lined up. You want things to look locked together and overlap as needed for visual interest. This is also where I get creative with scale.
Space Your Dark Colors
Place darker colors opposite one another. If you have more than one sketch or repeating color, I tend to also have those placed opposite one another too. This is a good rule of thumb to use, as it keeps the eye moving and the viewing experience dynamic.

Aim for a Bottom-Heavy Design
Try to have bigger heavier pieces towards the bottom but not all. This will ground the vignette more strongly.
Abide by the Lines
Stay inside the lines of the tape and make sure you are paying attention to where the hanging hook or wire is on the neck of each piece. That is where you will have to hang each piece of art. You don’t want that to slide below or above the tape.
Make Adjustments as Needed
Be sure to step back and look at your gallery holistically. Have fun with it and be creative. There is no right or wrong here. You will know when it feels right to you.
Save Those Memories!
Take a pic once you have a layout you love. You would be surprised how quickly you can forget. Do this before moving on to the next step!

Make Your Mark(s)
Mark where you will need a hook. I have a pro tip here. Simply, squeeze the tiniest drop of toothpaste on the hook or center of the wire where you will need to have the art hung. Then place the art on the wall where you want it to live and pull it off. Guess what? That tiny little dot is where you will want to place a command hook to hang each item (you can also use command strips)!
These are my favorite items for hanging wall art. I don’t love putting small nail holes in my walls and I move art around a ton. They come in tons of sizes and options. You can’t go wrong with the sawtooth version that works for both a hook and wire. I have been linked here.

Once you have an adhesive hook on the back of the frames and you have them snugly placed on the wall you will be able to see how well your layout is working in your space. Take a moment to lightly nudge anything that’s looking crooked, and feel free to remove or add additional command hooks as you see fit. They are super easy. Guys, that’s it – now you have a brand new gallery wall!
What About the Wall Itself?
A gallery wall serves as a great focal point on its own, but that doesn’t mean you can’t enhance its design even further. Coloring the wall a different color from every other wall in the room instantly adds a sense of contrast to the room, which can really help your DIY gallery wall gallery ideas art pop!
On the other hand, it’s essentially a project on top of a project, so you should make sure it’s really what you want to do before committing to this option. Still, if this is something you’d like to try, then the first thing you’ll need to do is take a look at your current walls.
What color are they, and what color will compliment them without clashing with your art selection? Generally, you’ll want your accent wall color to be opposite your main wall color. In other words, choose a darker color for lighter walls; lighter colors for darker walls.
For simplicity’s sake, choosing one color is always a good option (which can easily be accomplished by painting). However, if you want to get a bit more creative, you can always add patterns to your wall. Wallpaper would be the easiest way to do this.
Of course, that’s not your only option. Other potential ideas include tile, wooden, brick, or even stone! Regardless of what you choose, don’t get lost in this design. Remember, it’s only secondary: the main feature of your wall will be your gallery wall art.
FAQ
How do I build a cheap gallery wall?
Your best option is to print your own art (as detailed above) and find picture frames for cheap at second-hand stores. While it might be a bit harder to find exactly what you’re looking for, it’s definitely cheaper than buying new empty frames for every picture!
How do you make a simple gallery wall?
To create an extremely simple gallery wall, you’ll only need three photos. This doesn’t leave you with much space for visual flow, so you’ll want to stick to one of your favorite art styles with the same color palette for a cohesive look.
Mount the largest piece on either side, and center the two smaller pieces on the opposite side of the first piece. Alternatively, if all of your photos are the same size, you can simply line them up next to each other on the wall.
How many frames do I need for a gallery wall?
As above, you could technically make a gallery wall with as few as three photos (provided they’re the right size). In general, however, I would say most people will want at least five photos for their gallery wall. Remember, while more photos mean more options, it also means you’ll need to put in a little more effort for the designing aspect of your gallery wall layout!
What size frames for a gallery wall?
That really depends: how much space does your DIY gallery wall have? Remember, an overcrowded space is an awkward space, so—depending on the size of the space you’re working with—you may need as much as a few inches of space between each piece!
That said, you’ll want frames that are a minimum of 11×14 most of the time. For smaller spaces, 10×10 or 8×10 frames may be suitable. When in doubt, I recommend whipping out your trusty tape measure for a rough idea of the spacing constraints.
Should a gallery wall have all the same frames?
You certainly can have uniform frames, but it won’t be a very visually stimulating design. In fact, the only way I would recommend using uniform frames in your own gallery wall is if you’re trying to make a triptych gallery wall.
Outside of that, I’d say variety is best. Using a mixture of different colored frames (such as black frames next to white frames,) while also mixing large frames with smaller pieces is a great way to add personality to an otherwise blank space!
Is there an app to create a gallery wall?
It’s 2023: of course there is! Provided your phone can support it, using an app like WALLARY is the easiest way to create a mockup of your future photo wall using AR (Augmented Reality).
Find a picture of your chosen art print pieces (or take them yourself), upload these photos to the app, then construct an AR mockup before assembling your physical DIY gallery wall!

Will you be giving this home decor DIY a try? I hope so, and if you do please let me know over on Instagram. I really do think art makes all the difference in a home and I hope that this DIY and step-by-step on how to layout and hang your art helps you bring an affordable and beautiful gallery wall into your home. I know I love mine. I hope you do too.


Love it!! Moving into a new home next week and I’ve been collecting art to make a gallery wall in the living room. Can’t wait to use these tips!
Love it!! Moving into a new home next week and I’ve been collecting art to make a gallery wall in the living room. Can’t wait to use these tips!
Love it!! Moving into a new home next week and I’ve been collecting art to make a gallery wall in the living room. Can’t wait to use these tips!
Solid explanation, I appreciate it. Nicely done.