Refinishing hardwood pine floors might sound intimidating at first, but trust me, it’s pure DIY magic. Our cozy cabin loft went from warped, scratched, and yellowed to soft, neutral, and perfectly matte (no shiny plastic vibes allowed).
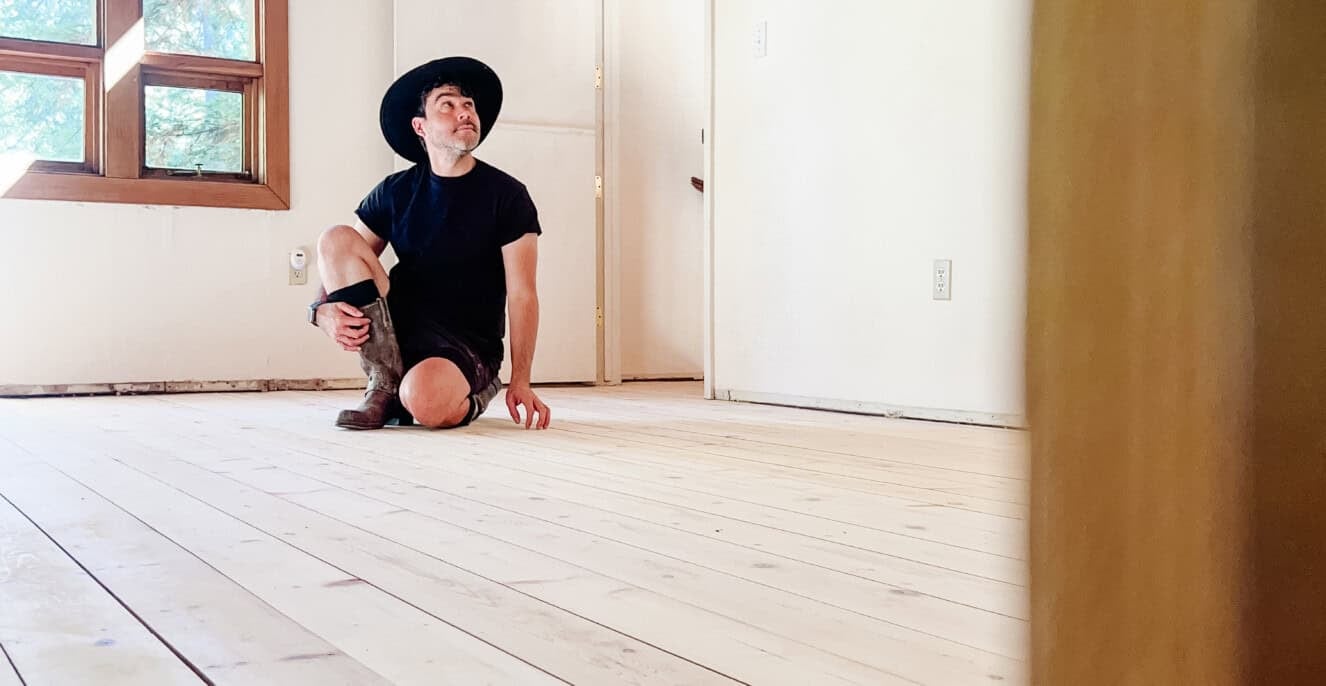
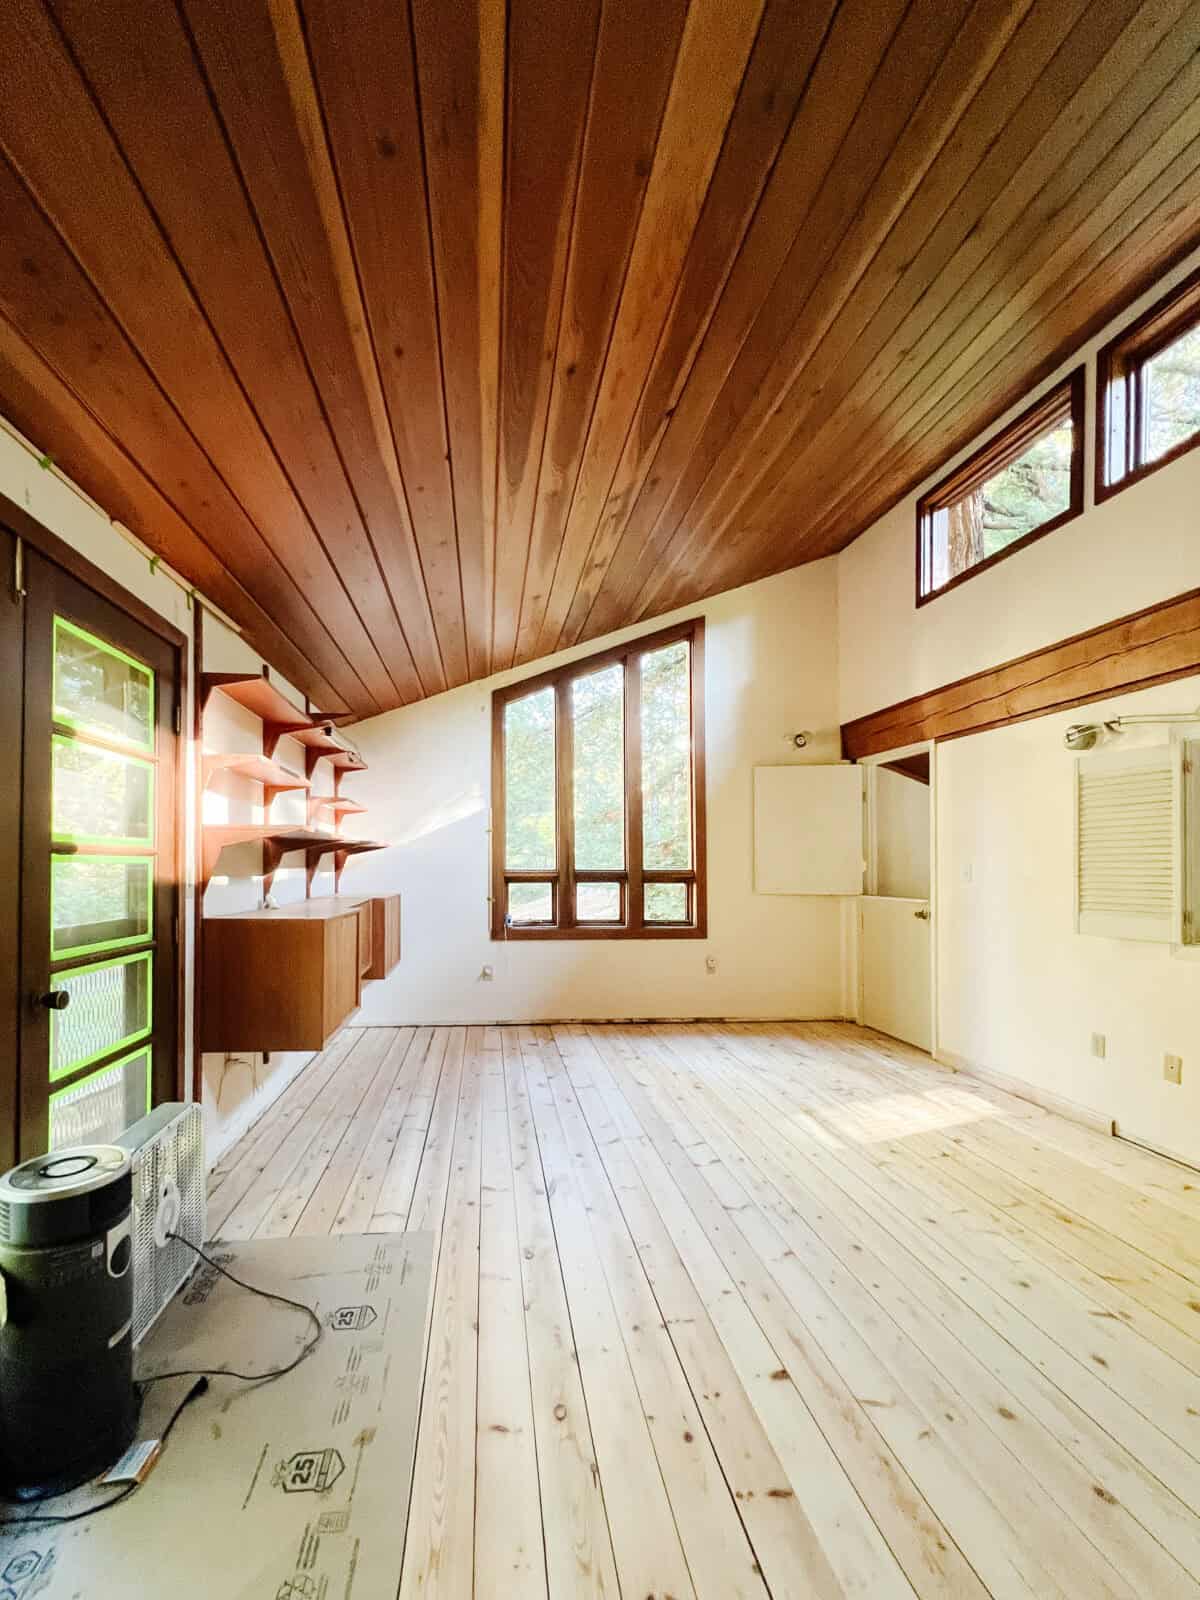
There’s that moment in every renovation where you have to decide: Do I replace it… or do I try to save it? When we walked into the loft at the cabin, the pine floors were rough.
Dry. Splintered. Years of wear baked in. Most people would have ripped them out. But if you’ve been following along for a while, you know that’s not really my style.
I like to bring things back to life, especially when the bones are this good. So I decided to refinish them myself.
And I’m not going to sugarcoat it, this was one of the most physically demanding projects I’ve done. But also one of the most rewarding.
The transformation blew me away, and I’m sharing every step and pro tip so you can get the same dreamy, character-filled look in your own home. Want more great home improvement? Try my box moulding DIY project, or how to add a DIY banquette to your space.
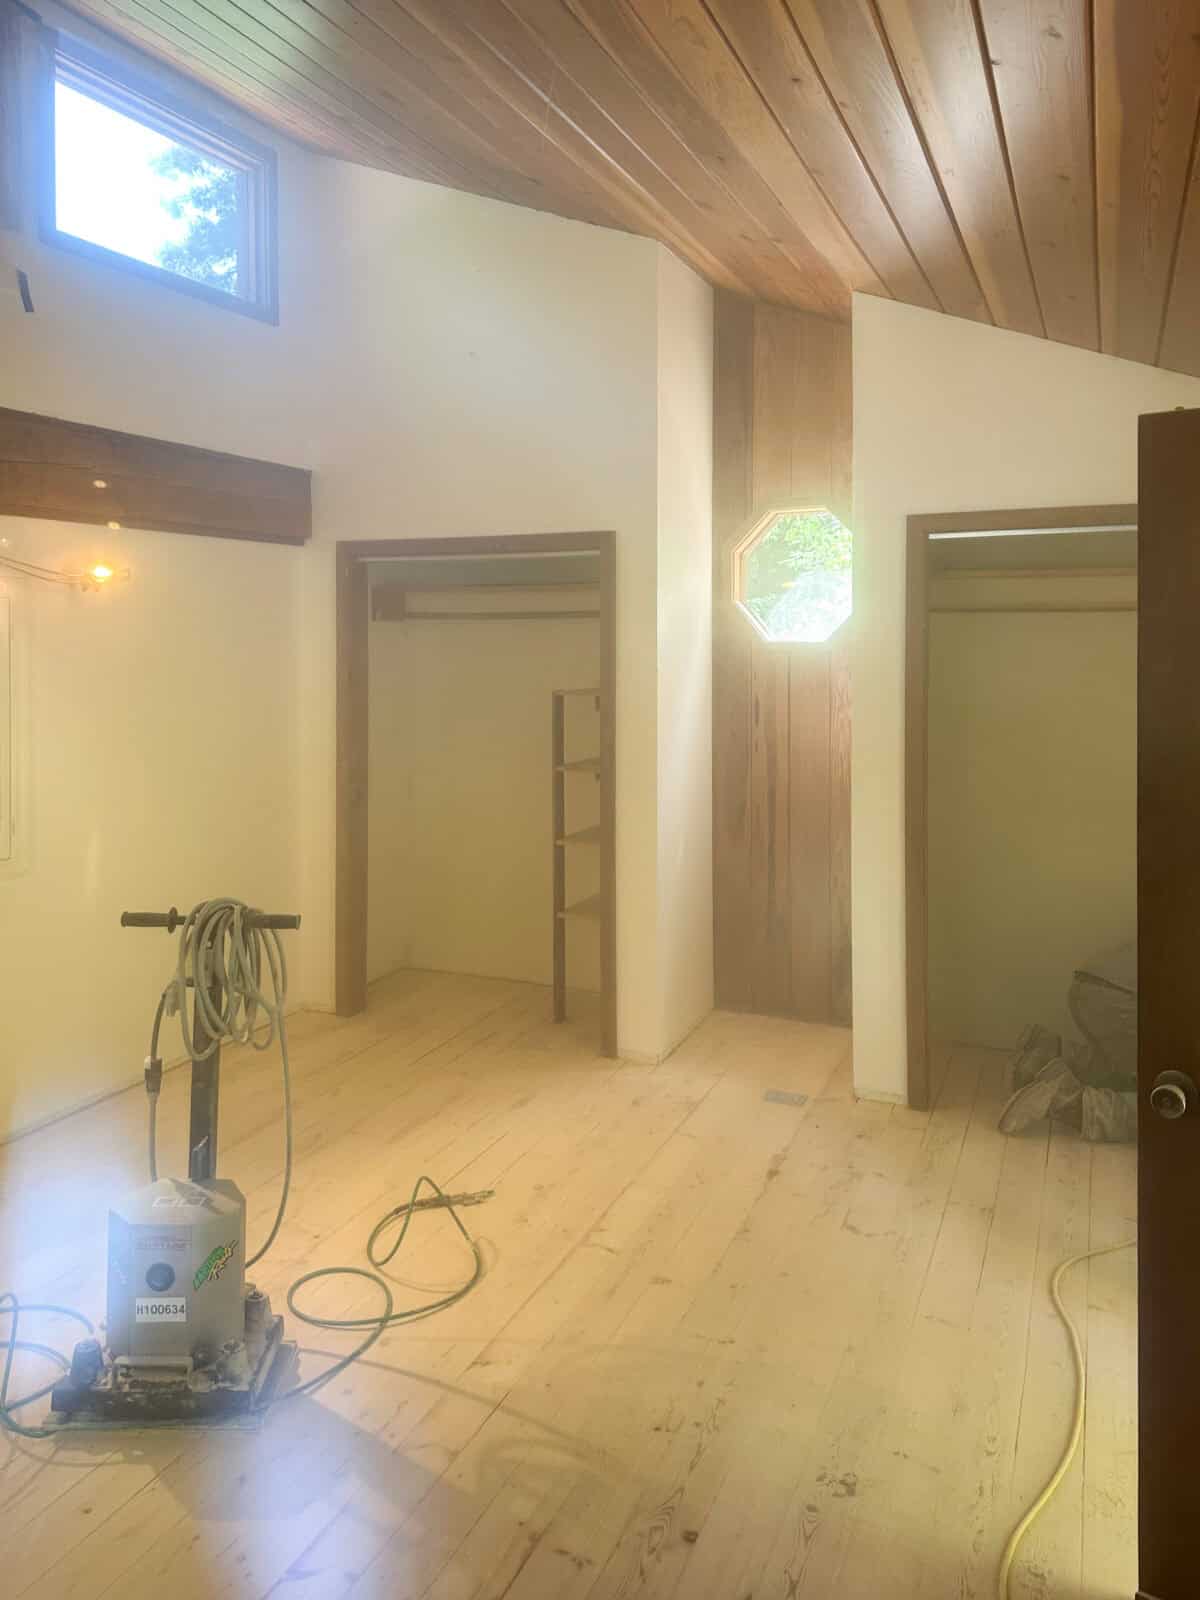
Table of Contents
- Why You’ll Love This Project
- Why Refinish Hardwood Pine Floors?
- Materials and Tools You’ll Need
- When to Refinish vs. Replace
- Why Pine Floors and Redwood Ceilings Are a Dream Design Combo
- Before: Yellowed & Worn
- After: Our “Holy Grail” Formula for Pine Floors
- Step-by-Step Instructions to Refinish Hardwood Pine Floors
- What I Would Do Differently (Read This First)
- Cost Breakdown (Real Numbers)
- All About Pine Flooring: Key Details to Know
- Pro Tips for Refinishing Hardwood Pine Floors
- Commonly Asked Questions
- Floor Related Cotent
- Wrapping Up
- Keep Exploring
Why You’ll Love This Project
Refinishing floors might sound intimidating, but trust me: it’s gratifying, saves a ton of money, and not too tricky – like most projects, it just takes time and elbow grease. With refinishing floors costing around $8 per square foot, I was happy to save the money and allocate it to the decor and furnishings. budget. Refinishing pine wood floors:
- Saves thousands vs replacing floors
- Preserves the natural character of real wood
- Lets you control the exact finish (no orange/yellow tones)
- Adds serious value to your home
- Feels incredibly satisfying when you’re done
Why Refinish Hardwood Pine Floors?
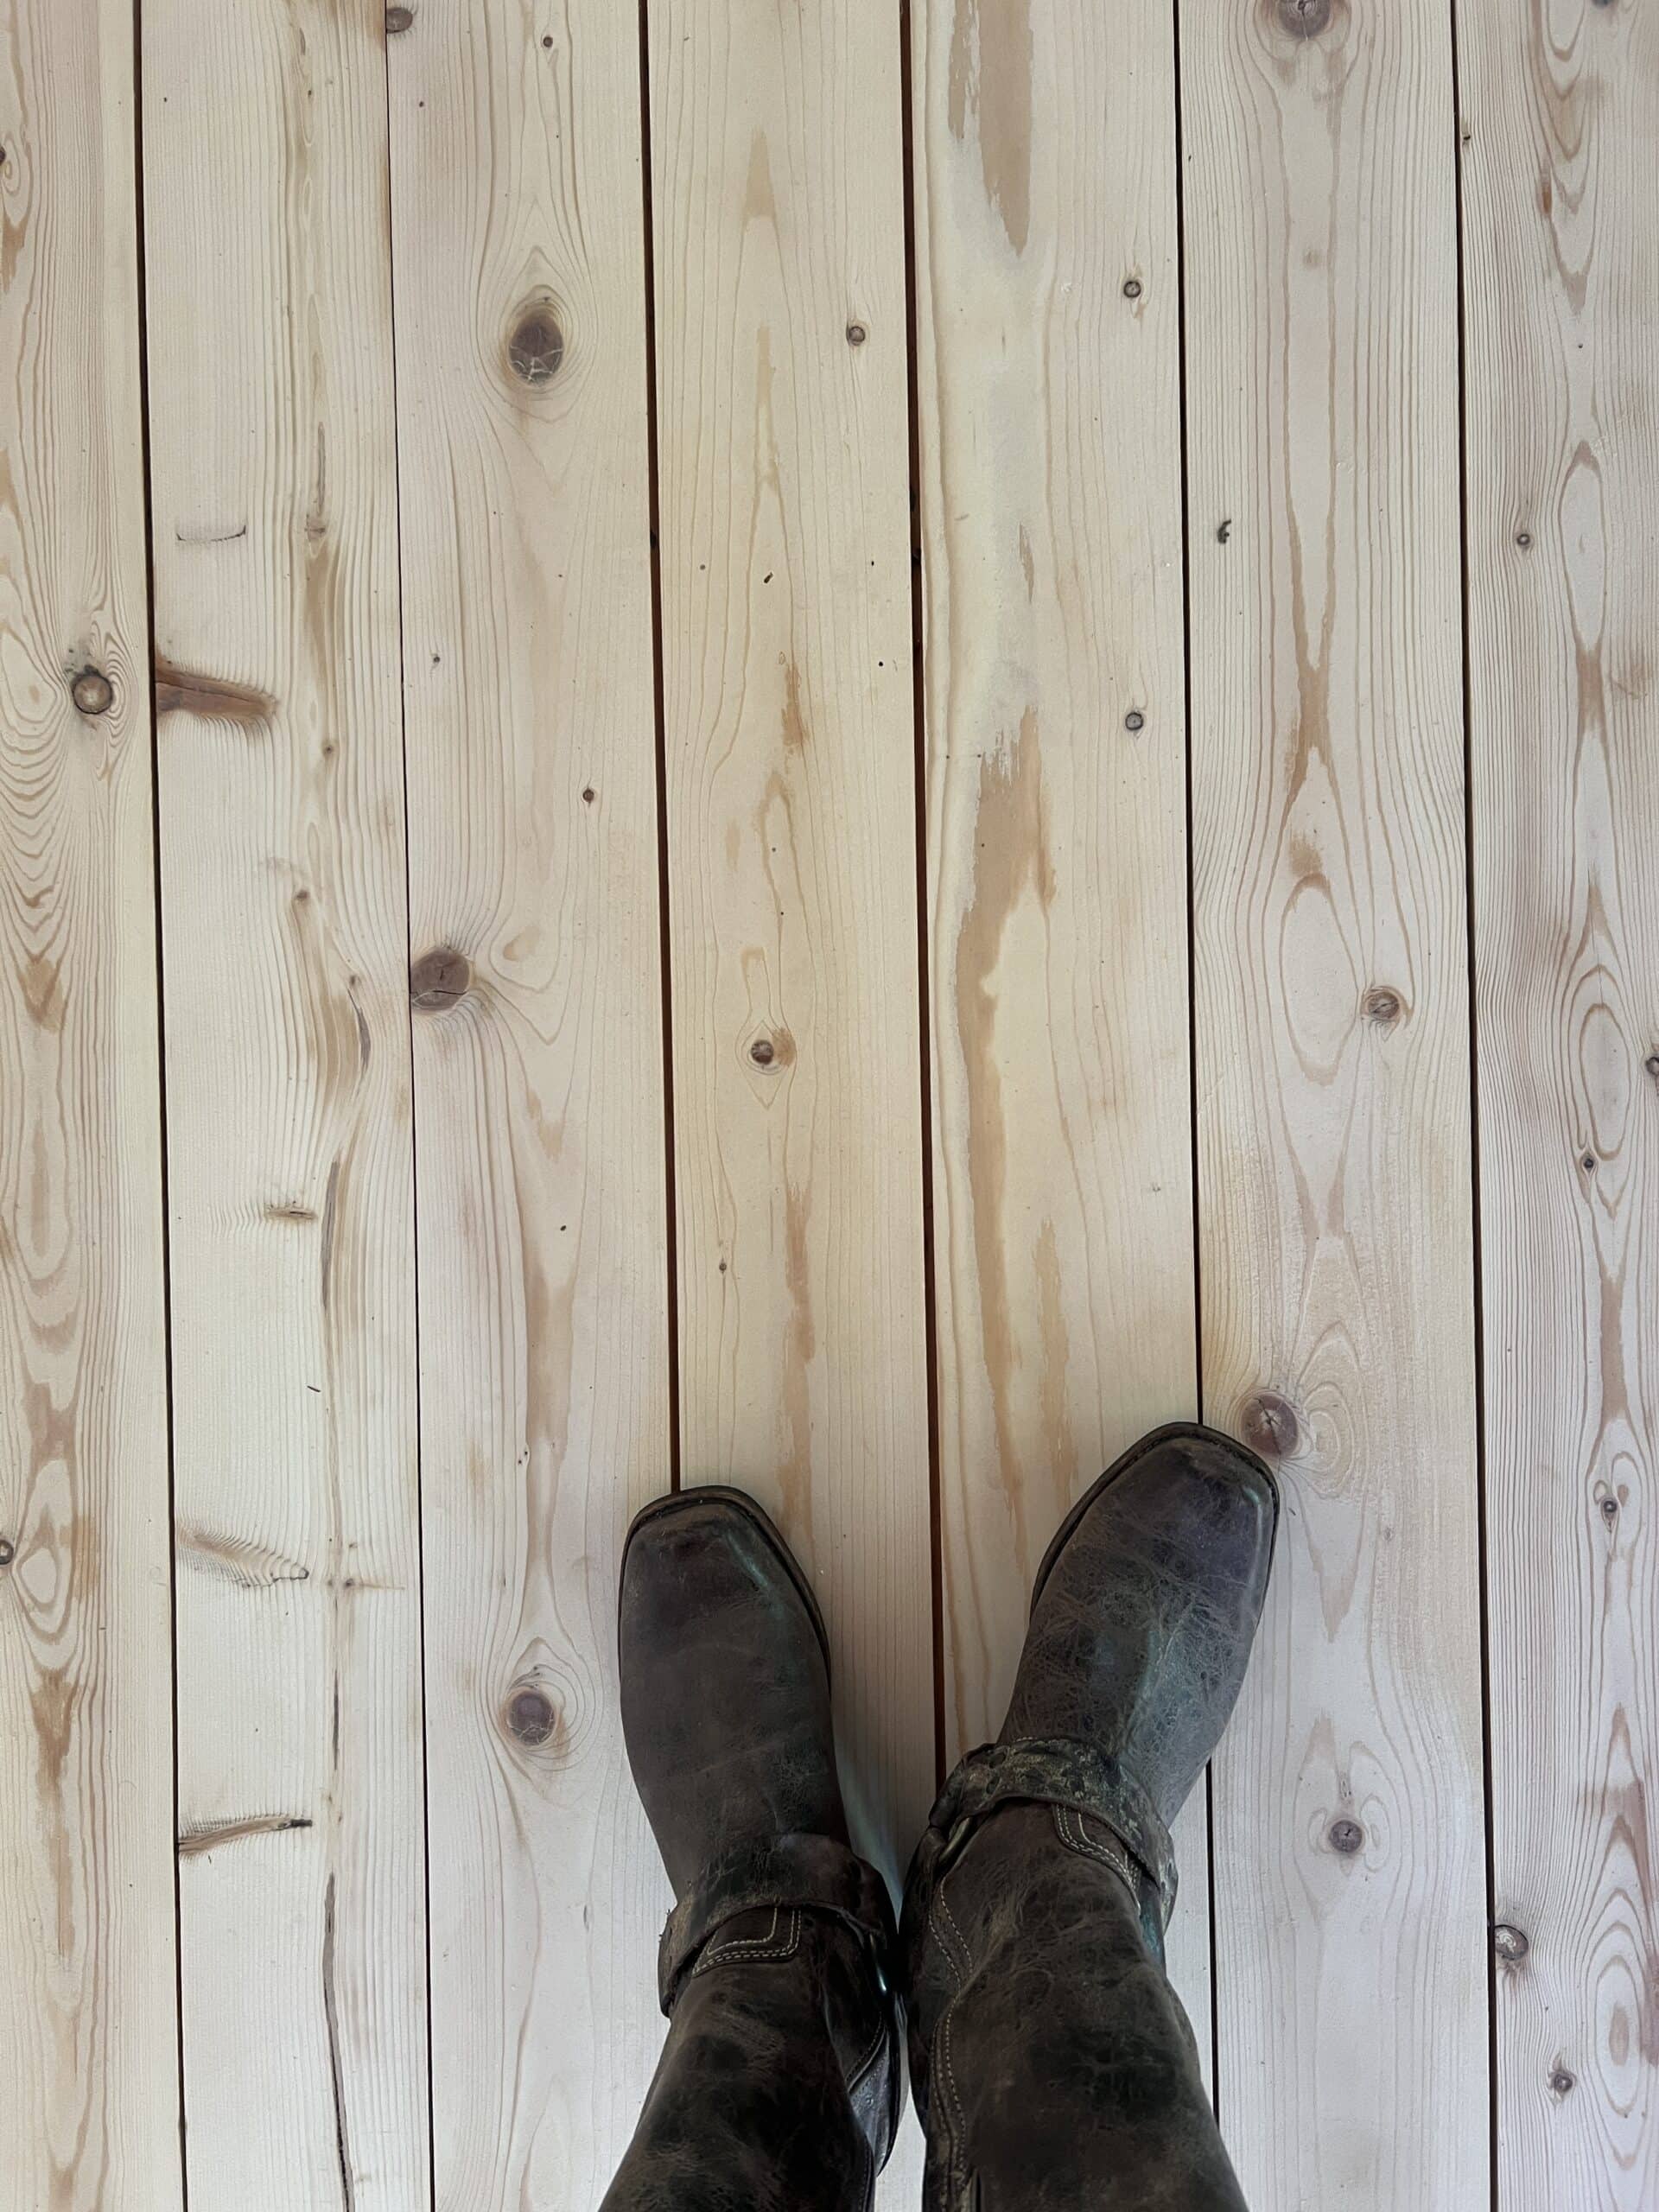
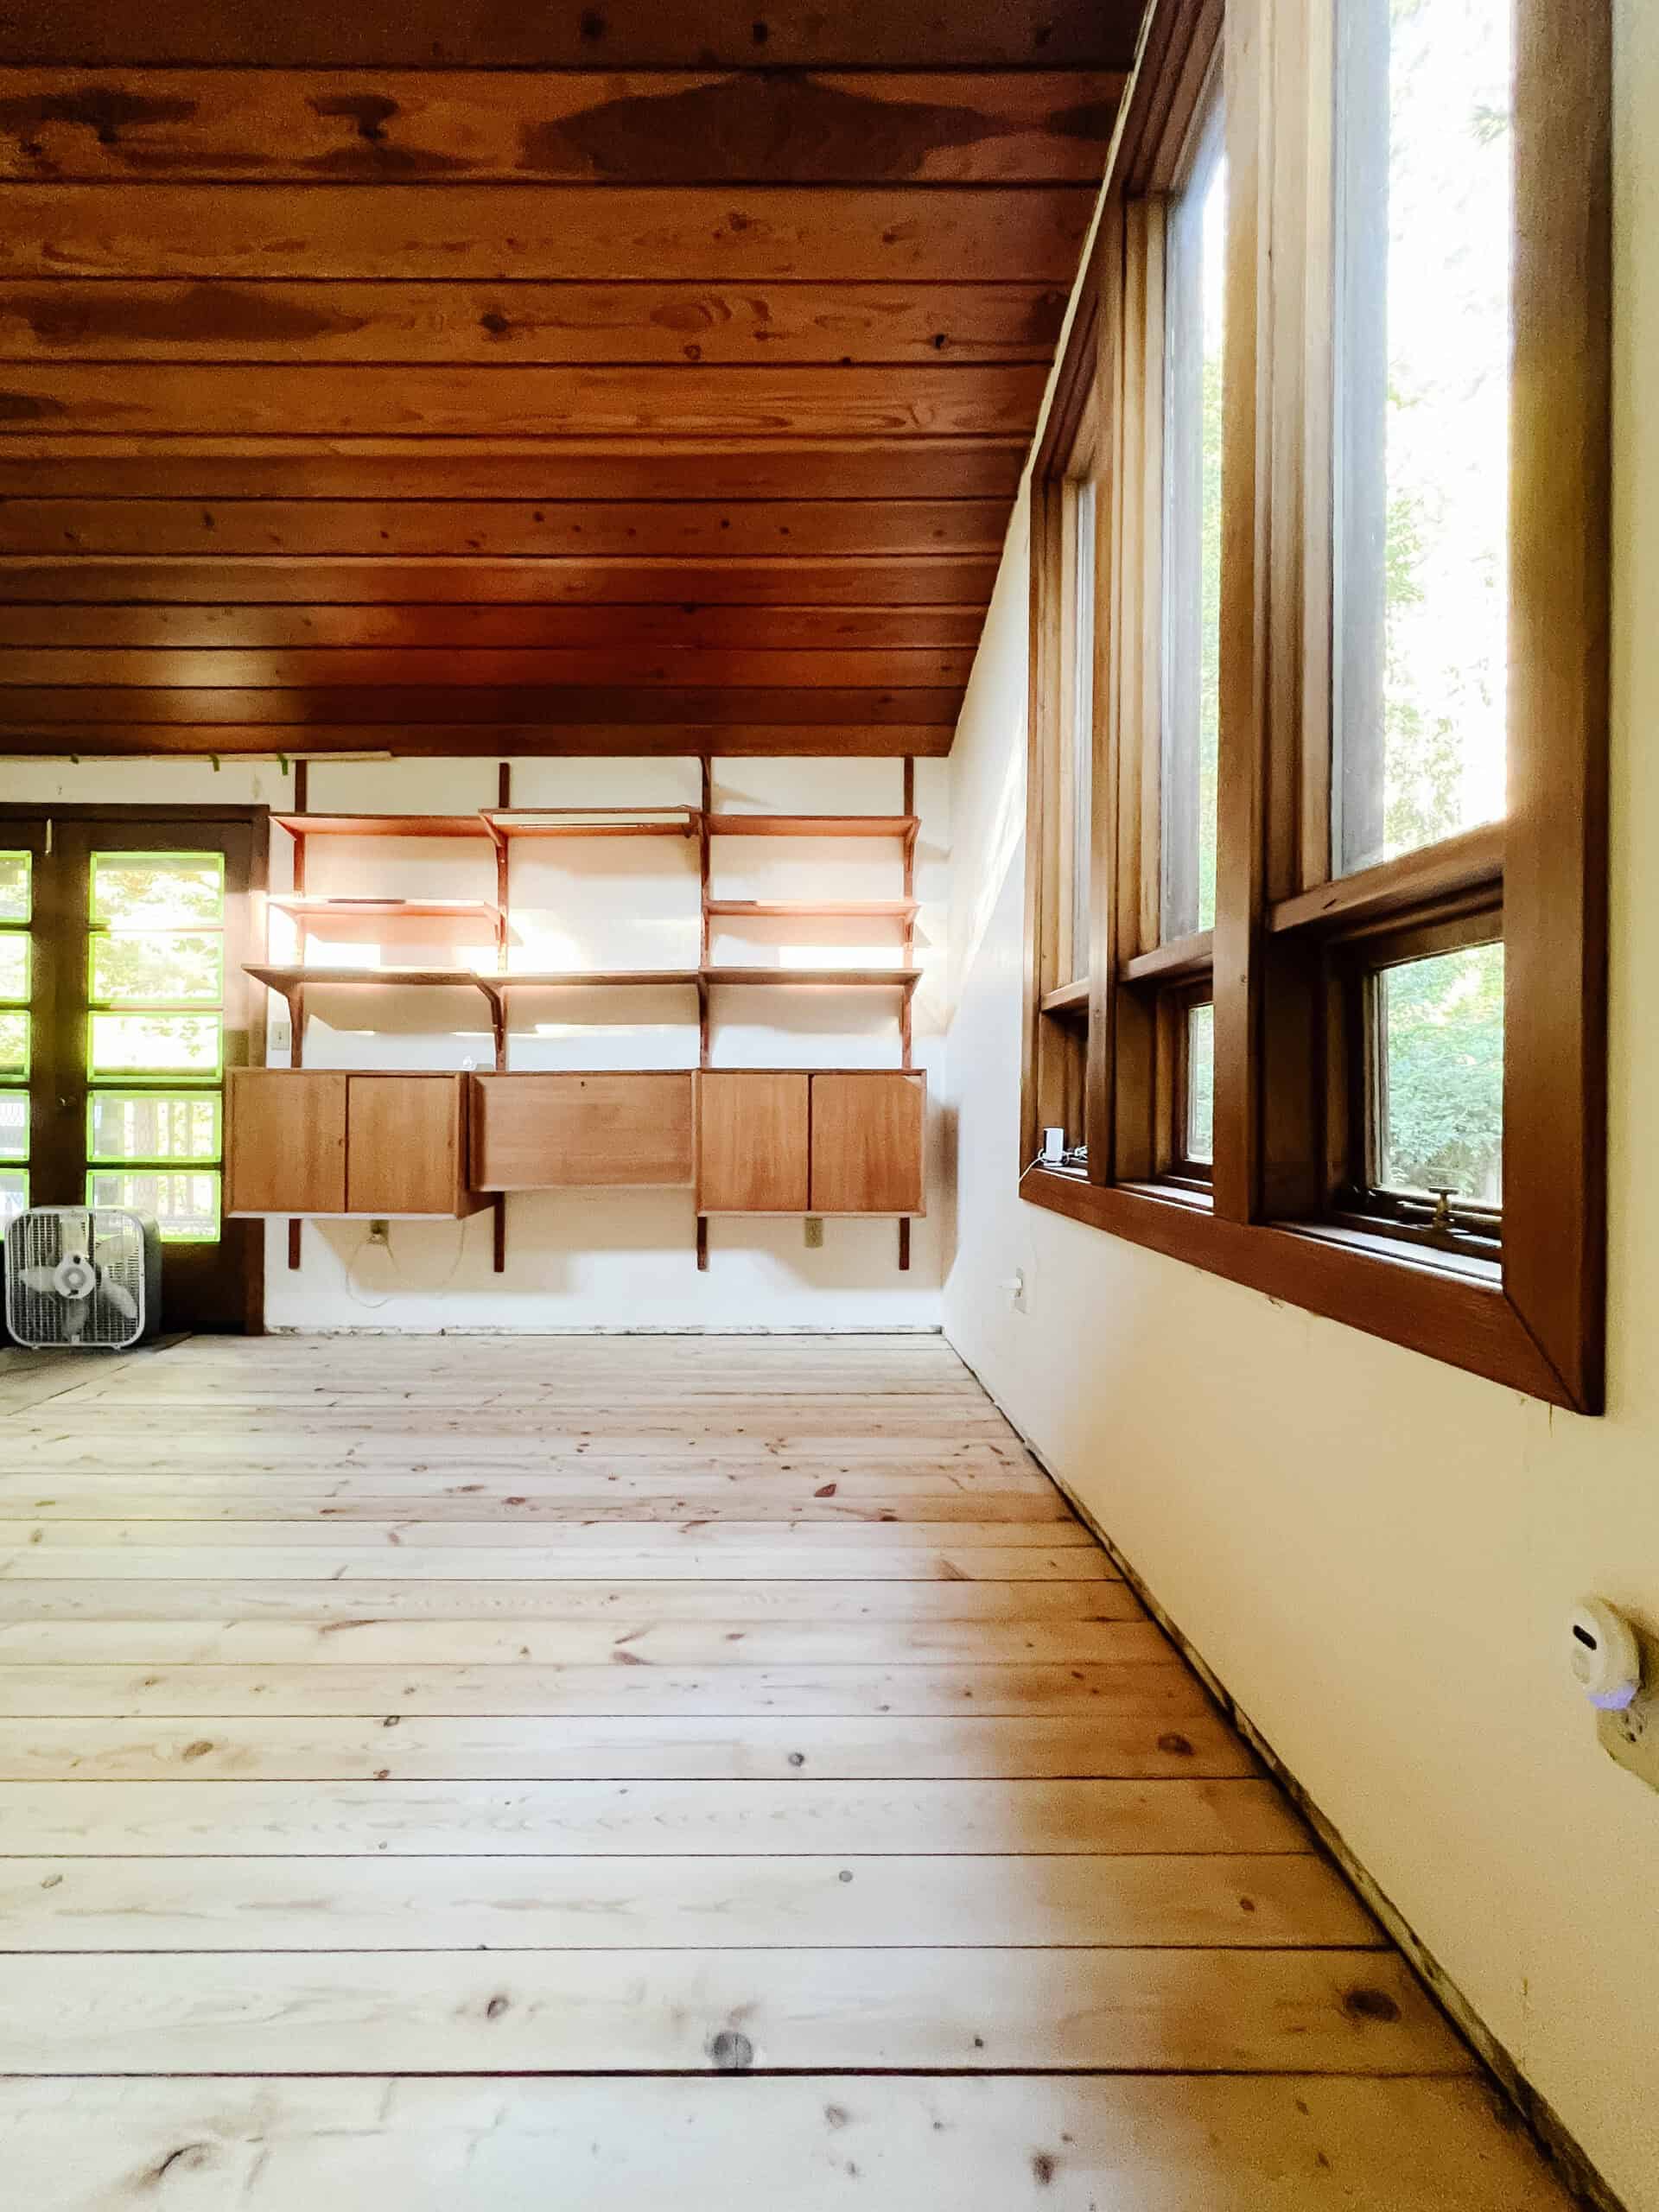
Refinishing pine floors is one of the best ways to preserve the character and charm of your home. Instead of ripping them out, you get to keep a piece of history while saving money and reducing waste. Our floors were dinged up, yellowed, and worn, but underneath they were still in solid shape, ready for a second chance. There’s something special about giving old hardwood a new life. I’ll never forget the first time I stepped onto those revived planks; the creak underfoot and the clink of my boots felt like music to the heart.
Materials and Tools You’ll Need
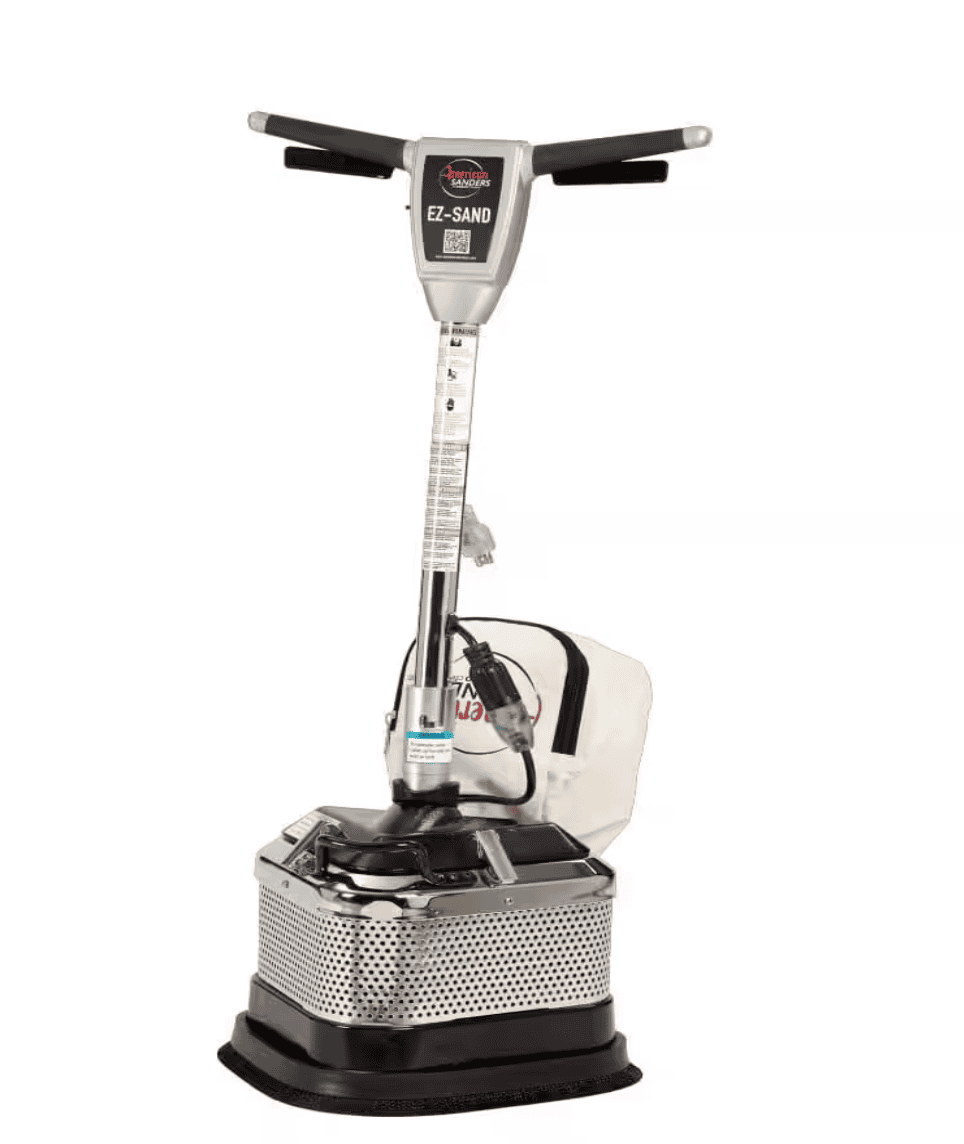
- Drum Sander: We rented a good one from Home Depot. Good sanders are expensive.
- Sandpaper Grits: You’ll want a sequence, typically 80-grit to start, then 120-grit, and finally 220-grit for that ultra-smooth finish. These fit my hand sander. Simply put you want: Sandpaper (40, 80, 120, 220 grit)
- Hand Sander: For touch-ups, detailing edges and corners.
- Pry Bar and Mallet: For removing baseboards if needed.
- Shop Vac and Tack Cloth: For dust cleanup. My vac is small and lightweight.
- Old Masters Armor (Flat) and Hardener Additive: For sealing the floors.
When to Refinish vs. Replace
- Check the bones first – if your pine floors are structurally sound, refinishing is almost always the better choice. Thin or severely damaged boards might need replacement, but don’t assume they’re a lost cause.
- Boards are too thin – if floors have been sanded down too many times, there’s not enough wood left.
- Severe water damage – warping, buckling, or rot that can’t be fixed with patching.
- Structural issues – soft spots, sagging, or subfloor problems that compromise safety.
- Missing large sections – if too many boards are gone, repair may cost more than replacement.
- Termite damage – if pests have eaten away at the core, it’s time to start fresh.
- Character over cookie-cutter – old pine has dents, knots, and quirks that engineered floors just can’t replicate. That lived-in look? Priceless.
- My “almost mistake” moment – when I first saw our floors, I thought, “Rip them out, start fresh.” But a quick reality check reminded me: keeping the original hardwood isn’t just thriftier, it’s about preserving the soul of the home.
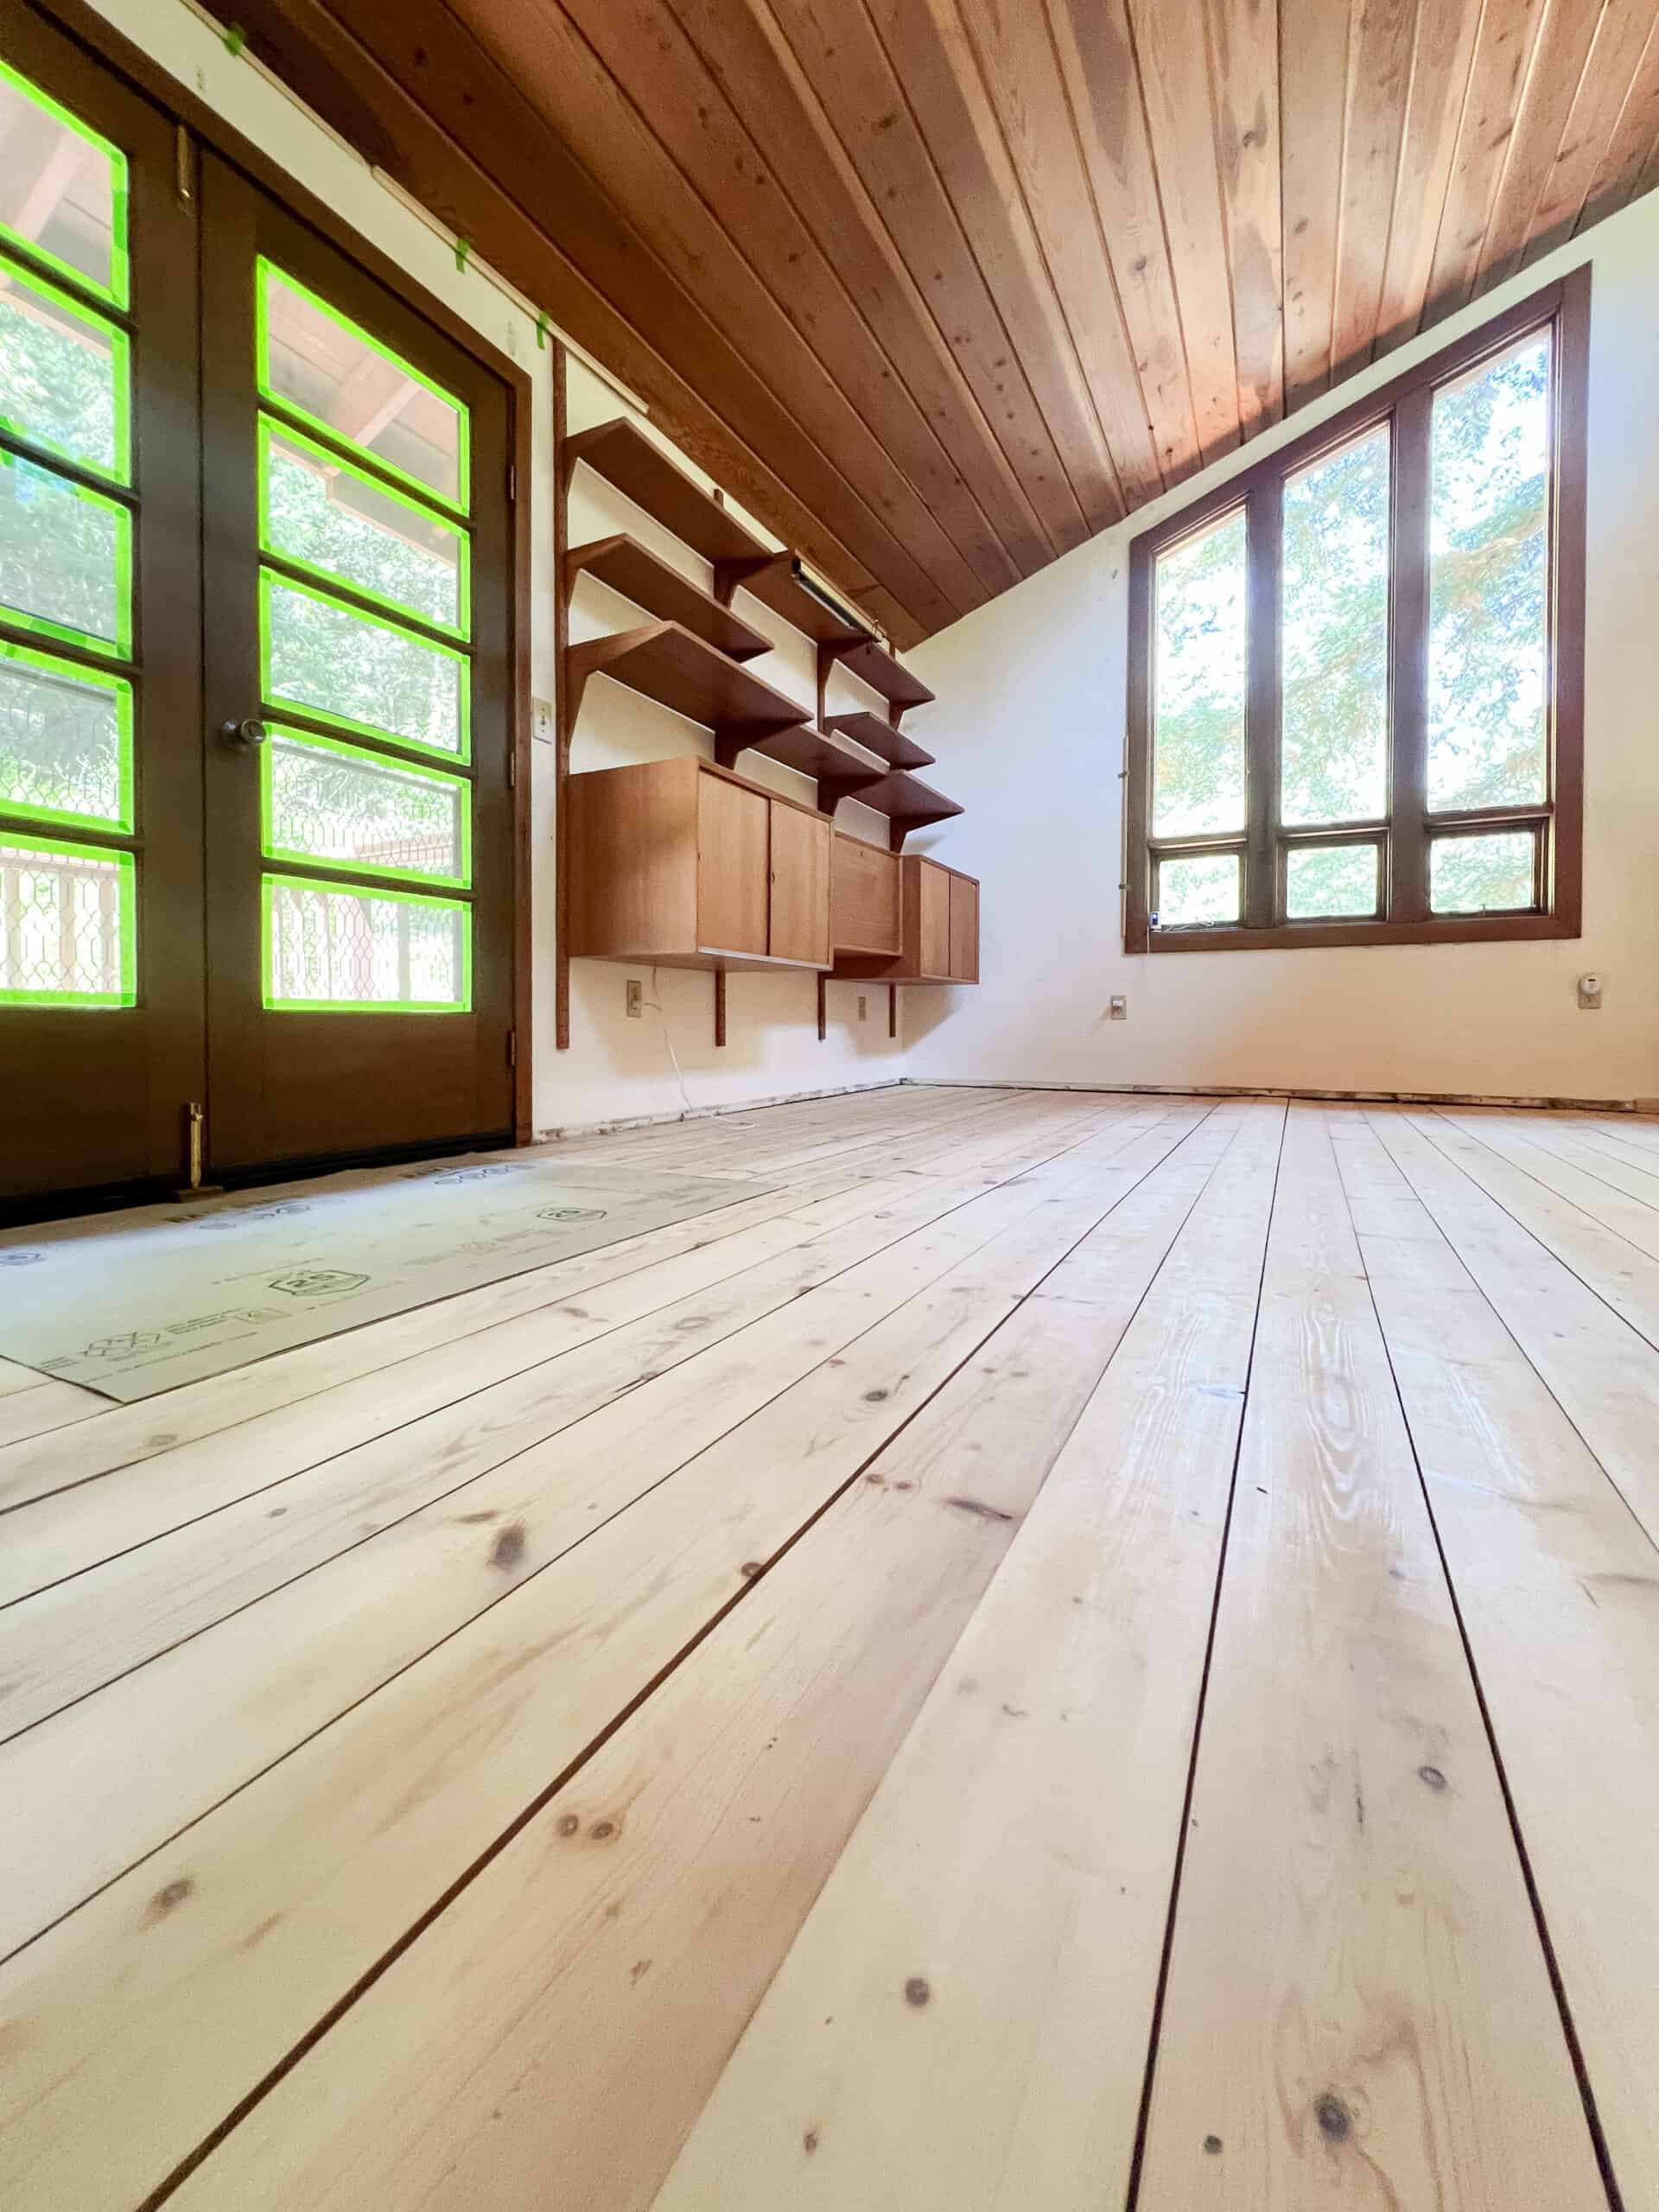
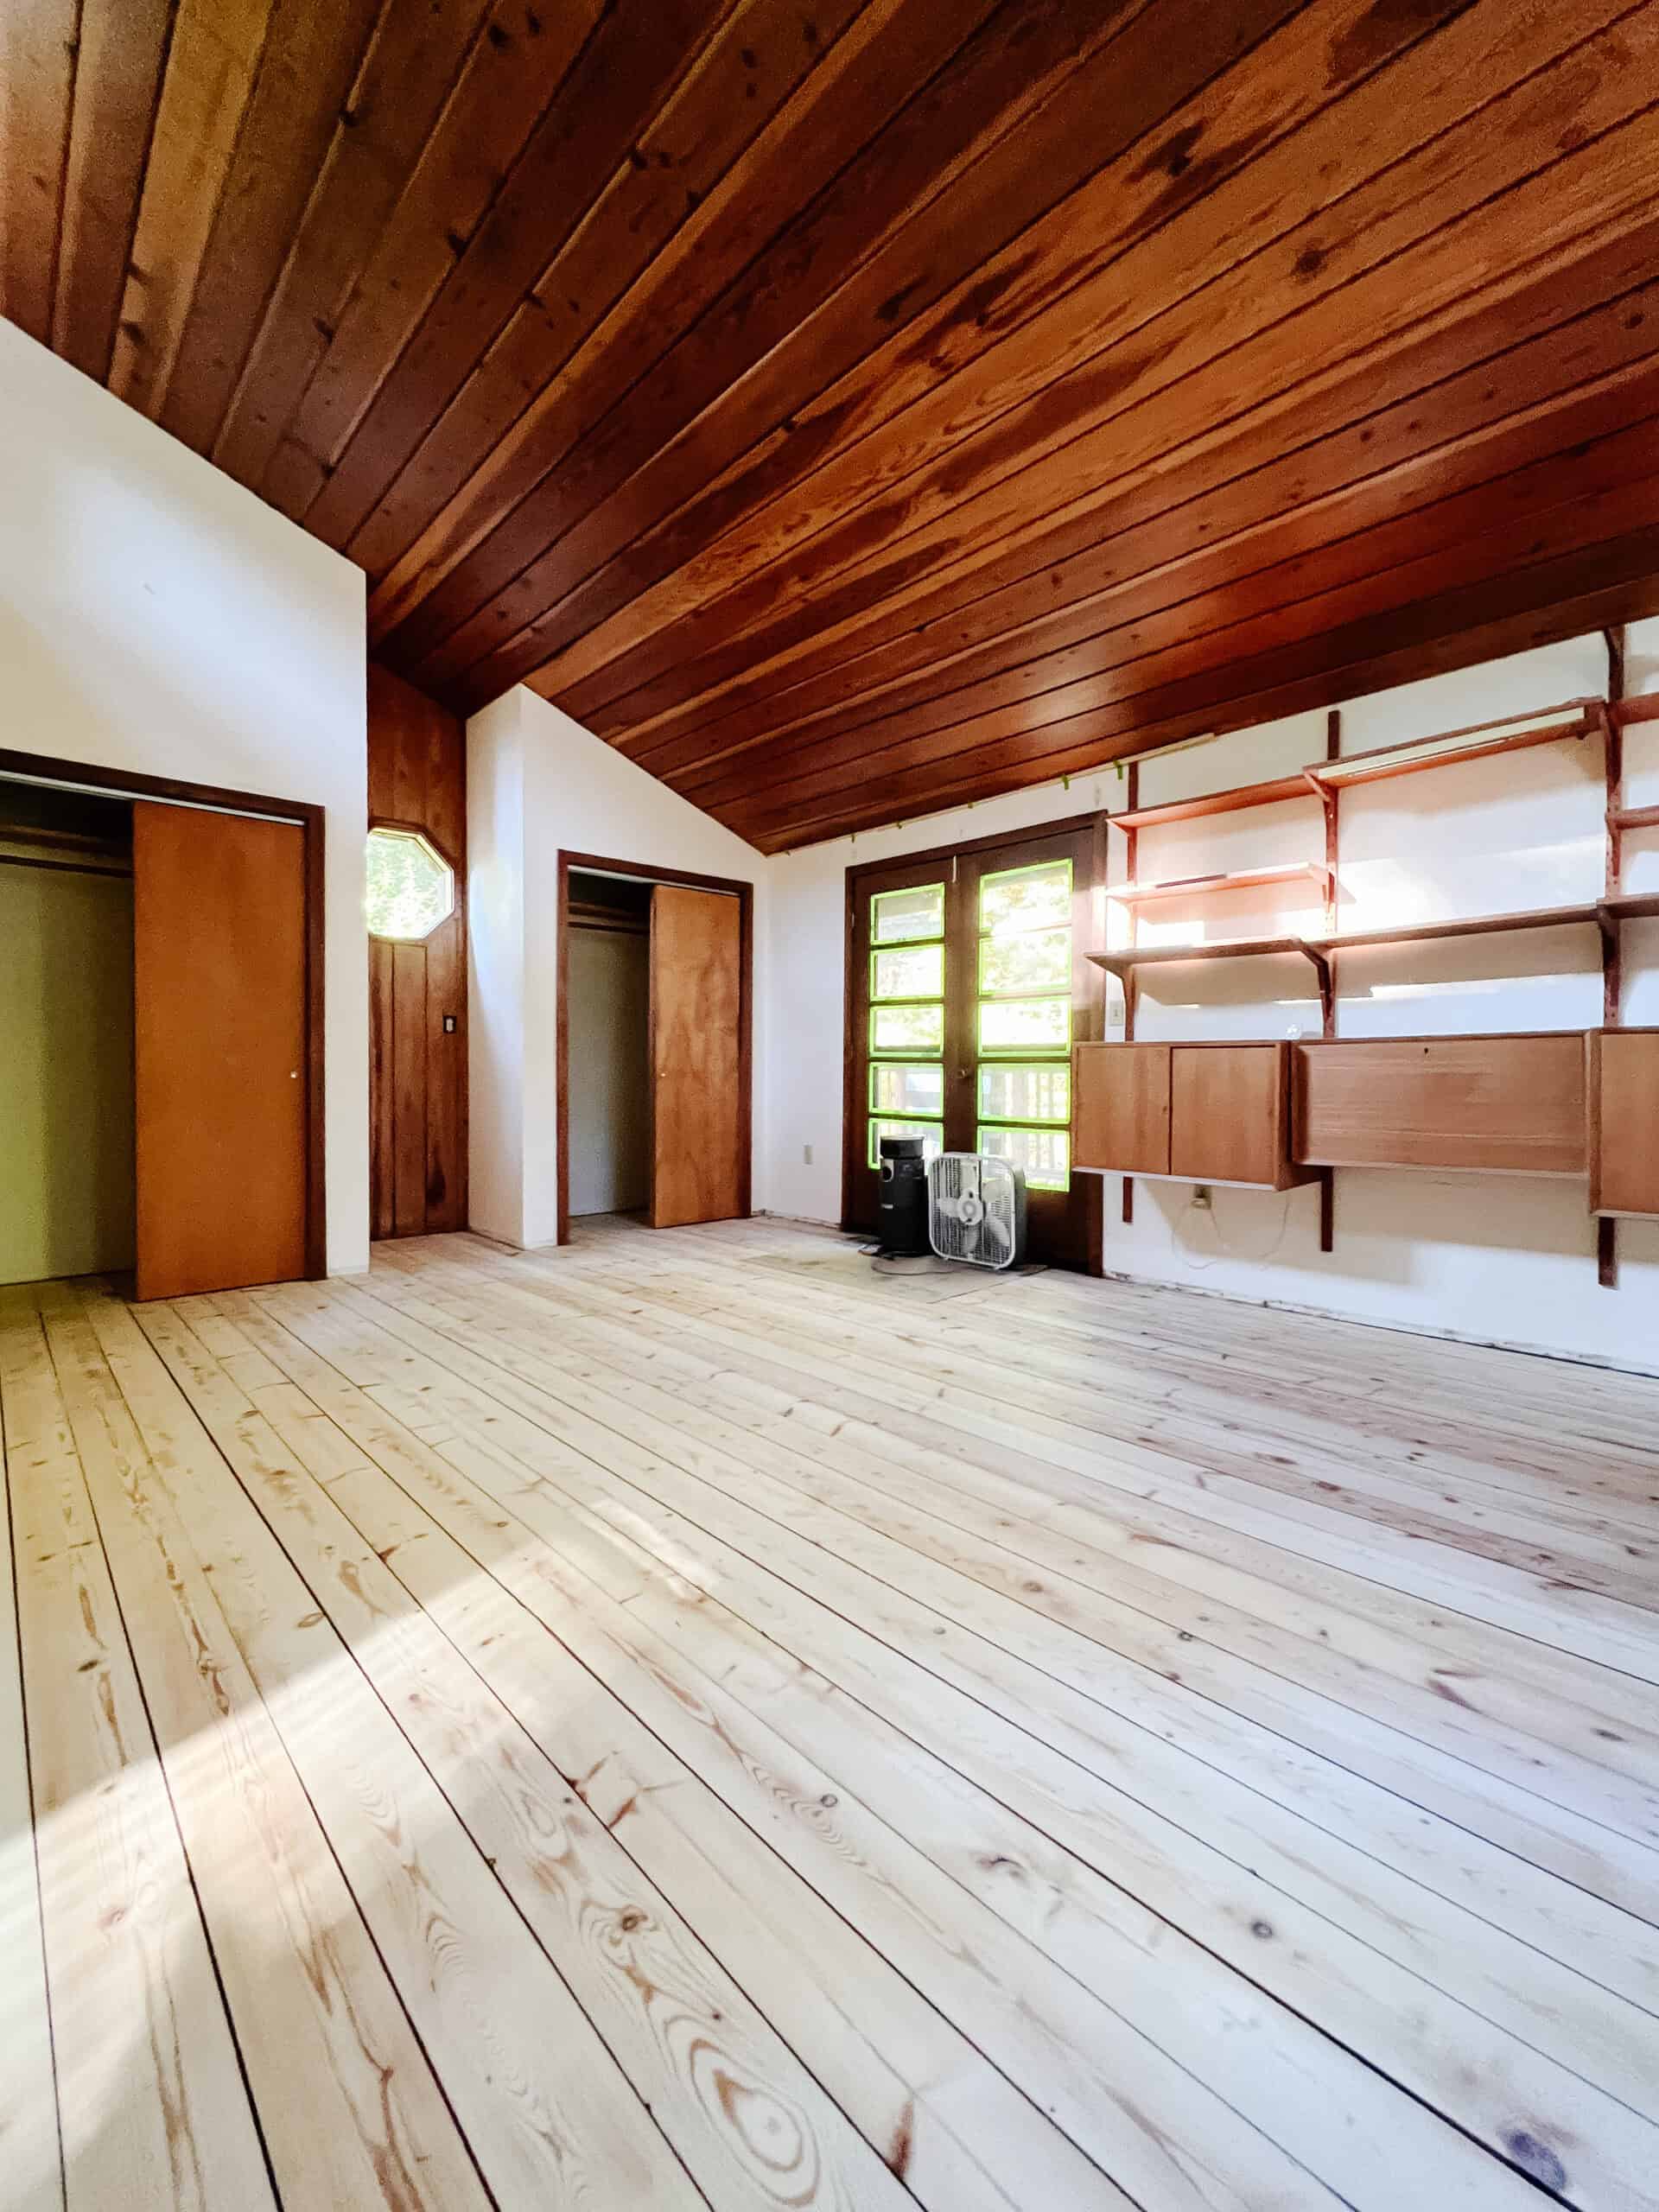
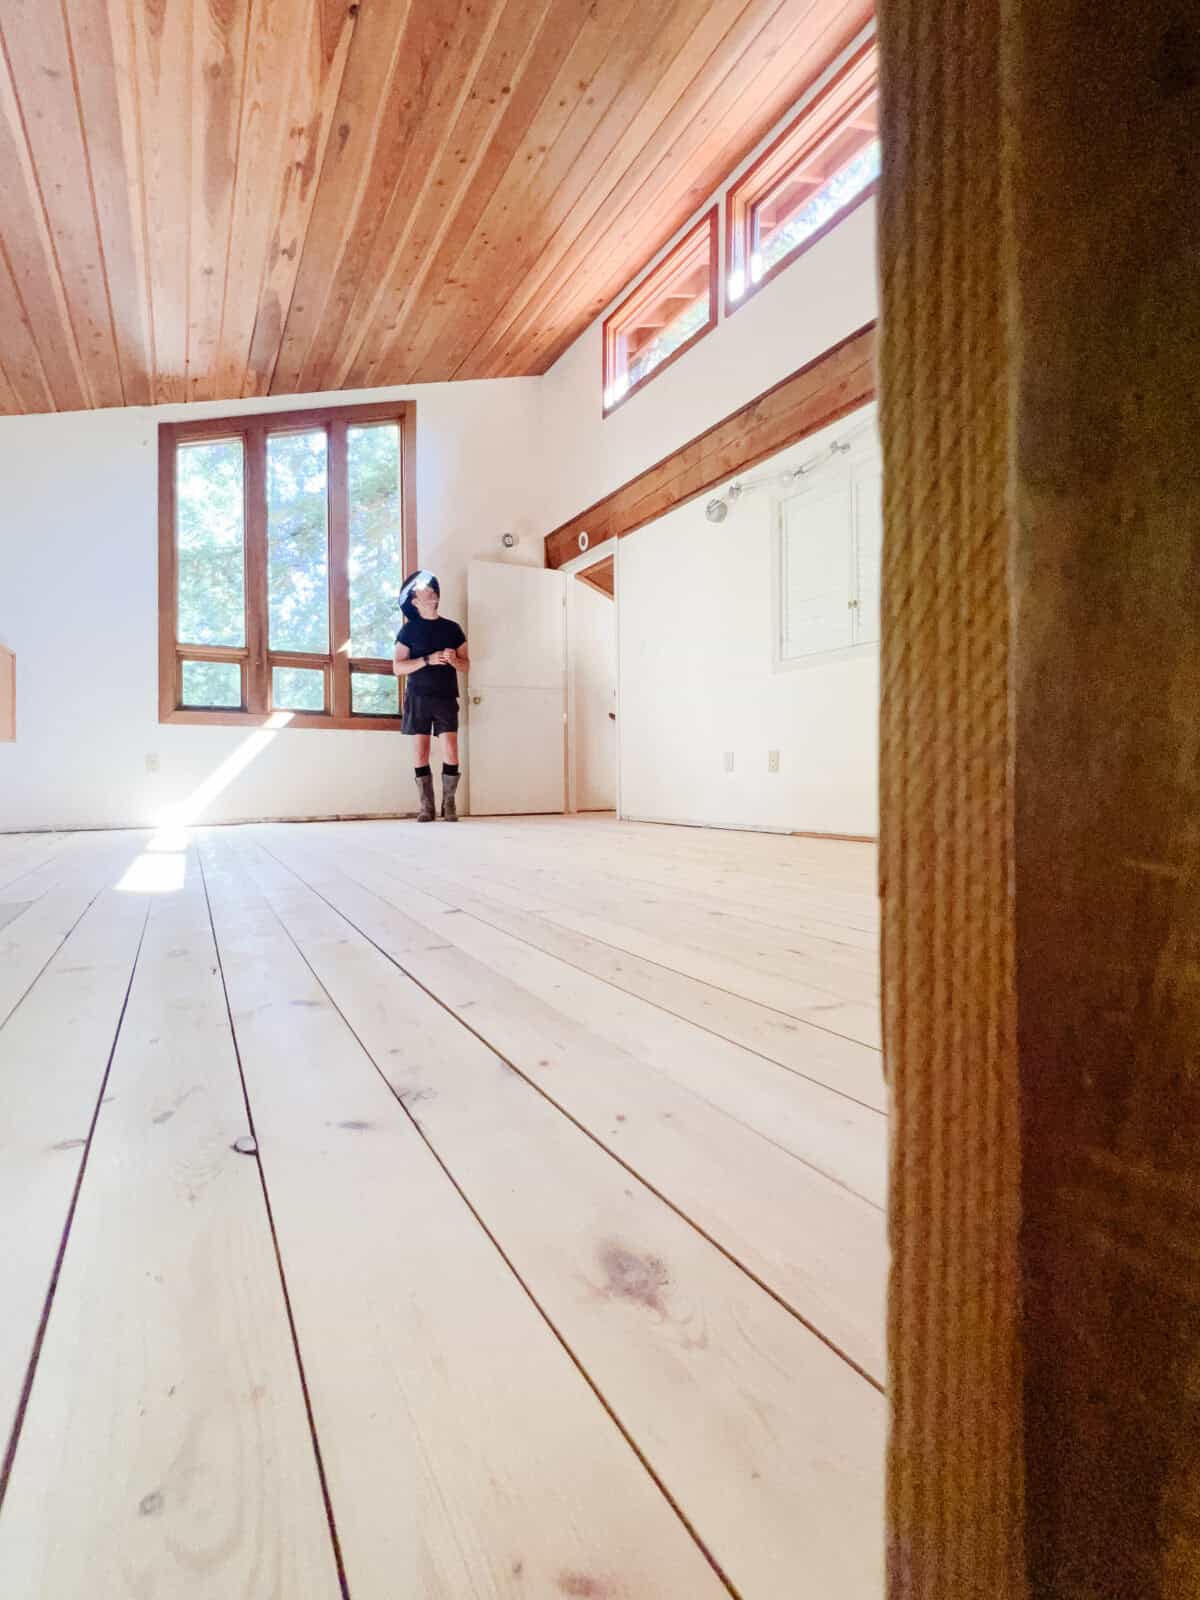
Why Pine Floors and Redwood Ceilings Are a Dream Design Combo
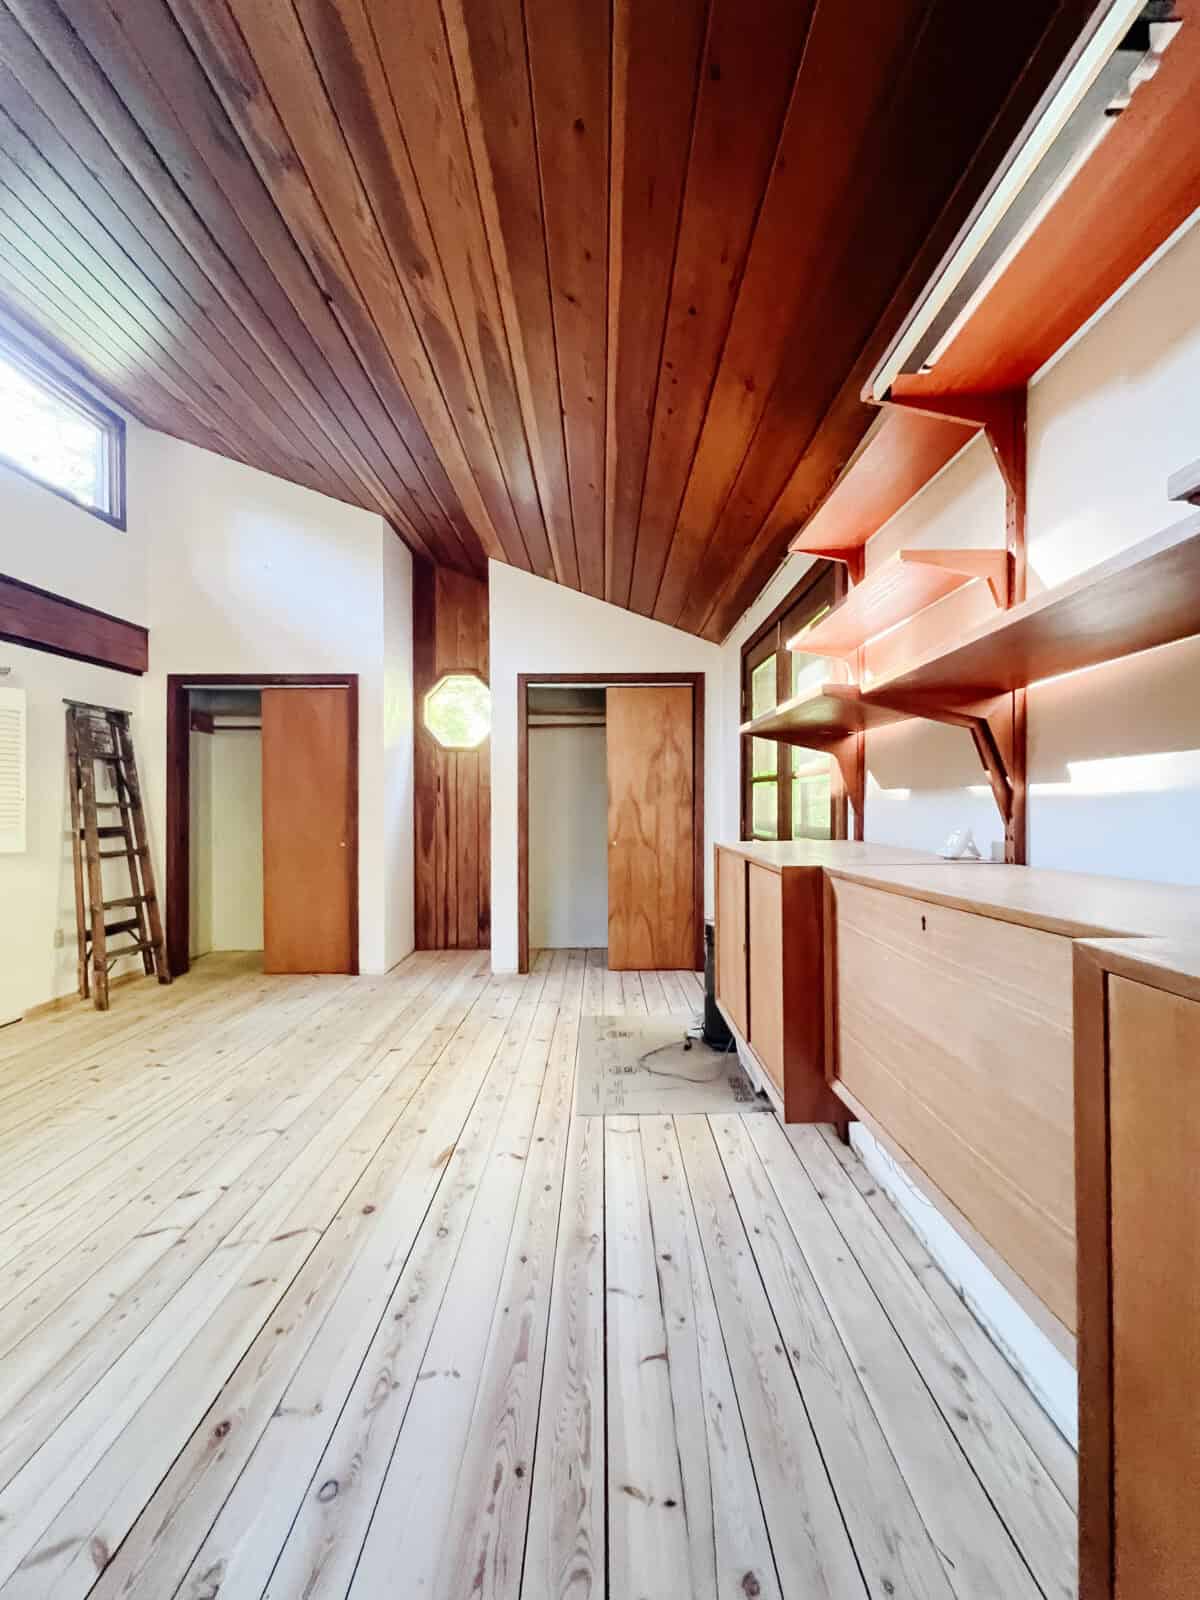
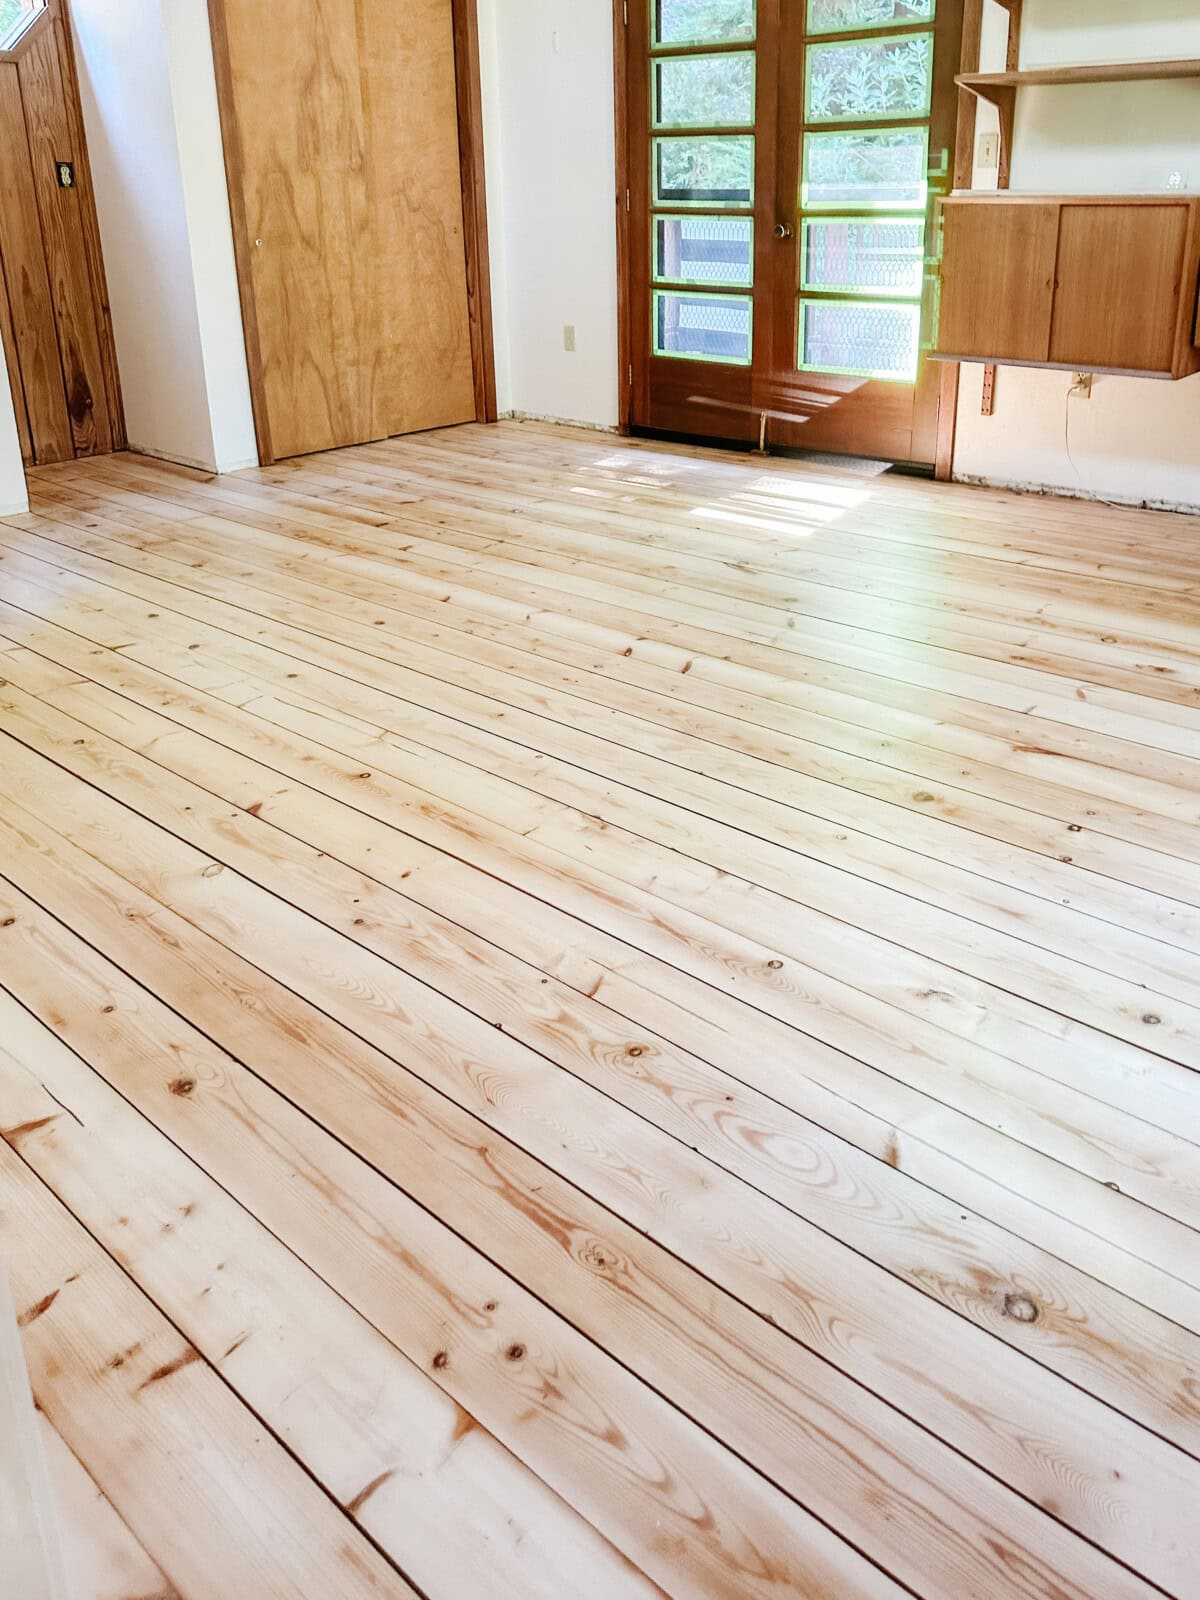
Matching different woods is tough. However, from a design perspective, I’m all about contrast. One of my favorite design choices in that spirit is pairing refinished pine floors with redwood ceilings and trim. This contrast opens up the space and keeps it from feeling too dark or cave-like.
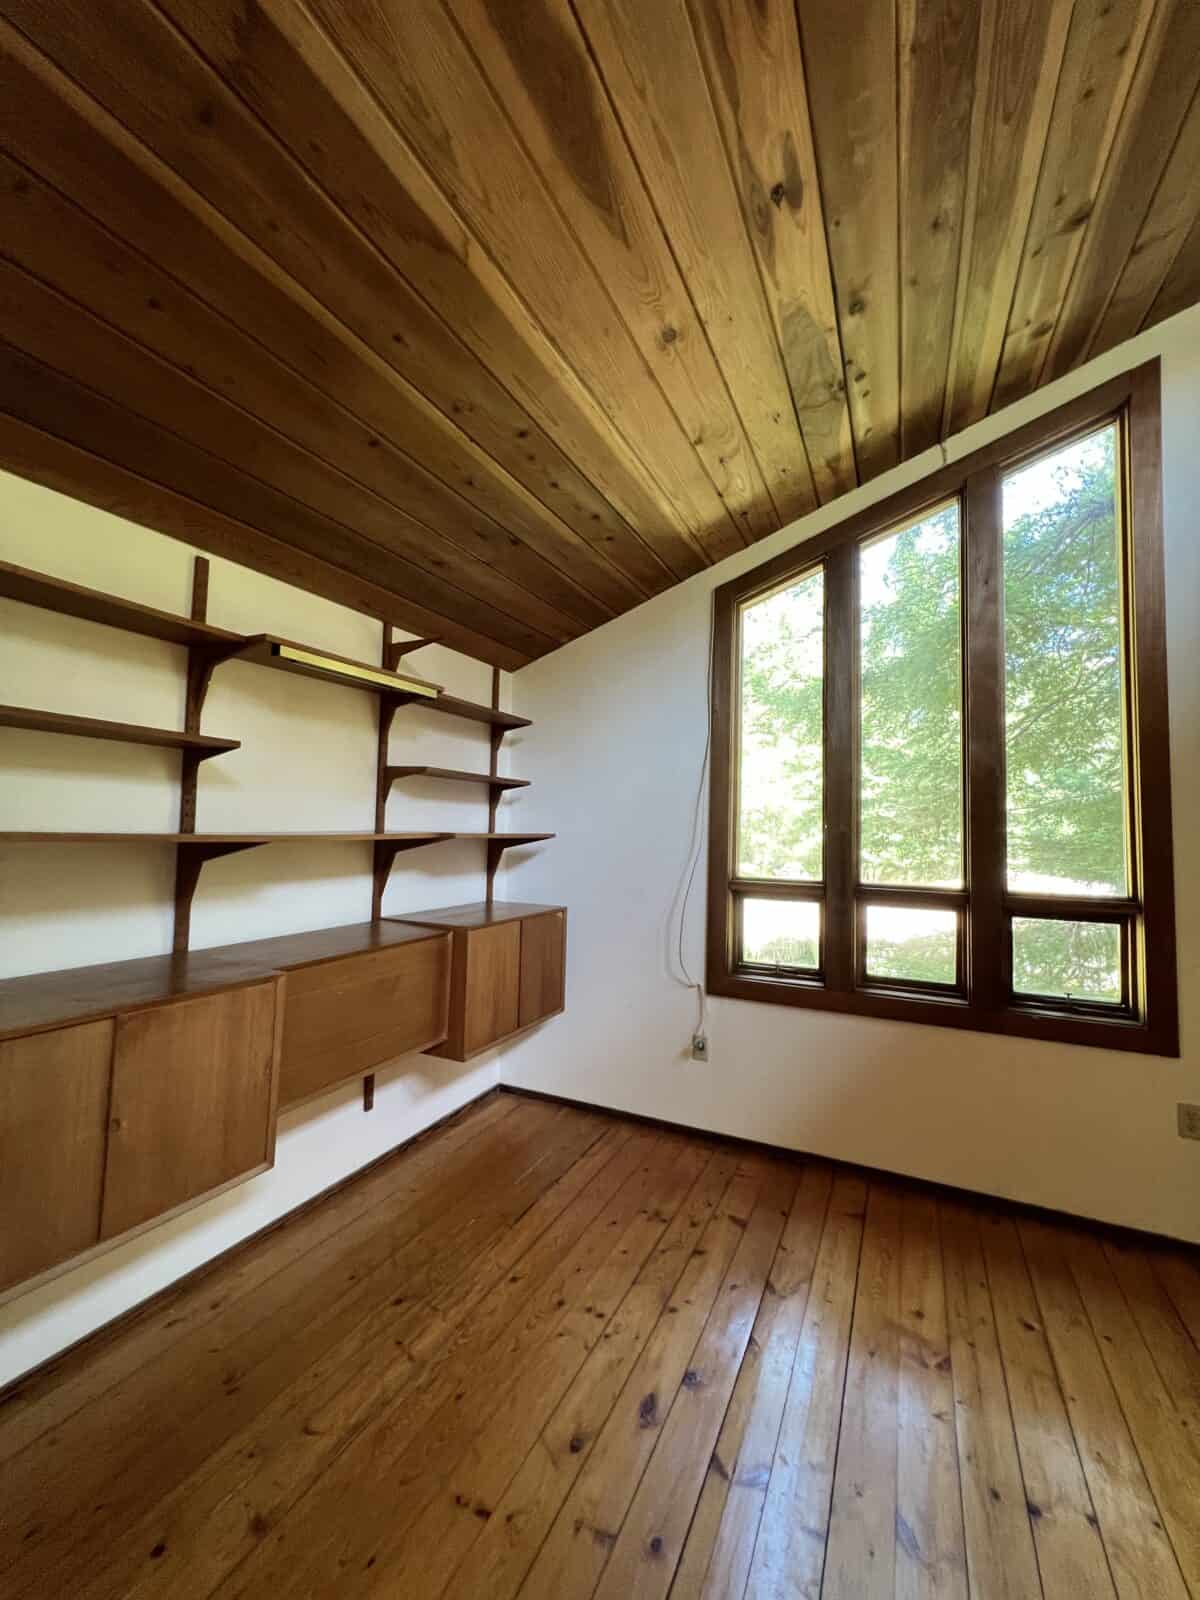
This was the problem with the original stain. By opening up with light hardwood pine floors and darker ceilings, we’re able to create a more airy feel. Now, the room feels brighter and more open, and that contrast is just magic. Don’t ya think?
Before: Yellowed & Worn
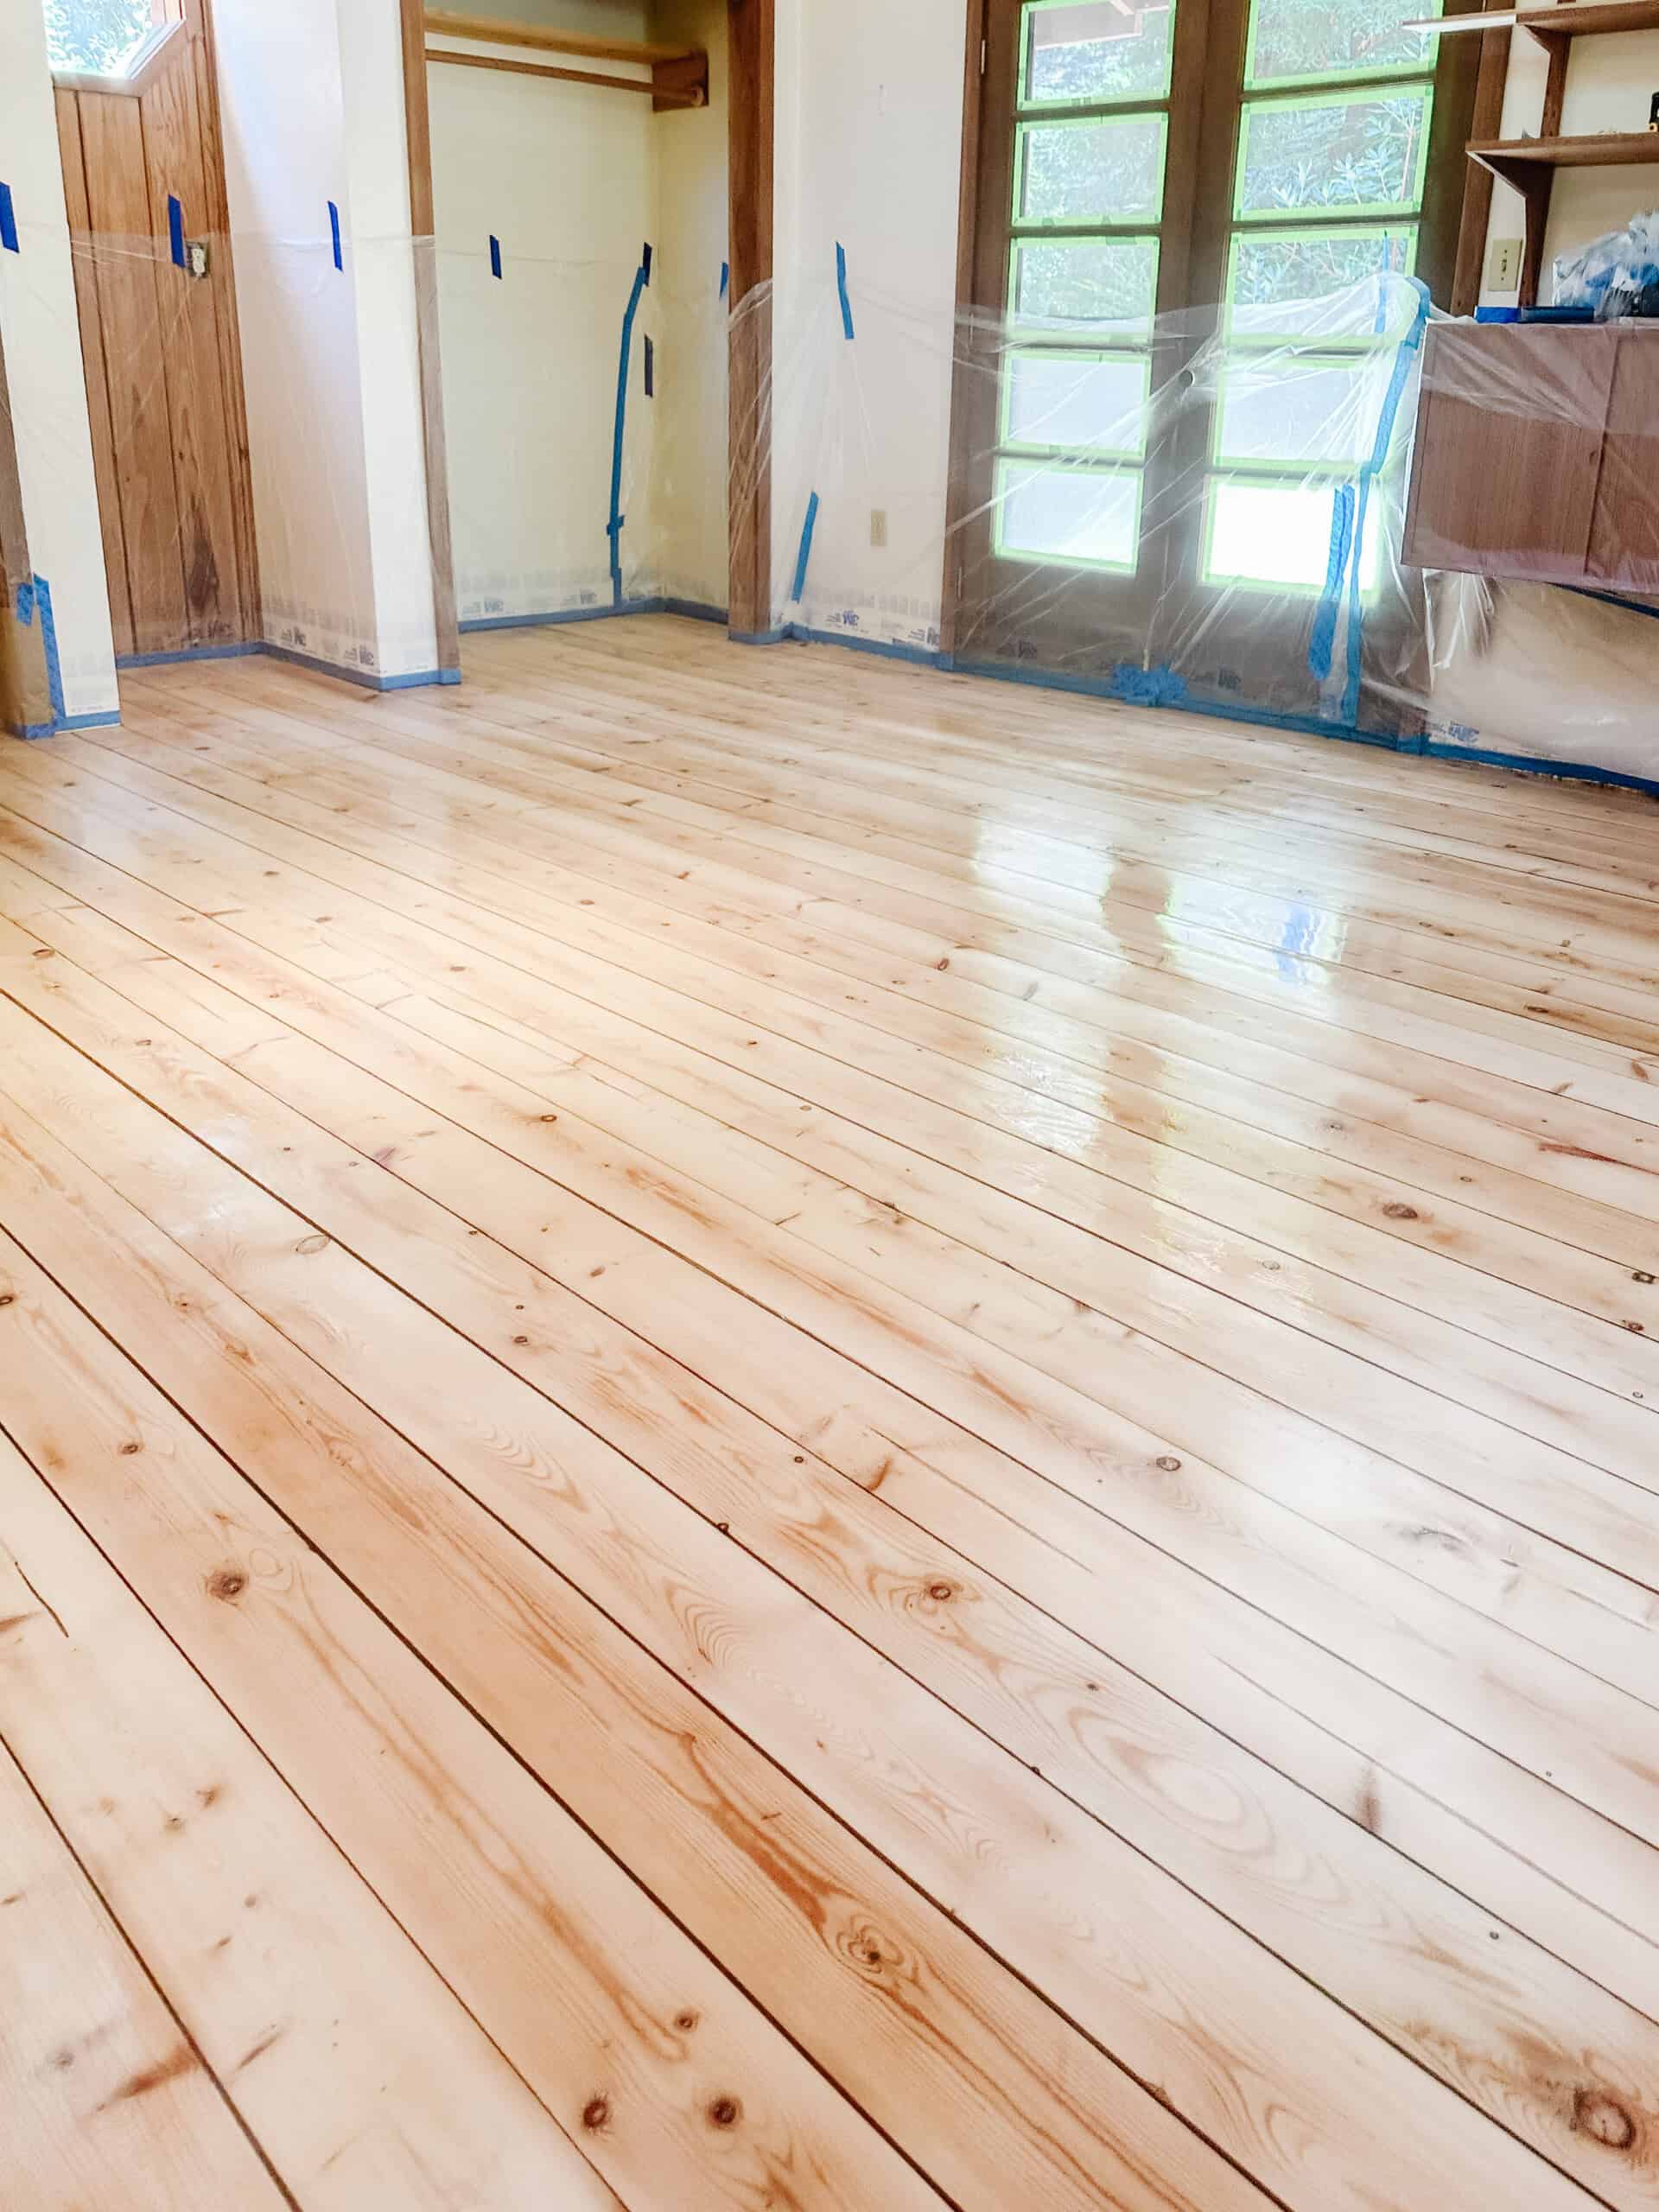
Once sanded, the floors were night and day. Pale, raw, almost vanilla creamy in tone. This is the stage everyone falls in love with, and also where panic sets in.“How do I keep them looking like THIS without turning yellow again?” This is where most blogs left me hanging. So here’s the actual solution that worked for us.
After: Our “Holy Grail” Formula for Pine Floors

We skipped stain (we didn’t want them to darken) and went straight for a sealer with surface hardener for an added protection combo. After weeks of debate and research, here’s the exact formula that gave us that soft, just-sanded look without yellow or amber tones:
Step 1: Seal
- Product: Old Masters – Masters’ Armor
- Application: Flat
- Coats: 3
- Why: Designed to be extra hydrating, counteract yellowing with a matte finish. Think ultra-light effect, mostly clear, just enough to neutralize the amber and low sheen. It only darkens slightly, which is exactly what we wanted!
Step 2: Protect and Harden
- Product: Part B Hardener
- Application: 3 coats with the included hardener.
- Why: Durable enough for commercial spaces, wipeable for everyday living, and the flat finish bounces light without looking plasticky. This makes the soft pine more durable and able to withstand everyday foot traffic.
Step-by-Step Instructions to Refinish Hardwood Pine Floors
1. Prep the Room – First things first: remove all furniture and any baseboards along the walls. This gives you a clean slate and helps you get those edges nice and even. A good dusting, vacuuming, and light mopping with warm soap and water is ideal. Let the hardwood pine dry fully before sanding.

2. Start Sanding With a Drum Sander – Begin with your lowest grit sandpaper, usually around 40-grit. The trick here is to sand with the grain of the wood. Keep the sander moving steadily, don’t let it sit in one place too long or you’ll get gouges. Think of it like mowing a lawn, each pass slightly overlapping the previous one. Vacuum the dust, and wipe with a damp tack cloth.
3. Mix and Apply Old Masters – Apply a coat of Old Masters mixed with Part B hardener with a synthetic fiber brush, foam brush, flat pad, or sprayer. A lambswool applicator may be used for large, flat areas. Apply in full, even coats in the direction of the grain. If brushing, apply liberally and keep a wet edge, working quickly to ensure an even coat. Apply with care to prevent bubbles in the finish.
4. Dust, Sand, Seal, and Repeat – After each coat, vacuum the dust, wipe with a damp tack cloth, and allow the sealer to dry for at least 3 hours. Repeat this process while progressing through 120-grit, and a final 220-grit sandpaper for a smoother finish. The order should be: 40 grit to remove damage, 80 grit to smooth the surface, 120 grit to refine, 220 grit for final polish. Each grit removes the scratches left by the previous sanding and helps create a clean, sealed surface. Three coats are ideal.
Tip
Hand Sand the Hardwood Pine Floor Edges and Corners – For those tricky corners and edges, break out a hand sander. This is where you get up close and personal with the floor. Keep the same grit sequence from step 4 so everything stays consistent.
5. Cure – After the final 220-grit sand and seal, vacuum thoroughly and wipe with a tack cloth for a spotless surface and apply the last coat of Masters Armor. Let the floors cure at least 48 hours before use, I prefer a full 7 days if possible for the best, flawless (and tough) finish.
Tip
Pine floors are gorgeous, but not the toughest wood out there, so adding a hardener is a game-changer. It gives you that lovely polished look without the shine, and it’ll hold up to all the foot traffic you can throw at it. Simply mix 4 oz. of the part B hardener per gallon of old masters and go at it!
What I Would Do Differently (Read This First)
This is the section most blogs skip, but honestly, it’s the most important.
- I would rent better dust control equipment
- I’d budget more time (this took longer than expected), almost two weeks.
- I’d test the finish in multiple lighting conditions
- I’d mentally prepare for how physical this job is
Cost Breakdown (Real Numbers)
- Sander rental: ~$100–$150/day
- Sandpaper: ~$50–$80
- Finish + hardener: ~$100–$150
- Total: ~$300–$400
Compare that to:
- $3,000–$8,000 for new floors. DIT saves a ton!
All About Pine Flooring: Key Details to Know
- Why It’s a Good Option: Pine is relatively affordable and easy to work with. Its softer nature makes it comfortable underfoot, and it takes stains well, allowing you to customize the color.
- Hardness: Pine is a softer wood compared to hardwoods like oak or maple. It’s known for its character rather than its hardness, so it can dent more easily.
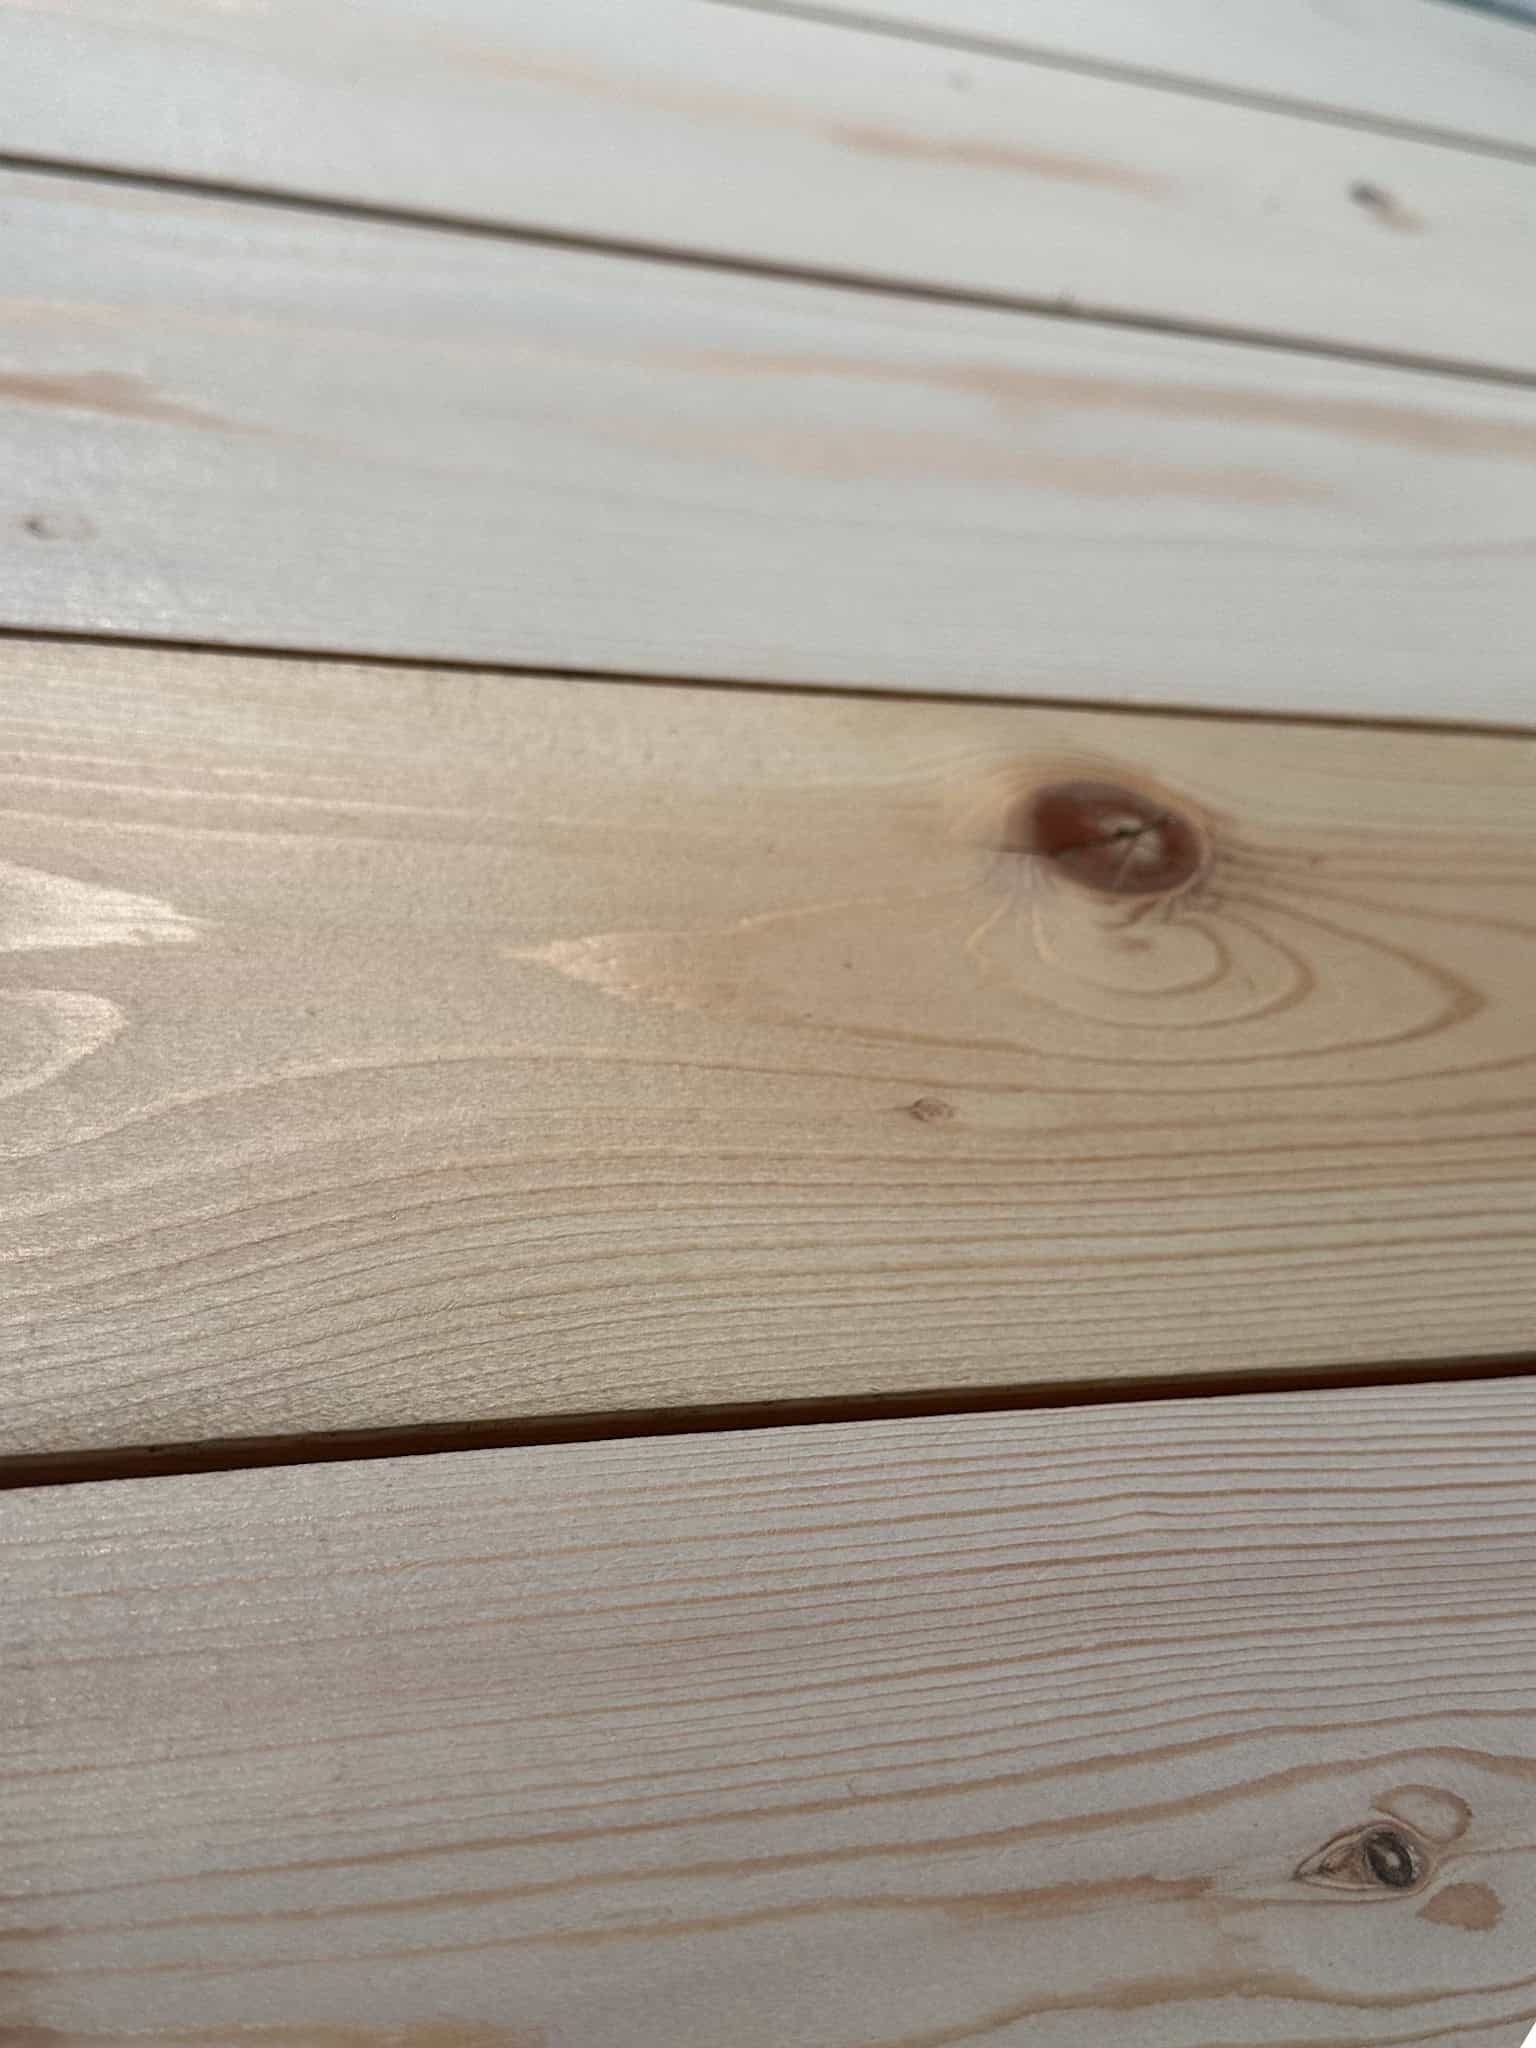
- Characteristics: Pine floors have a warm, rustic charm with visible knots and grain patterns. They add a cozy, lived-in feel to a space and can be stained or finished to suit different styles.
- Common Uses: Hardwood Pine is often used in cabins, cottages, and homes where a more rustic or traditional look is desired. It’s also a popular choice for anyone wanting a bit of natural character.
- Challenges and Remedies: Because it’s a softer wood, pine can be prone to dents and scratches. To remedy this, using a good-quality sealer with a hardener can add durability. Regular maintenance and using area rugs in high-traffic areas can also help protect the wood.
Pin this article
Pin It NowPro Tips for Refinishing Hardwood Pine Floors
Now let’s talk pro tips, because I’ve definitely learned a few things the hard way:
- Remove baseboards first: makes sanding/finishing clean and pro-looking.
- Always Test Your Sander First: Before you go full throttle, do a test patch in a corner. I learned this the day I accidentally left a drum sander mark in a hidden corner; thankfully, it was hidden! Keep the sander moving and never let it sit still.
- Go Slow and Steady: Don’t skip from coarse to fine too fast; pine is softer than oak and needs care. Patience is your friend. Each pass with a finer grit erases the scratches from the previous round, and trust me, that buttery-smooth finish is worth it.
- Dealing with Knots and Soft Spots: Pine can have soft spots or knots that need a little extra TLC. One time, I found a knot that just wouldn’t sand down evenly, so I switched to hand-sanding that area to keep it level. A little extra care goes a long way.
- Keep the Dust Down: Sanding is a dusty job, no way around it. But having a good shop vac and using a tack cloth between grits helps keep the dust under control. I’ve learned to do a “final wipe” before sealing to get that perfect finish.
- Vacuum between coats – pine dust is sneaky and will show in the finish.
- Mix small batches of finish – so the hardener doesn’t cure before you use it.
Commonly Asked Questions
Generally, if your floors are structurally sound—no major rot or deep damage—you can refinish them. If there’s enough wood left to sand down (at least 1/8 of an inch), you’re good to go. If they’re too thin or badly damaged, replacement might be necessary.
A good rule of thumb is to start with a coarse grit like 40, then move to an 80-grit, then 120-grit, and finish with a 220-grit for a super smooth finish. Each step helps refine the surface.
The key is to keep the sander moving at all times. Don’t let it sit in one spot. Move smoothly with the grain of the wood, and overlap each pass slightly so you don’t create uneven spots.
A flat finish like Old Masters Armor keeps the wood looking natural and avoids that shiny, artificial look. It also prevents the pine from turning yellow or orange over time and lets the natural beauty of the wood shine through.
Adding a hardener to your sealer is a great way to give soft woods like pine extra durability. This helps them stand up to daily wear and tear while keeping them looking beautiful for years to come.
Floor Related Cotent


Wrapping Up
The floors completely changed the space. They went from dry, cracked, warped, and lifeless to warm, soft, and full of character. And most importantly… they still feel like they belong to the cabin. Not something foreign and brand new dropped in.
Refinishing pine floors isn’t the easiest DIY project. But it might be one of the most rewarding. Because when you’re done, you don’t just have “new floors.” You have something you brought back to life.
In the end, refinishing hardwood pine floors isn’t just about the technical steps; it’s about bringing a piece of your home’s history back to life. I hope these tips, along with a few personal stories, help you tackle your own project with confidence. Want more DIY Tips? Check out the best white paint and how to DIY wallpaper. Happy refinishing
Keep Exploring
If you’re working on your own space, these might help next:
- My full cabin bathroom renovation (moody, small-space design)
- How I restored original redwood walls
- Loft bedroom styling (and how I made it feel finished fast – coming soon!)
Don’t forget that the Part B Hardener will last 72 hours once mixed into the masters Armor! Use it quick.