Estimated reading time: 21 minutes
I’m pretty sure by now most of you have seen my DIY corner bench dining table and hardwood pine floors refinishing projects. I love them both, but this bench seating is the Beyoncé of banquettes, perfect for enjoying my famous apple blackberry crumble. Although, to be fair, I might be a little bit biased. It’s oh so easy to make. You can build a DIY banquette bench in a weekend for roughly $250–$750 in materials, and below I’m sharing the exact process I used in my SF kitchen.
If you have a keen eye, you may have also noticed that my built-in banquette bench has in-seat storage. So this DIY Banquette is really the ultimate fusion of form and function.

Believe it or not, building your very own banquette is quite easy. This is a beginner-friendly project. Mine was custom-made with the help of some friends during my home renovation. But never fear. I documented the entire process along the way. Anyone can do it, even if it’s your first time with this type of project, I swear!
Pin this article
Pin It NowThe thing is, a banquette can be a great solution for adding tons of comfortable seating when space is fairly limited (like it is in my eat-in kitchen).
If you can build and assemble kitchen cabinets, then you can definitely do this, and trust me – the final result is well worth it. You might even start asking yourself why you didn’t think of it sooner. Let’s get into it.
Table of contents

What You’ll Need
- Power drill
- Measuring tape
- Circular saw
- 1” wood screws
- Piano hinge
- 3/4” birch plywood
- Plywood and 2×4’s (to measurements)
- Towel Bars
- Custom or pre-made bench cushions
- Leather hanging straps
DIY Banquette Cost Breakdown
One of the most common questions I get about this project is how much it actually cost to build.
While prices vary depending on your size, lumber choice, and upholstery selections, here’s a realistic breakdown of what I spent on our built-in banquette with storage.
| Item | Approximate Cost |
|---|---|
| Birch plywood | $120 |
| 2×4 framing lumber | $35 |
| Wood screws & hardware | $20 |
| Piano hinges | $30 |
| Leather pull straps | $35 |
| Towel bars for lift-up storage | $25 |
| Custom bench cushions | $250 |
| Upholstery fabric | $125 |
| Paint, filler, sandpaper & supplies | $40 |
| Miscellaneous materials | $45 |
| Total DIY Cost | $725 |
What Would It Cost To Hire Out?
For comparison, most custom banquette seating projects in the San Francisco Bay Area typically run anywhere from $2,500 to $8,000+, depending on size, upholstery, storage features, and finish details.
That’s one of the reasons I love projects like this. With a few sheets of plywood, some patience, and a weekend of work, you can create a custom built-in that looks completely bespoke for a fraction of the price.
Worth It?
Absolutely.
This banquette added hidden storage, increased seating, created a dedicated dining nook, and became one of the most-used spots in our home. Dollar for dollar, it’s still one of the best DIY projects I’ve ever tackled.
Step-by-Step Process
Time needed: 2 days and 4 hours
To get started, I’ve listed all the steps you need to follow to make your own banquette bench with storage, plus a few tips to make your DIY banquette seating even better. Ready? Keep reading!
- Measure Your Space
As always with DIY projects like these, the first step is to measure! Determine the floor and wall dimensions to find the length you want the DIY corner bench dining table to run.
A simple way to determine the ideal seat depth and height for your banquette seating is to use a dining chair as a guide. Of course, you’ll also want to make sure your bench frame is sized to match the ends of the tabletop on each side.
Since my bench is L-shaped, I measured the distance along each of the two walls where the bench would ultimately run parallel to. - Rip Down Lumber to Measurements
I used birch plywood to create the banquette’s frame. Start by ripping your boards down with a table saw to your required measurements.
It would be great if you could find someone to help you with this step so your helper can support the wood’s weight during the process. Safety first!
You can even have the lumber for your dining nook cut down at Home Depot if you are not quite ready for this step.
If you want to do that, simply measure from the edge where you want the bench to be. Then, remove the plywood equal to the thickness of the trim pieces that you will use to cover up the framing.
In my case, the trim details were 1” thick and 1/4” for the board overlay. Just be sure to take that into consideration. - Assemble the “L” Frame
For your 2×4 frame, simply cut two 2×4s to the size you need to start with. The length of my longest wall is 56”, so I started there and cut two (one for the front and one for the back).
The depth of my bench is 19”, so I then cut two 2×4s to 15”, then simply placed them inside the 56” pieces perpendicularly, creating a complete rectangular shape.
Once you have the frame laid out in front of you, don’t be afraid to dry-fit it. Make any minor cuts or tweaks as needed.
No need to stress! Just make sure you lay out the base of the “L” piece in each rectangle first; if you need to, then simply build on top of it.
Don’t nail anything into the floor or walls yet! We want to make sure everything is perfect, right angles and all, before doing so.
Be sure to include a center piece in each rectangle if you need the added support. Once you feel good about the placement of the base frame, go ahead and nail (or screw) them together.
Do the same for the top by mirroring what you just did, but attaching the shorter bench side to the longest piece. Just subtract the depth from the dimensions and attach the shortest side to the longest. You’re already halfway there! - Face the Frame
Next, we want to assemble your newly built DIY corner bench dining table frame by attaching the front, side, and bottom panels using 1×4 poplar wood glue. It’s thin and sturdy, making it perfect for this purpose!
First, add the back panel, then add both side panels. Once you have assembled everything properly, screw all the individual pieces together using 1” wood screws to reinforce the entire structure.
The key to this step is to ensure that each “face” is now covered with a properly fitting piece of wood!
I like to do it piece by piece so that I don’t pre-cut everything and then end up with an inch too much (or too little). But, that’s just my style. Make sure each edge is seamless and fits flush at each corner before attaching them with screws and wood glue - Make the Lid
Using more poplar, start framing the bench’s top piece (the lid) to make the. I recommend using a circular saw when learning to build a bench seat for a kitchen table to make cutting the wood to the desired length and width of your benchtop easier.
You can start by tracing the dimensions for your bench’s hinged top door, which will give access to the extra storage space in the kitchen banquette.
Be sure to calculate the hinge’s size as well, and jigsaw a hole you can grab and lift through. Since this lid will sit just inside the bench, you will need something to grab to open it.
Again, I like the lid to rest flush, just inside the frame, on the 2×4 on each side. - Install the Hinge
Once dry-fitted, simply attach piano hinges inside the storage area of the bench, ensuring that it is perfectly flush with the door’s edge. I placed mine where the blue tape is seen above.
Since you’re still learning how to build a bench seat for a kitchen table, it’s a good idea to test it out before committing: make sure it opens and closes as intended! If the lid is off slightly, you can simply sand it down or make any necessary cut adjustments. I like to have the lid resting on the back 2×4 because it provides extra support when someone sits on the DIY Banquette.
After you get one lid cut to perfection, cut the other to complete the other side, but remember that it will be either shorter or longer (depending on which lid you made first). Make sure they don’t bump into one another.
See below and notice two things: one, that the lids are different lengths, and two, that they both sit flush inside the frame. - Install the Bench
Now comes the exciting part! The next step is to install the DIY corner bench dining table bench. Ensure that the top surface is level by using my favorite level, then attach the bench to the wall studs using wood screws that are approximately 3”.
You can screw the bench base directly into your floor, but you don’t have to. - Adorn the Face
To adorn the bench’s face, you can always dress it up with beadboard. Simply cut it to the proper height, then apply construction adhesive or spray adhesive to the back before installing it with finishing nails. This will help make the front of the bench look much more presentable!
- Prime and Paint
I wanted a traditional yet modern look. To achieve that, I simply added a classic box frame detail around each face. Then, I primed and painted it with my favorite black paint for an ultra-modern level-up!
Be sure to use paintable wood caulk at any seams where the bench meets the wall or where the framing is not exactly flush.
You can fill any nail and/or screw holes with wood putty. Let dry and then paint or stain (I suggest two coats). Similarly, if you’ve noticed any scratches or scrapes on your DIY corner bench dining table, you can get rid of these before painting by filling them with wood filler. - Install Towel Bar
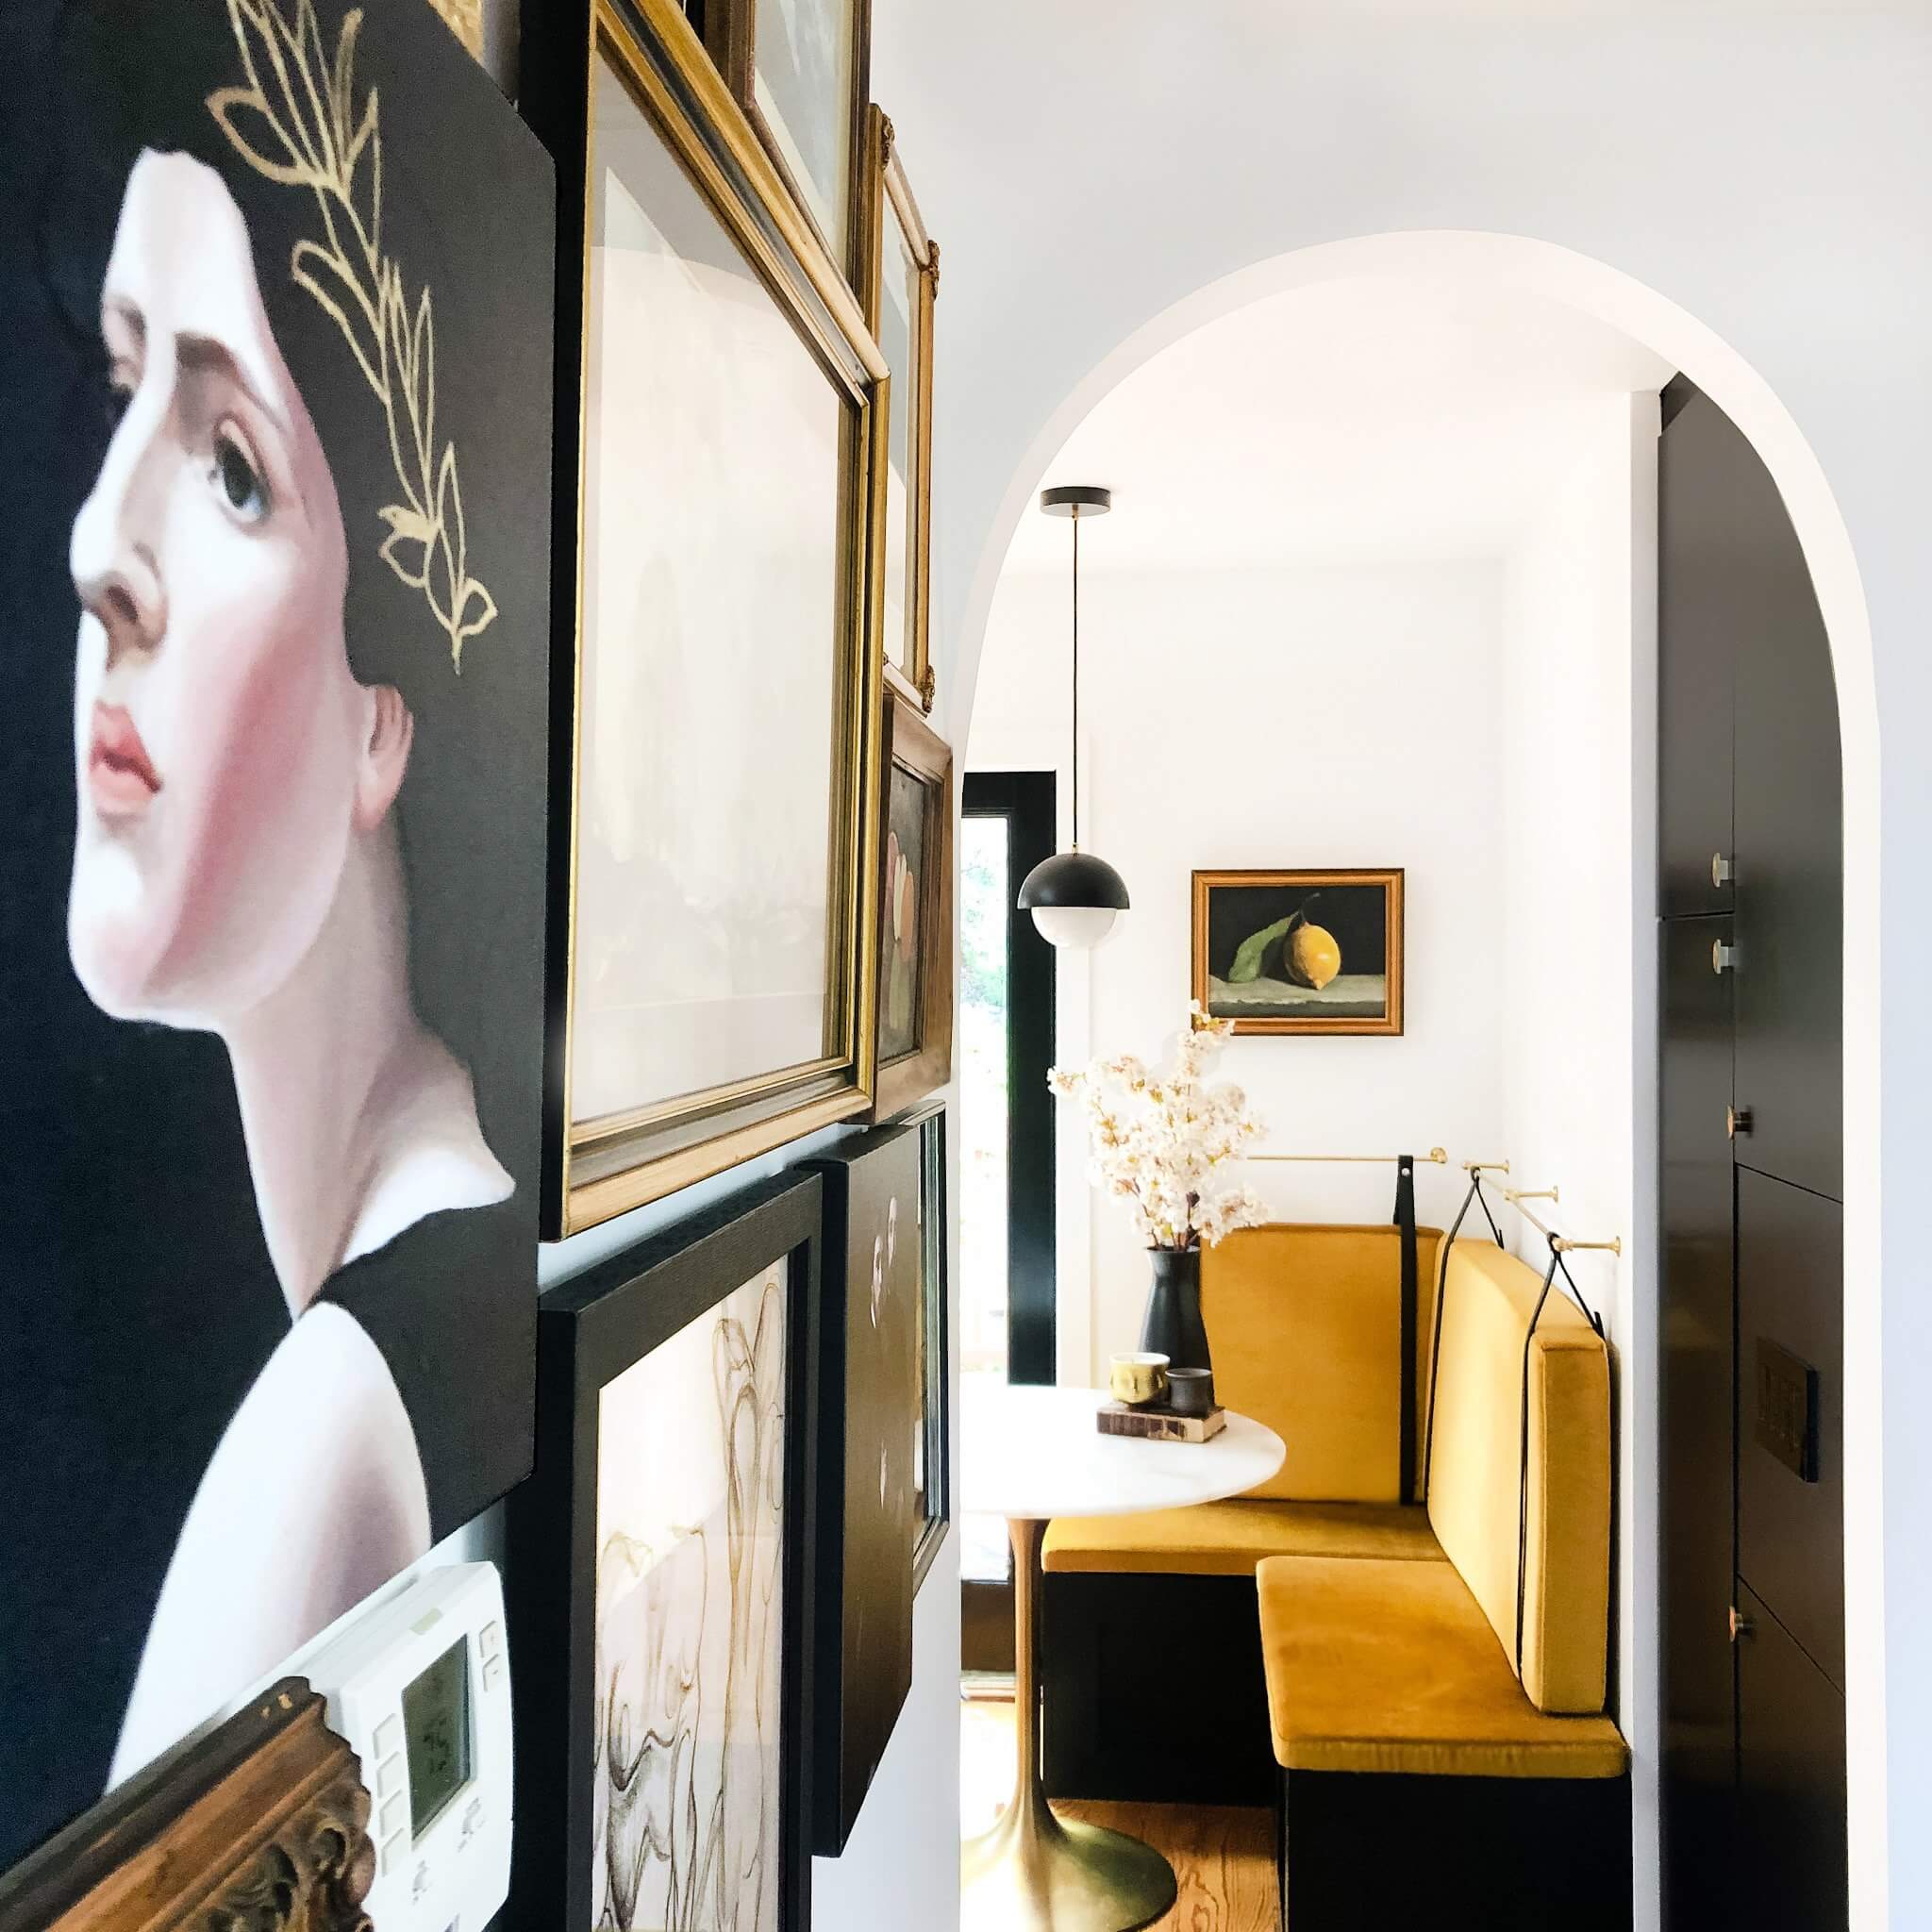
Now, let me share with y’all a huge cost-saving tip that looks like a million bucks. If you’ve seen the DIY Banquette before, you can probably guess what it is. For extra comfort, try suspending cushions (more on that below) to provide back support using bathroom towel bars!
Yes, towel bars! I got my brass ones from Pepe & Carols (in case you wanted to use the exact same ones I did). Simply order them to the custom length you need to match the back of the bench.
Then install them with the provided screws, ideally into the studs at the height where the cushions will rest, and use leather straps to keep ‘em in place.
I absolutely adore my DIY banquette bench, and the addition of the suspended cushions just gives it an extra appealing element,

My Banquette dimensions are:
- Longest length: 56”
- Shortest length: 37 “
- Bench depth: 19”
- Bench height 17”
Rip Down Lumber to Measurements

Tip
For an L-shaped bench like mine, make sure you start with the longest side first and begin measuring and cutting from there. I used a trim piece at the end for a more finished look.
Face the Frame

Make the Lid

Install the Hinge

Install the Bench

Adorn Each Face

Prime and Paint


Add Towel Bar Back Cushions

Get Custom Cushions Made
As for the cushions themselves, I had mine custom-made by a local upholsterer. Guys, it was worth it and it took no time. They are filled with a foam insert and wrapped in the Golden Savoy Fabric. Go bold and make a moment!
I am so glad that I did. Simply order them to your measurements, taking into consideration the height of the wall and the length you need.
Nails Vs. Screws Which is Best?
You always want to make the best choice when it comes to selecting the right components for your DIY corner bench dining table. This is especially true when you’re creating something that’s going to be weight-bearing: the last thing you want is for your bench to fall apart while you’re sitting on it!
Well, in your efforts to ensure your corner bench lasts for a long time, you’ve probably come across the nails vs. screws debate. I’m using the word “debate” for a specific reason: neither option can be dubbed the perfect solution!
While the final choice is up to you, I thought it was worth laying out the pros and cons of each. With these factors in mind, it should be fairly easy to make your final decision!
YOU MIGHT ALSO LIKE


Nails
Nails have a few different factors going for them. They’re often the go-to choice for DIY projects, mainly due to the fact that they’re quicker to use. This is especially true if you’re not using power tools, as it’s much quicker to hammer a nail than it is to use a screwdriver.
Another thing that nails have going for them is their low total cost. Most of the time, nails are cheaper than screws, which is definitely a bonus if you need a lot of them. Lastly, nails are just easier to cover up for that “finished look”.
Once they’ve all been driven in, you can simply cover them with wood filler to seamlessly blend them into the wood!
However, nails do have a few downsides worth considering. For one, they don’t have as much holding power as screws do. If you’re trying to hold down something that will have a lot of force applied to it, you’ll need to use fairly long nails.
The next point might not be particularly relevant for this exact project, but it’s definitely something you’ll run into on other projects: nails don’t like to come out! Often, the only way to remove a nail is by bending the wood enough to grab onto the nail with a hammer.
As you’d expect, this can damage the wood, reducing the likelihood that you’ll be able to use the piece again without some in-depth touch-up work. While this might be manageable in some situations, if you split the top pieces, you’ll likely need to redo the whole thing.
In the end, nails aren’t that great if you need to adjust something on your DIY Banquette later down the road. While you can—to a certain point—bend nails, this just reduces their structural integrity and isn’t an ideal solution.
Screws
Screws excel at every point where nails fall short. Unlike nails, they’re excellent at creating long-lasting connections between surfaces. With more holding power for the same length of metal, this makes screws a great option for load-bearing connections.
Whereas nails have little to no adjustability, screws can be easily and precisely adjusted as needed. This comes in handy when you’re trying to get something perfect but the measurement is off just a tad.
Of course, they can be easily removed as well. This makes them ideal when it comes time to repair your furniture.
Also, screws are generally less likely to split wood. This isn’t a guarantee though, so I always recommend creating pilot holes and pocket holes if you’re working with a piece of wood that’s likely to break. It’s better to be safe than to be sorry!
However, while screws are better than nails in many aspects, they also have a number of drawbacks that are worth thinking about.
For one, screws are more expensive. This is especially true if you’re buying speciality screws (although the same is true for speciality nails as well).
Whereas nails can be easily hidden using wood filler, screws don’t have this option. Well, you could technically cover the screw with wood filler, but—should you ever need to remove it—you’ll have one heck of a time getting it out. Even more so if you’re trying not to damage the wood!
Remember, screws will make this last step take longer than if you were to use nails. I never recommend using a handheld screwdriver. It’s time-consuming, cramps your hand, and can get very frustrating.
If you decide to go with nails, then either a hammer or a nail gun will work just fine. However, if you end up using a screwdriver, I strongly recommend getting an electric screwdriver. Trust me: you’ll be glad you did!
The best material to make a bench seat

That depends: are you talking about the DIY corner bench dining table seat itself or the cushion that sits on top? If you’re talking about the actual seat itself, then it’s fair to assume that the seat would be made from the same material as the rest of the bench.
There are a bunch of different materials you could make a bench from when learning how to build a bench seat for kitchen table. Personally, I think wood is the best. Of course, there are plenty of options in this category as well! Here are a few of my personal favorites.
- Oak is a classic choice, and for good reason. There are many different species of oak that you can choose from, which offer a fairly wide variety of shades and colors. It’s generally fairly cheap, is easy to stain, and is pretty strong (it is hardwood, after all!).
- Maple prices vary. Sometimes it’s higher than oak; other times, it’s lower. Regardless, it’s a great option for any DIY bench project due to its overall durability and beautiful lighter shades.
- Cherry wood doesn’t always take well to staining, but it’s extremely easy to work with otherwise. Sturdy and scratch-resistant, this wood is unique in the sense that it will actually darken into a darker color over time!
Should a dining bench be longer or shorter than table?
Proper sizing is important when it comes to finding the perfect balance between tabletop and seat space. However, whether your bench should be longer or shorter than the table depends on the setup you’re working with.
For a corner bench, the table will have to be longer than the bench itself (assuming you’re using a pedestal table). Since the table is round, it will curve away from the bench. You don’t want to have to stretch for your food so make sure to choose a large enough round table!
If you’re using a square table for a corner bench then the table can be of equal length or slightly shorter than the bench.
For regular, rectangular tables, you should aim to have the bench and table of equal lengths if you want the “full-length” look. If you’d prefer to be able to slide your bench underneath the table, then you’ll need to have your bench slightly shorter than the distance between the legs of the table.
While the length of the table is definitely something to consider, you’ll also want to keep the height of the table in mind. If it’s too low, you won’t have enough room for your legs. Too high, and you’ll have to stretch just to eat a meal.
This is why I recommended using a dining chair as a guide above!
How wide should a bench be for a dining room table?
As before, the answer depends on the type of table you’re talking about! For a corner bench breakfast nook, you’ll want to have a minimum of 21 inches of width for each person.
With that in mind, you should base the width of your proposed corner bench on the number of people you routinely anticipate seating at the table. For a family of five, this means you’d want to have each bench extend 63” from the center to the end (when measured from the inside).
This would allow three people to fit comfortably on either side, with space for one additional person if needed. However, if your eat-in kitchen uses a regular bench & table arrangement then the answer is a bit more open to interpretation.
Generally, though, a width of 42 to 52 inches is enough for two people. 53 to 80 inches should be enough for three adults, whereas picking a bench over 80 inches is the best way to comfortably seat four or more adults.
Commonly Asked Questions
Bench dining tables, especially corner models, are perfect for small kitchens or dining areas. They maximize seating and space, offering more room for guests than traditional chairs. Corner benches also provide hidden storage, making them a practical and space-saving solution for compact spaces.
When building a DIY corner bench, the seat is usually made from the same material as the rest of the bench. Popular choices include oak for its strength and stainability, maple for durability and light color, and cherry wood, which darkens naturally over time and is scratch-resistant.
The ideal thickness for a bench seat depends on its length. For a seat up to 36 inches, 1 inch is sufficient. For longer benches, especially those seating more than one or two people, aim for 1.5 to 2 inches.
The cost to build a banquette can range anywhere from $300 to $2,000+, depending on the size, materials, and whether you choose custom cushions. Our DIY banquette costs approximately $725, including the plywood, framing lumber, hardware, paint, leather pulls, and custom upholstered cushions. For comparison, hiring a carpenter or cabinet maker to build a custom banquette often costs $2,500 to $8,000 or more, making it one of the best DIY projects for adding custom built-in seating on a budget.
Key Takeaways
- Building a DIY corner bench dining table requires measuring your space and selecting the right materials like birch plywood and wood screws.
- It involves several steps, including assembling the frame, attaching the lid with hinges, and adorning the bench for aesthetics.
- For added comfort, consider using towel bars to suspend back cushions, making the bench both stylish and functional.
- The project allows for creativity, including custom cushions and paint colors to match your home decor.
- Overall, a DIY corner bench dining table is a great solution for maximizing seating in smaller spaces.
A Few Parting Words

I can’t wait for you guys to try this DIY corner bench dining table project and make your own banquette so you can experience it firsthand. Come on, tell me you’ll give it a try! It has been a space of pure joy ever since we did it. Tag @136home if you do on Instagram. I want to see!
For those who aren’t feeling brave, you can purchase a bench that’s already made. Want more game-changing DIY? Check out my DIY Gallery Wall Guide and how to add box molding posts. You still need to solve the cushion situation and find a matching kitchen table for yourself, but the base itself is ready to go! If you find you really love the look, you might use similar bench plans to add bench seating to other rooms, like your living room, as well.
Regardless, just be sure to paint it in a gorgeous color to get it ready to match your beautiful home, and select a fabric of choice to make it all your own.


One thing I’d do differently if I built this banquette again: I’d run electrical inside the bench for hidden charging outlets.
Also, don’t skip the storage hinges. They cost a little more upfront, but being able to lift the seats with one hand makes a huge difference in everyday use.
Pro tip: Before cutting any wood, tape the banquette footprint on the floor with painter’s tape and live with it for a few days. It’s the easiest way to make sure your dining table, chairs, and walking paths all feel comfortable.
Happy building, friends. If you make one, I’d love to see it.