Cupboards and cabinets aren’t the only way to store your possessions. A wall shelf or open shelving as some call it – is a simple DIY for a tight-fit area where upper cabinets might not make sense.
Floating shelves are an excellent choice for people who can appreciate clean lines and a minimalist aesthetic. It is easy to customize the DIY versions to fit any space. Adding floating shelves to your home not only increases your storage options, but also lets you showcase your personal style using a practical approach!
This easy step-by-step tutorial is a good idea for building your own DIY floating shelves and can help you make use of that underutilized vertical space while providing an opportunity to flaunt some of your most precious styling possessions and home decor.
About DIY Floating Shelves
These DIY floating shelves are made from sturdy wooden pieces with a support frame that can be installed onto a blank wall, or deep shelf in your home to help maximize your space with a modern look in a single day. You don’t even need mounting plates!
It’s a great project for making actual floating shelves (small) that don’t require metal brackets. The name derives from the fact that these shelves seem to be floating in the air without any visible support.
White oak is an option, but I love poplar too. To me, this is a great design choice – I love a streamlined look.
Check out the entire process in my Instagram Stories here. But, if ya want to get going ASAP on your new DIY floating wood shelf like I did read on for the step-by-step instructions.

Why Install DIY Floating Shelves?
They can look complicated, but they are actually really easy to build on your own and can be completed with just a few tools quickly.
Before we learn about how to DIY your own float shelf, let’s discuss why these can be a great solution for creating extra storage space, and opening up your floor space to leverage your wall to do more day-to-day.
They Add Personality
A DIY floating wood shelf adds character to your home and brightens up any wall or corner. Floating shelves also look a lot more stylish than bulky cabinets, shelves with brackets, or dated cupboards lending an air of sophistication.
They’re Especially Great in Small Spaces
When you have a small apartment or space, floating shelves can help maximize the space available by bringing the eye (and items) up and off the floor. You can even use multiple floating shelves to make an arched bookcase!
The free space available around a floating shelf also creates the illusion of a taller and thus larger room. That’s why you see lots of small apartments using vertical space – a floating shelf is perfect for this.
They Can Be Installed in Any Room
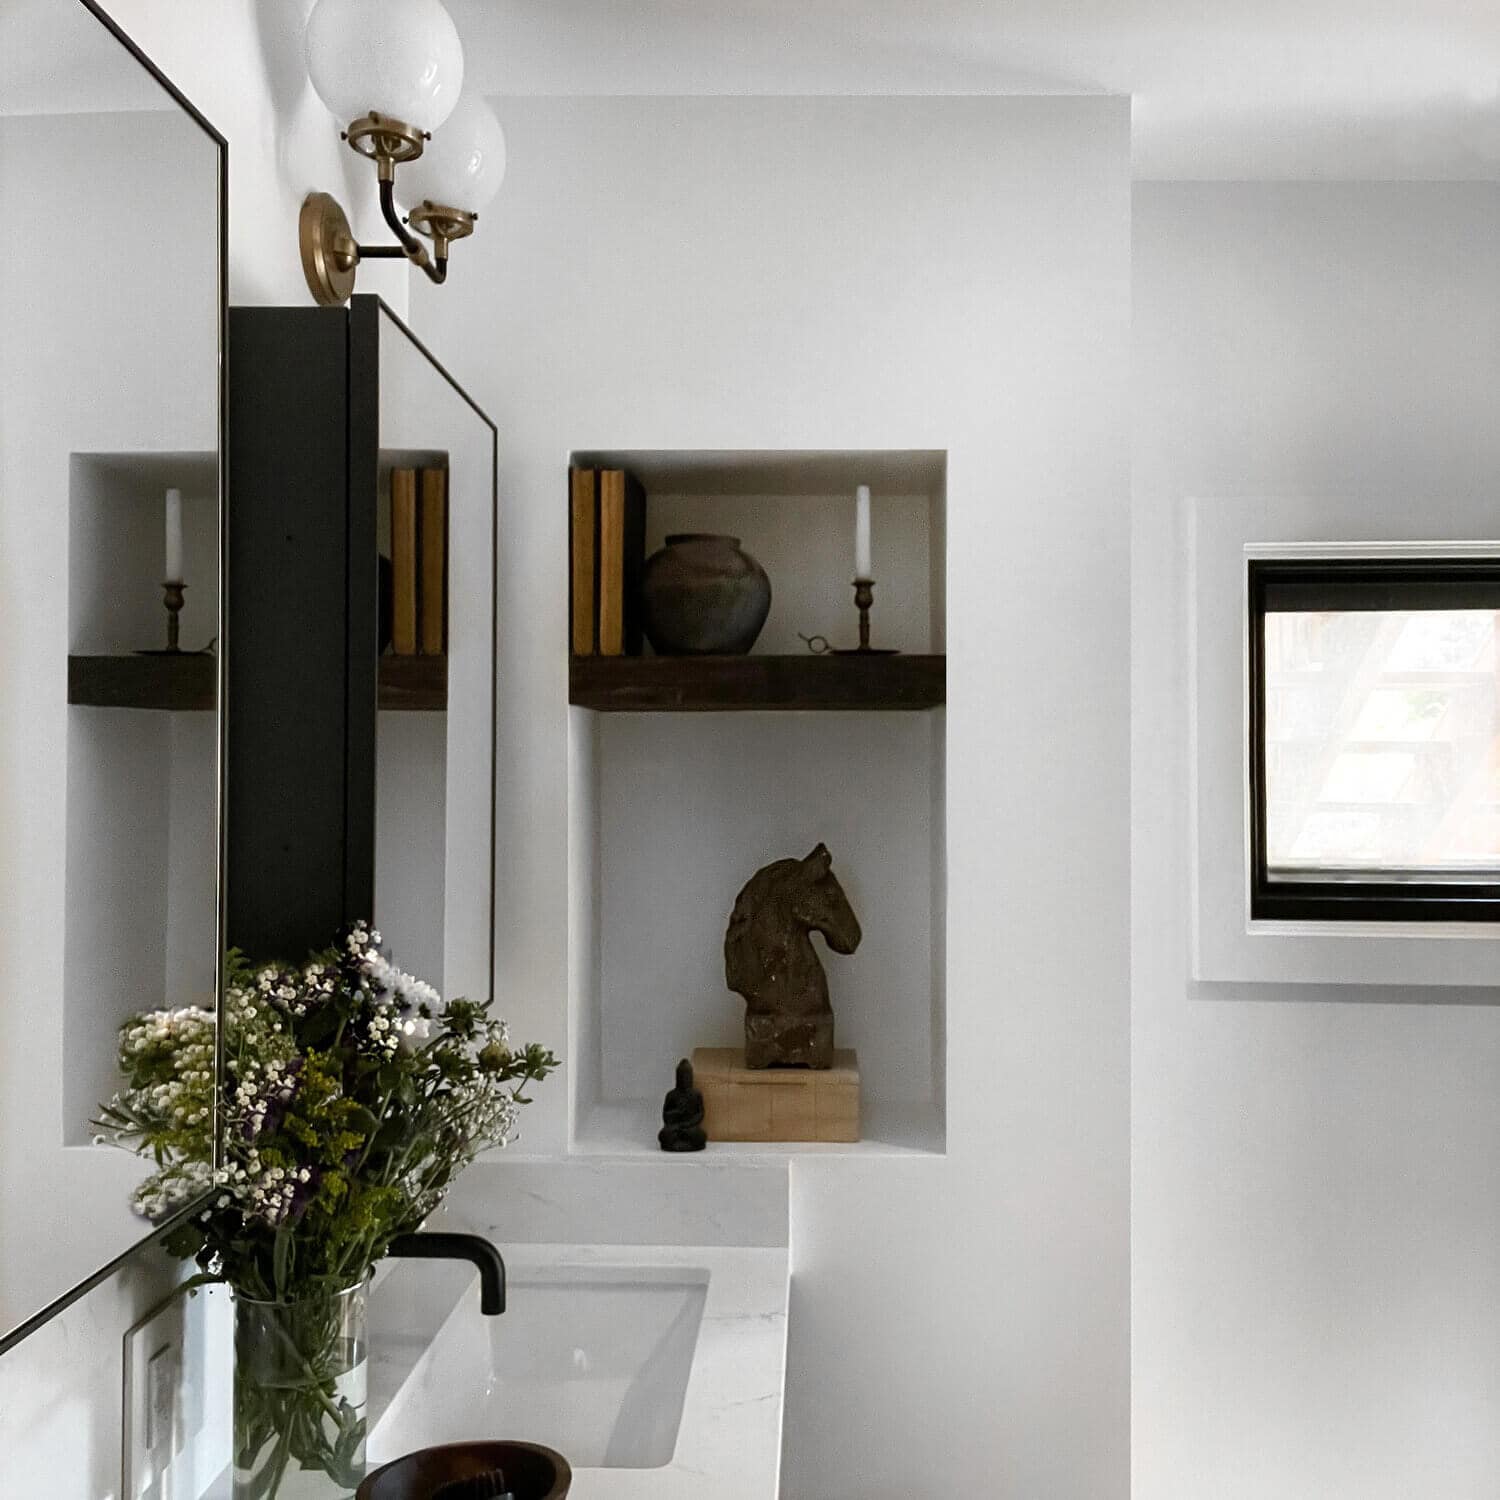
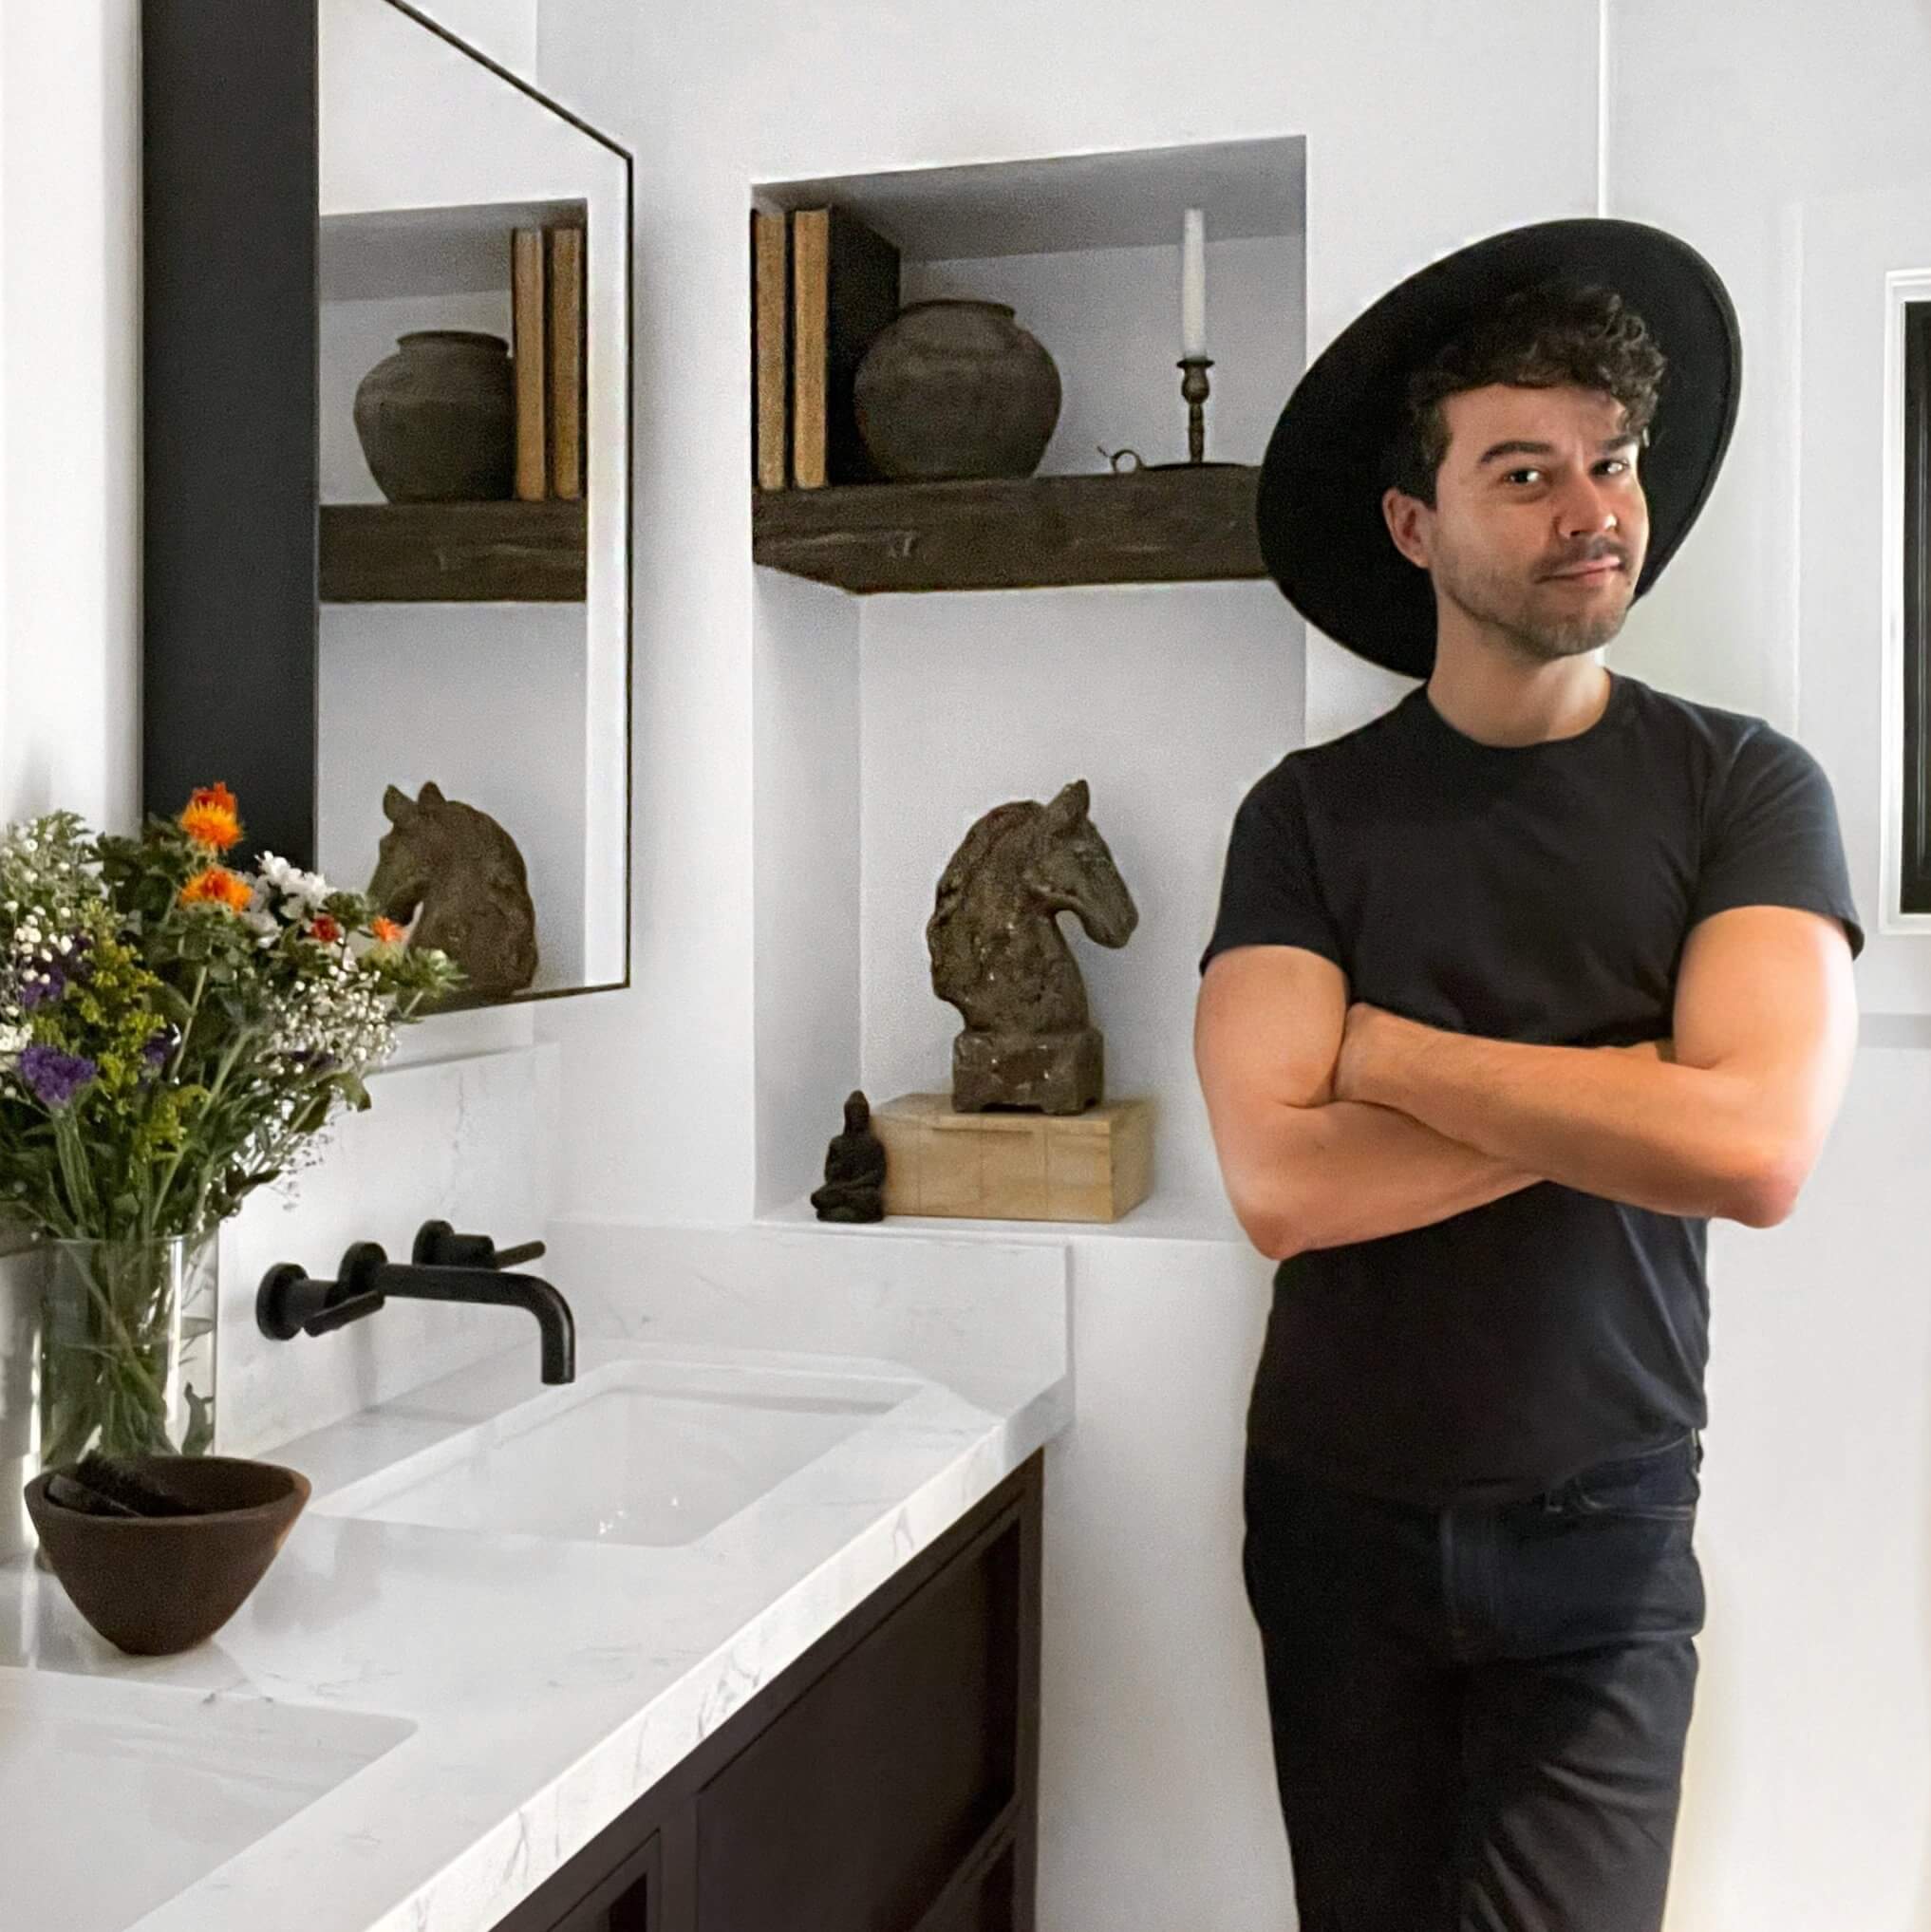
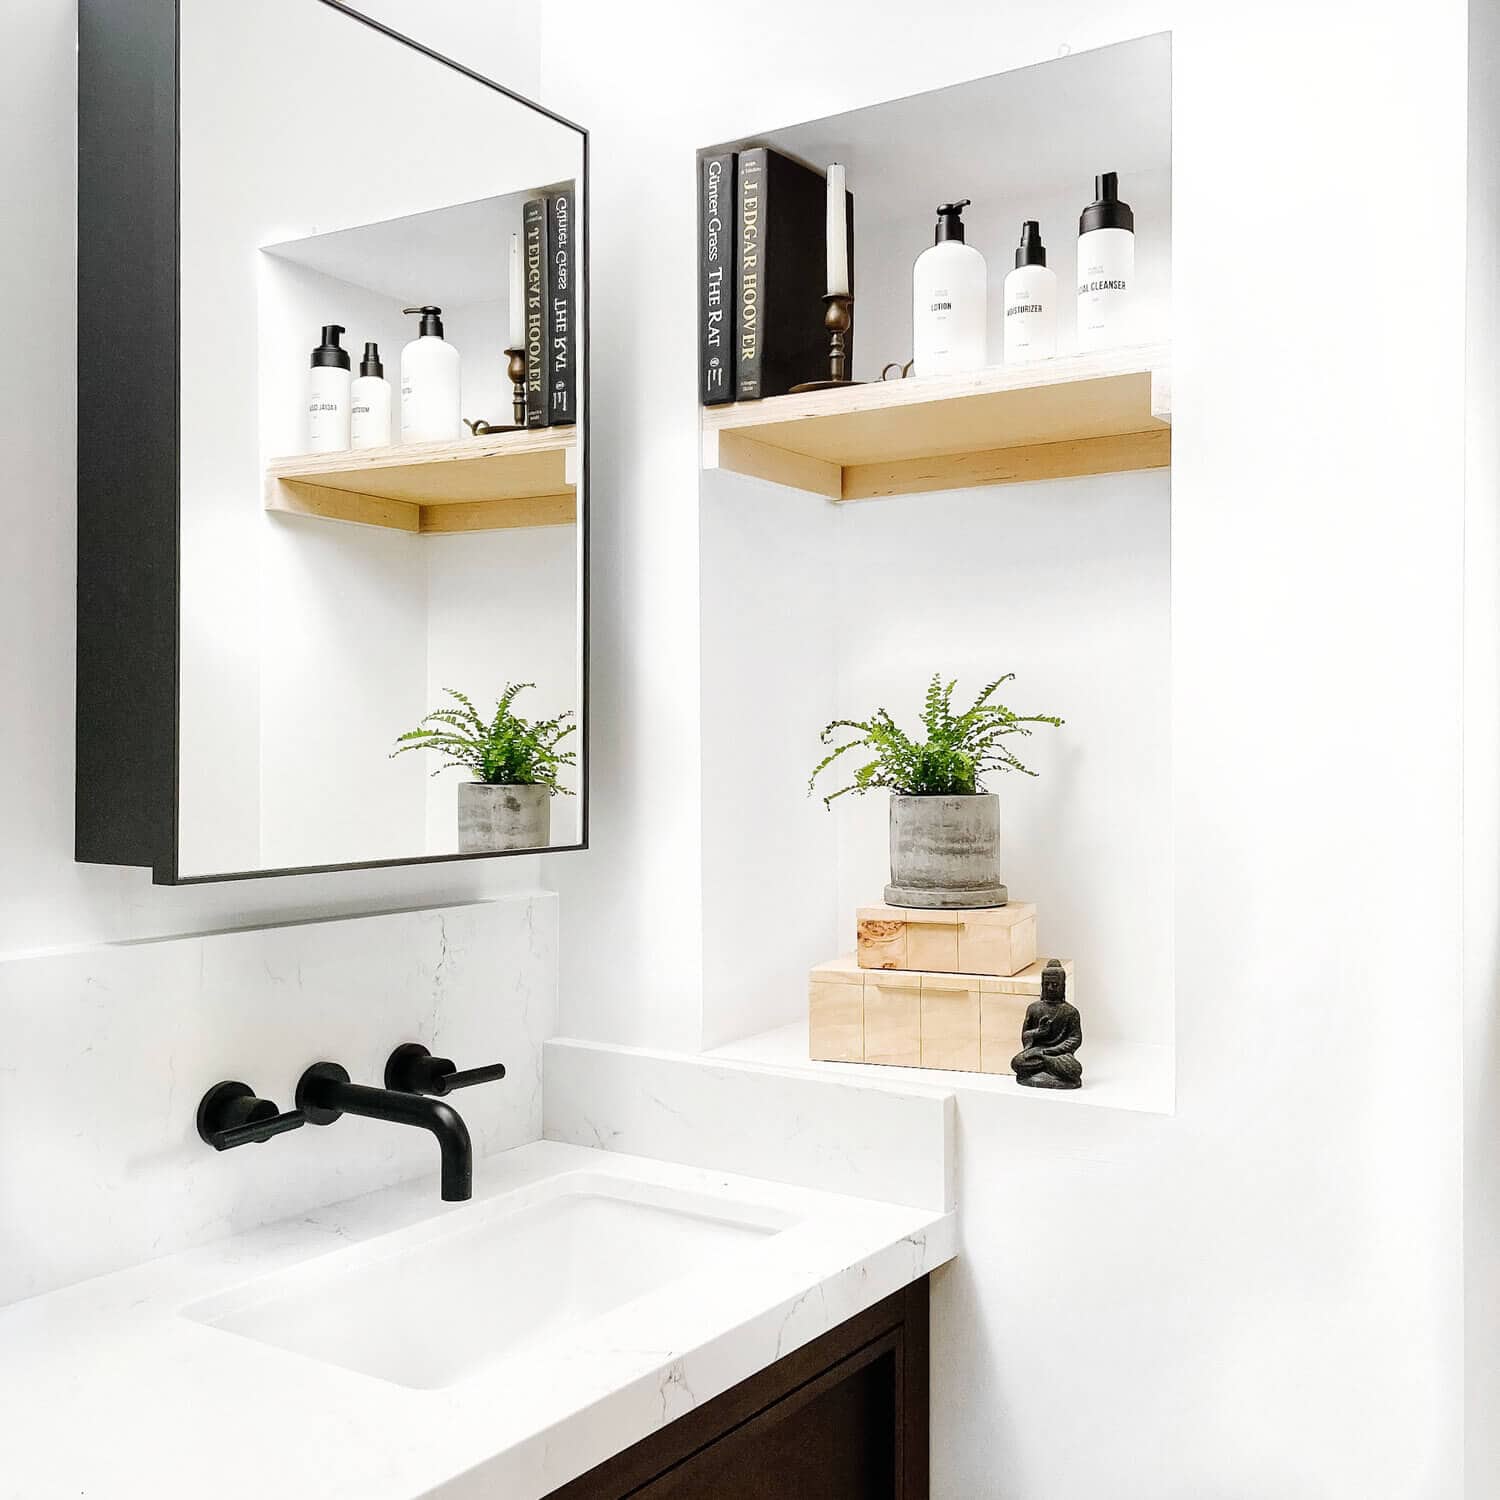
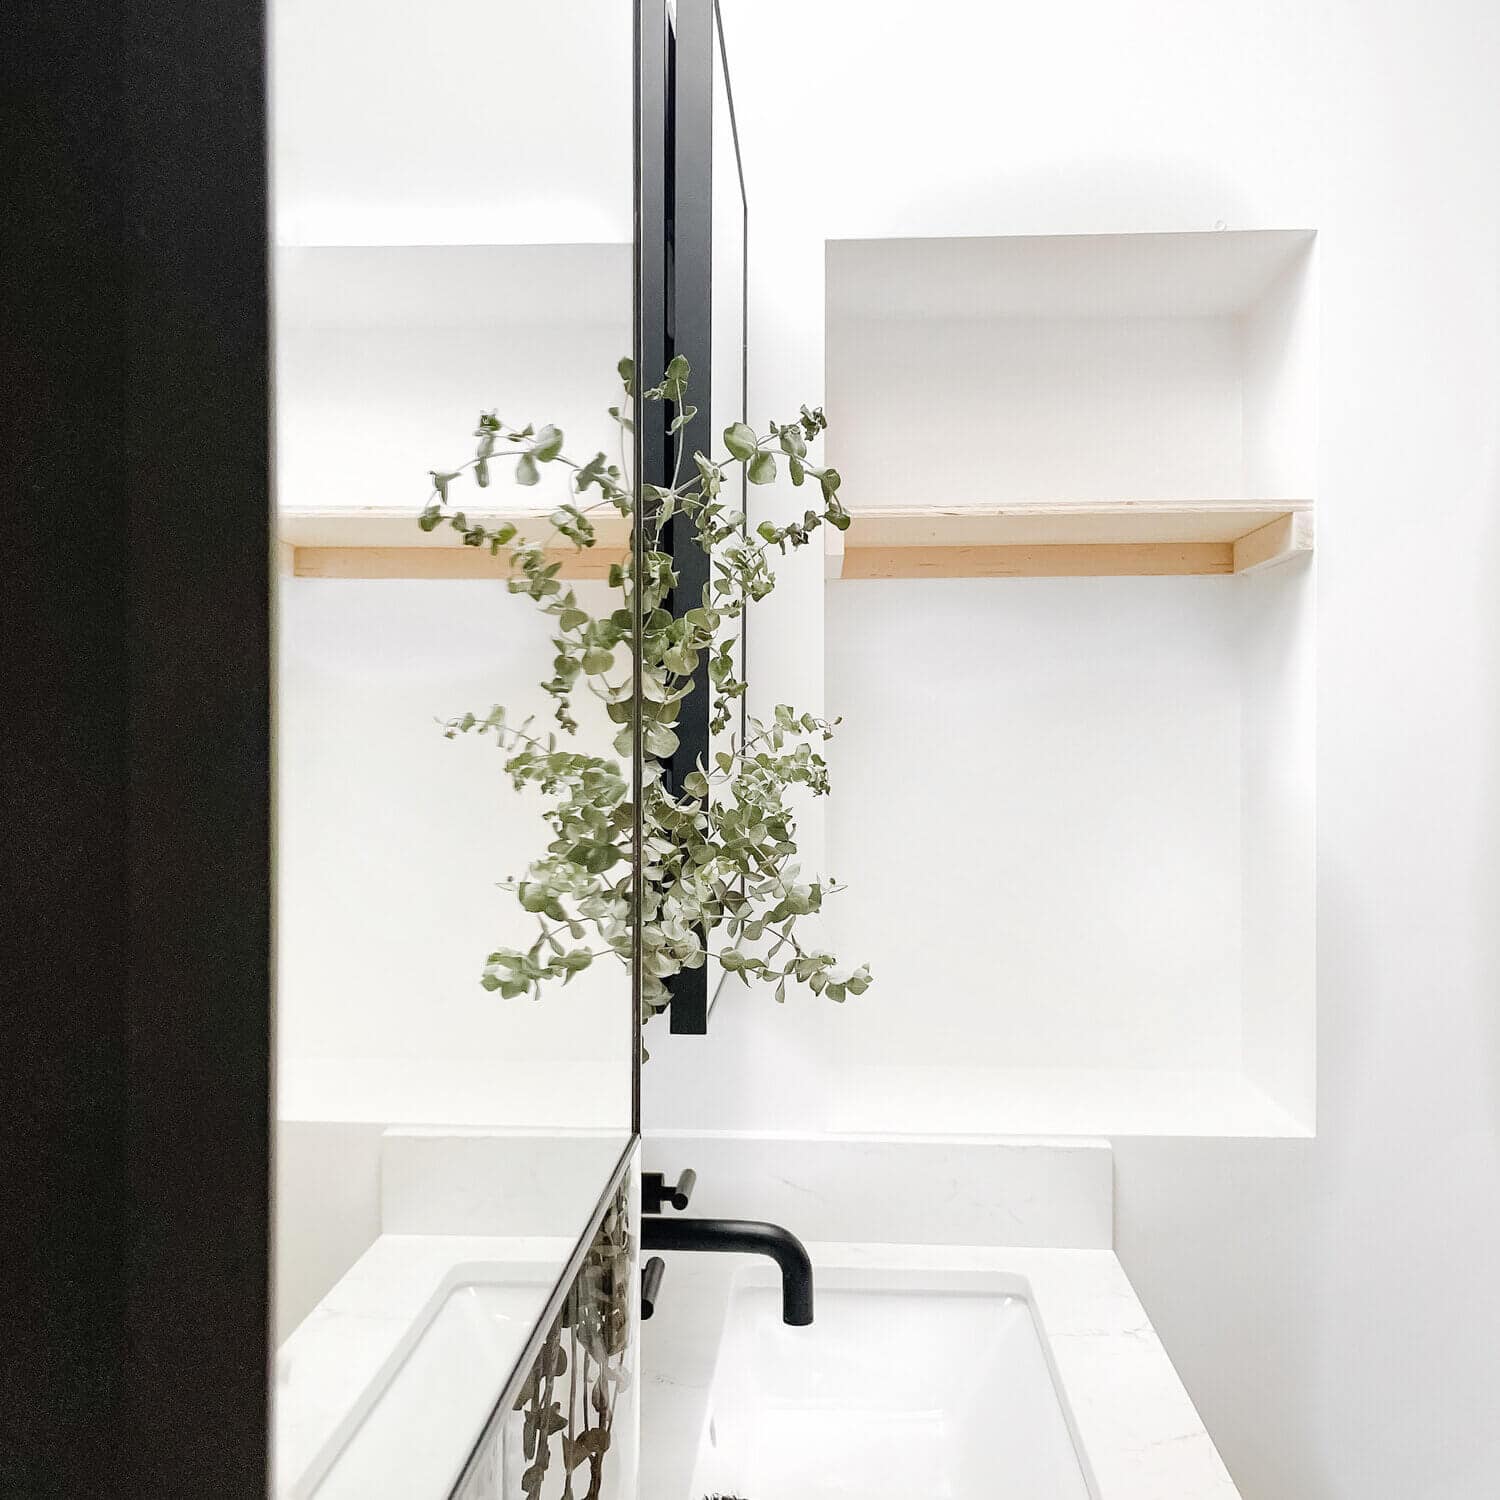
DIY floating shelves are also great because they can be added to almost any room – they aren’t just meant for a kitchen, etc. Living rooms or even bathrooms (like mine) can be enhanced by displaying your favorite books, and oddities.
Bedroom interior design can be enhanced by placing artwork, artificial flowers, or contemporary décor. Kitchens benefit from a floating shelf by displaying prized cutlery jars of dry goods, your favorite wines, and even plants.
If ya need some extra storage in a bathroom an added float shelf is a natural home for scented candles, extra towels, or even a box of tissues. No matter which room you need to style, a floating shelf will come in handy – I promise.
While it is possible to get pre-made shelves from stores like Home Depot and IKEA, you don’t have to. Also, if space is not a standard size, making one yourself might be the best route.
You will be able to customize your shelf to the final dimensions and color of your choice if you’re up for a DIY.
Finding the Right Type of Wood
Choosing the right type of wood is important when making DIY floating shelves, especially if you intend to use them properly. While less sturdy woods are fine for purely decorative shelves, you’ll want to select a strong and durable type of wood for shelves that will hold anything of weight.
Fortunately, there are plenty of options available. Each offers its own unique characteristics and qualities, so it’s worth comparing a few different options before making your selection for your DIY floating wood shelf.
Hardwood vs. Softwood
Generally, wood is split into two categories: hardwood and softwood. Softwood—as mentioned above—is fine for purely decorative pieces, but will bend and warp over time, making it a subpar option for shelving.
Hardwood, on the other hand, is excellent for DIY shelving. Long-lasting, durable, beautiful, and easy to stain, I always recommend choosing hardwood for this type of project!
Oak, Maple, Cherry, Mahogany, and Walnut are all popular options when it comes to wood shelving. Plywood is semi-popular as well, but I would recommend avoiding it. Not only is it unsightly, but plywood also has a tendency to warp, crack, and splinter over time. Not good!
Beyond choosing which type of wood you want, you can also choose between new or reclaimed wood. Reclaimed wood is wood that has been salvaged from older projects. By using this type of wood, you can not only be eco-friendly, but also add a unique sense of character and charm to your project!
There are quite a few options so I definitely recommend going to see the various types of wood in person—rather than online—before making your decision. This will help ensure you get the exact look, feel, and quality you’re after!
Convinced? Great! Here is a quick how-to guide to this easy DIY you can do on your own:
What You’ll Need to Get Started
- 2” x 10” pine or poplar board (measurement can vary based on your requirements)
- Hammer and Nails or nail gun (I use the Brad Gun Nailer with finish nails), OR
- Screws and a screwdriver
- Drill
- Stud Finder
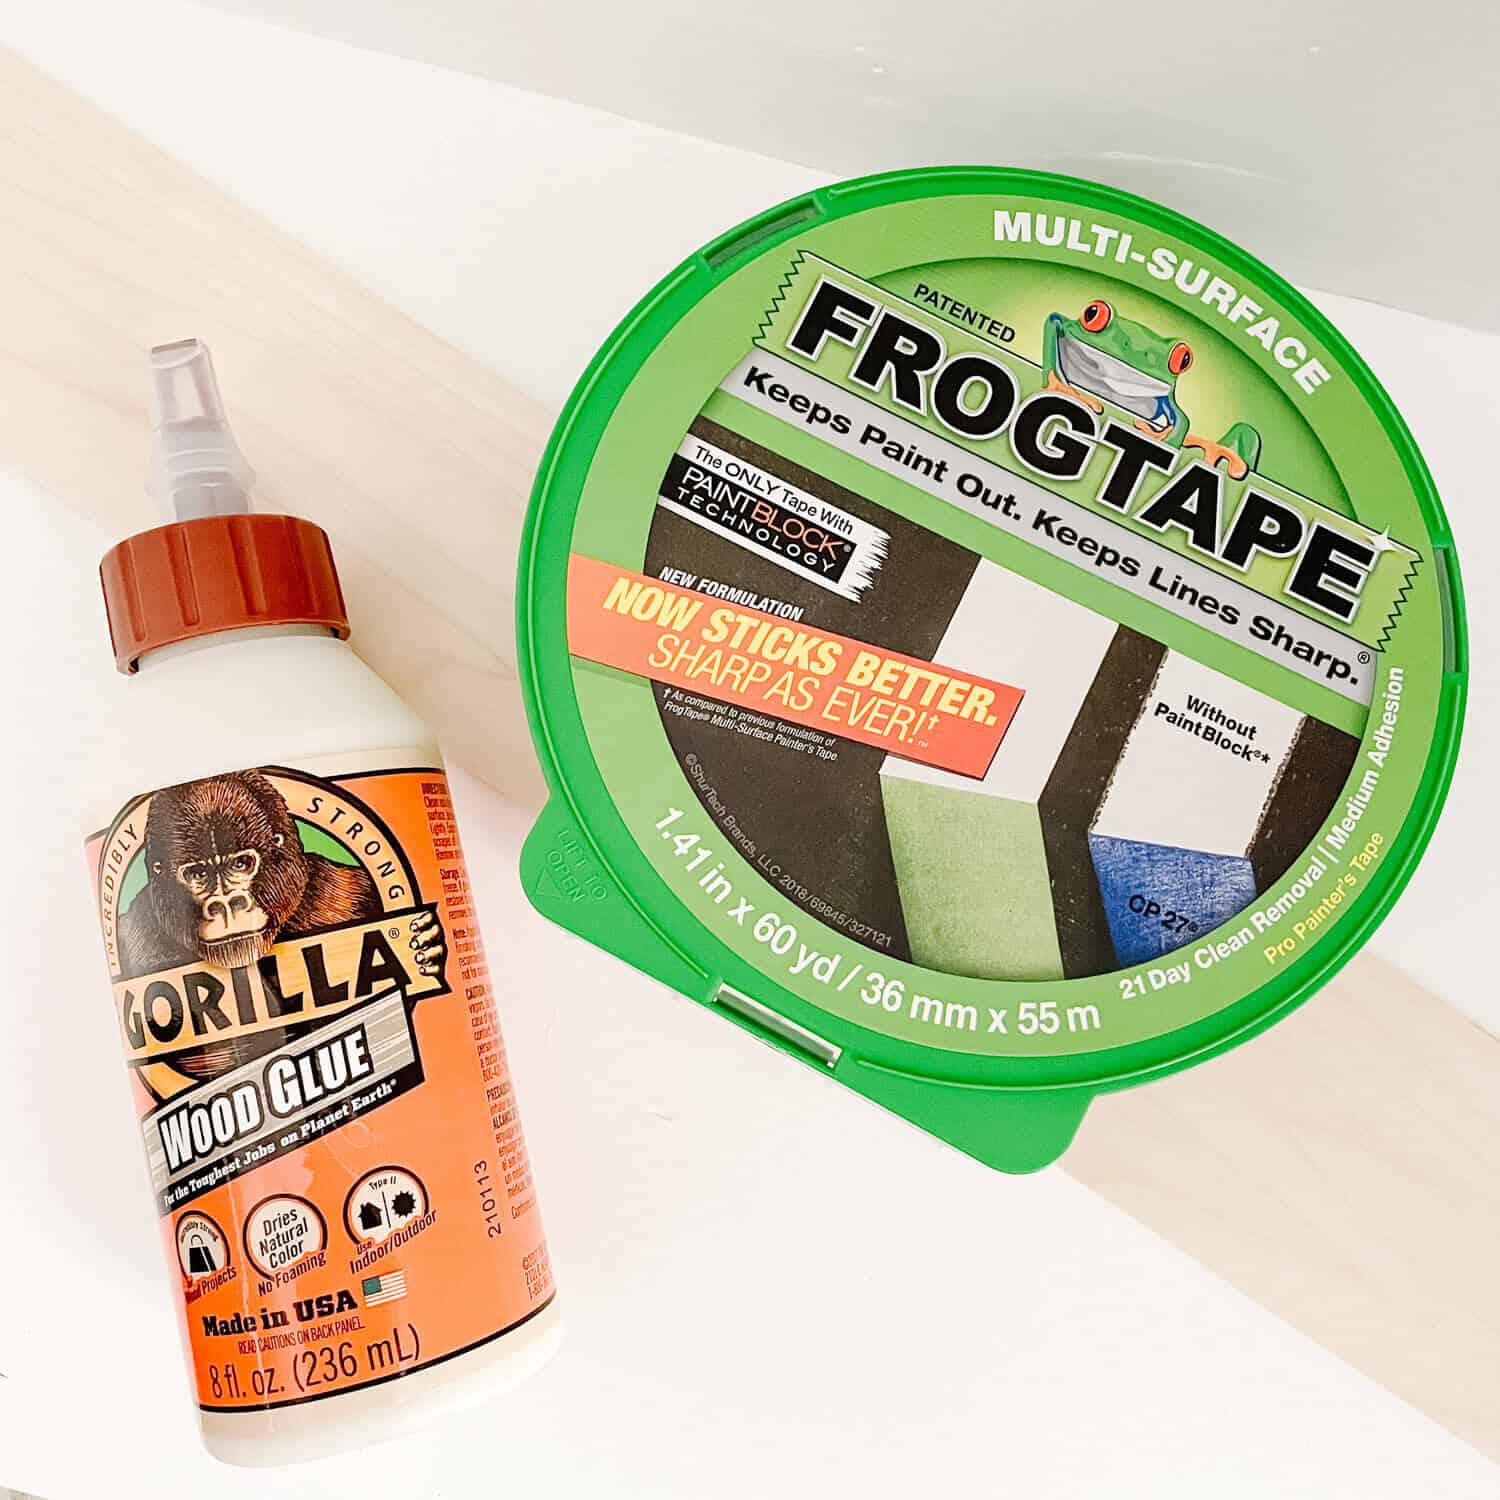
- Wood glue
- Tape measure or straight edge
- 220 grit sandpaper
- Sandpaper
- Miter or circular saw
- (If you don’t want to use power tools use a miter box and saw)
- Cloth (2 or 3)
- Stain or paint
- Frogtape or painter’s tape
Steps
1. Get Your Measurements
The first thing you’ll want to do is to get an idea of the space available in the area where you want to install your DIY floating wood shelf. I love to cut pieces down and dry fit to make sure we are in the right ballpark.
Measure the wall or alcove so that you don’t end up with a board that is too big or too small. You need a support board flush to the back of the wall (the required length will vary, depending on the length of the shelf). This will go on the back of the wall or alcove making the back side of the shelf.
Also, you will need to measure space for the two to three support pieces that you will place perpendicular to the back shelf support piece of wood. The length of these pieces will depend on the depth of the shelf.
Make sure it’s not too shallow or long – especially if the shelf is in a pass-thru space. 8” inches is a good standard shelf depth!
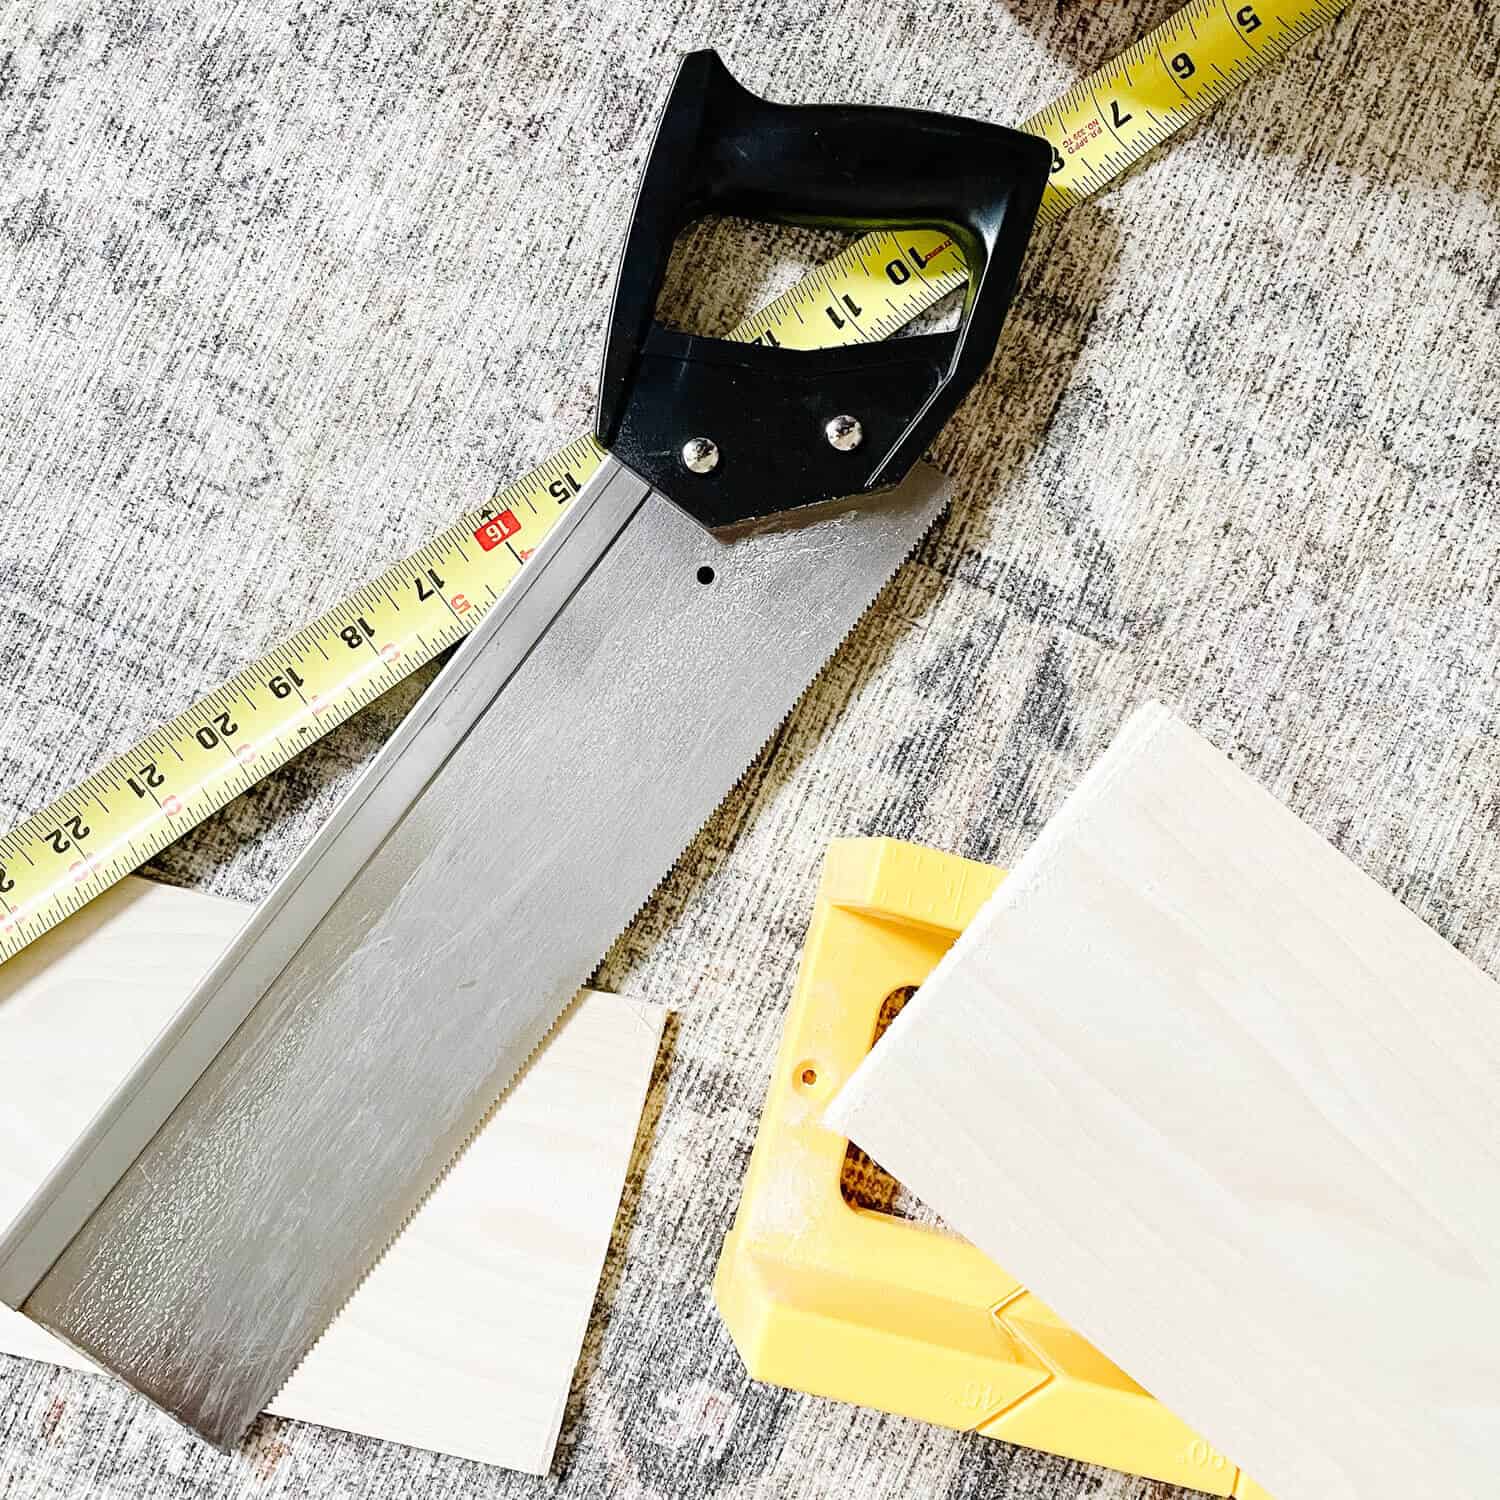
2. Cut the Shelf
Once you have the right measurements and have figured out what size float shelf you want, use a saw to rip it into the desired size. If the idea of using a power tool saw is too intimidating, don’t fret just yet!
You can use a miter box and saw instead, or grab your lumber at Home Depot (just ask them to cut to size).
3. Cut Your Supports
The next step is the process of cutting your supports, which include both the back piece(s) and the side pieces. You can use three support pieces or boards for the back to support the top shelf. Mine were one inch thick and 19 inches wide.
Two more poplar pieces measuring ten and a half inches in length can complement the back-support piece. These will serve as strong support for your shelf.
The top and bottom pieces will need to go on after the support pieces. A finishing front piece will complete your DIY floating wood shelf. See below and adjust to suit your specific goals!
4. Drill Your Pilot Holes
With all of the measurements out of the way, now is a good time to prepare your screw holes. Sure, you could just screw directly into the wood, but this greatly increases the chance of the wood splitting. I recommend using a drill to make pilot holes and/or pocket holes before attaching the shelf to eliminate this risk!
Note: You can also do this if you’re using nails, as it will still help prevent the wood from splitting.
5. Sand & Stain the Wood
To get rid of any sharp edges on the shelf/visible supports while ensuring that the stain adheres, give the entire shelf a light 220-grit sand. I like to vacuum up the dust as I go with a dustbuster. Don’t press too hard, just enough to open up the wood and smooth out any splinters or imperfections.
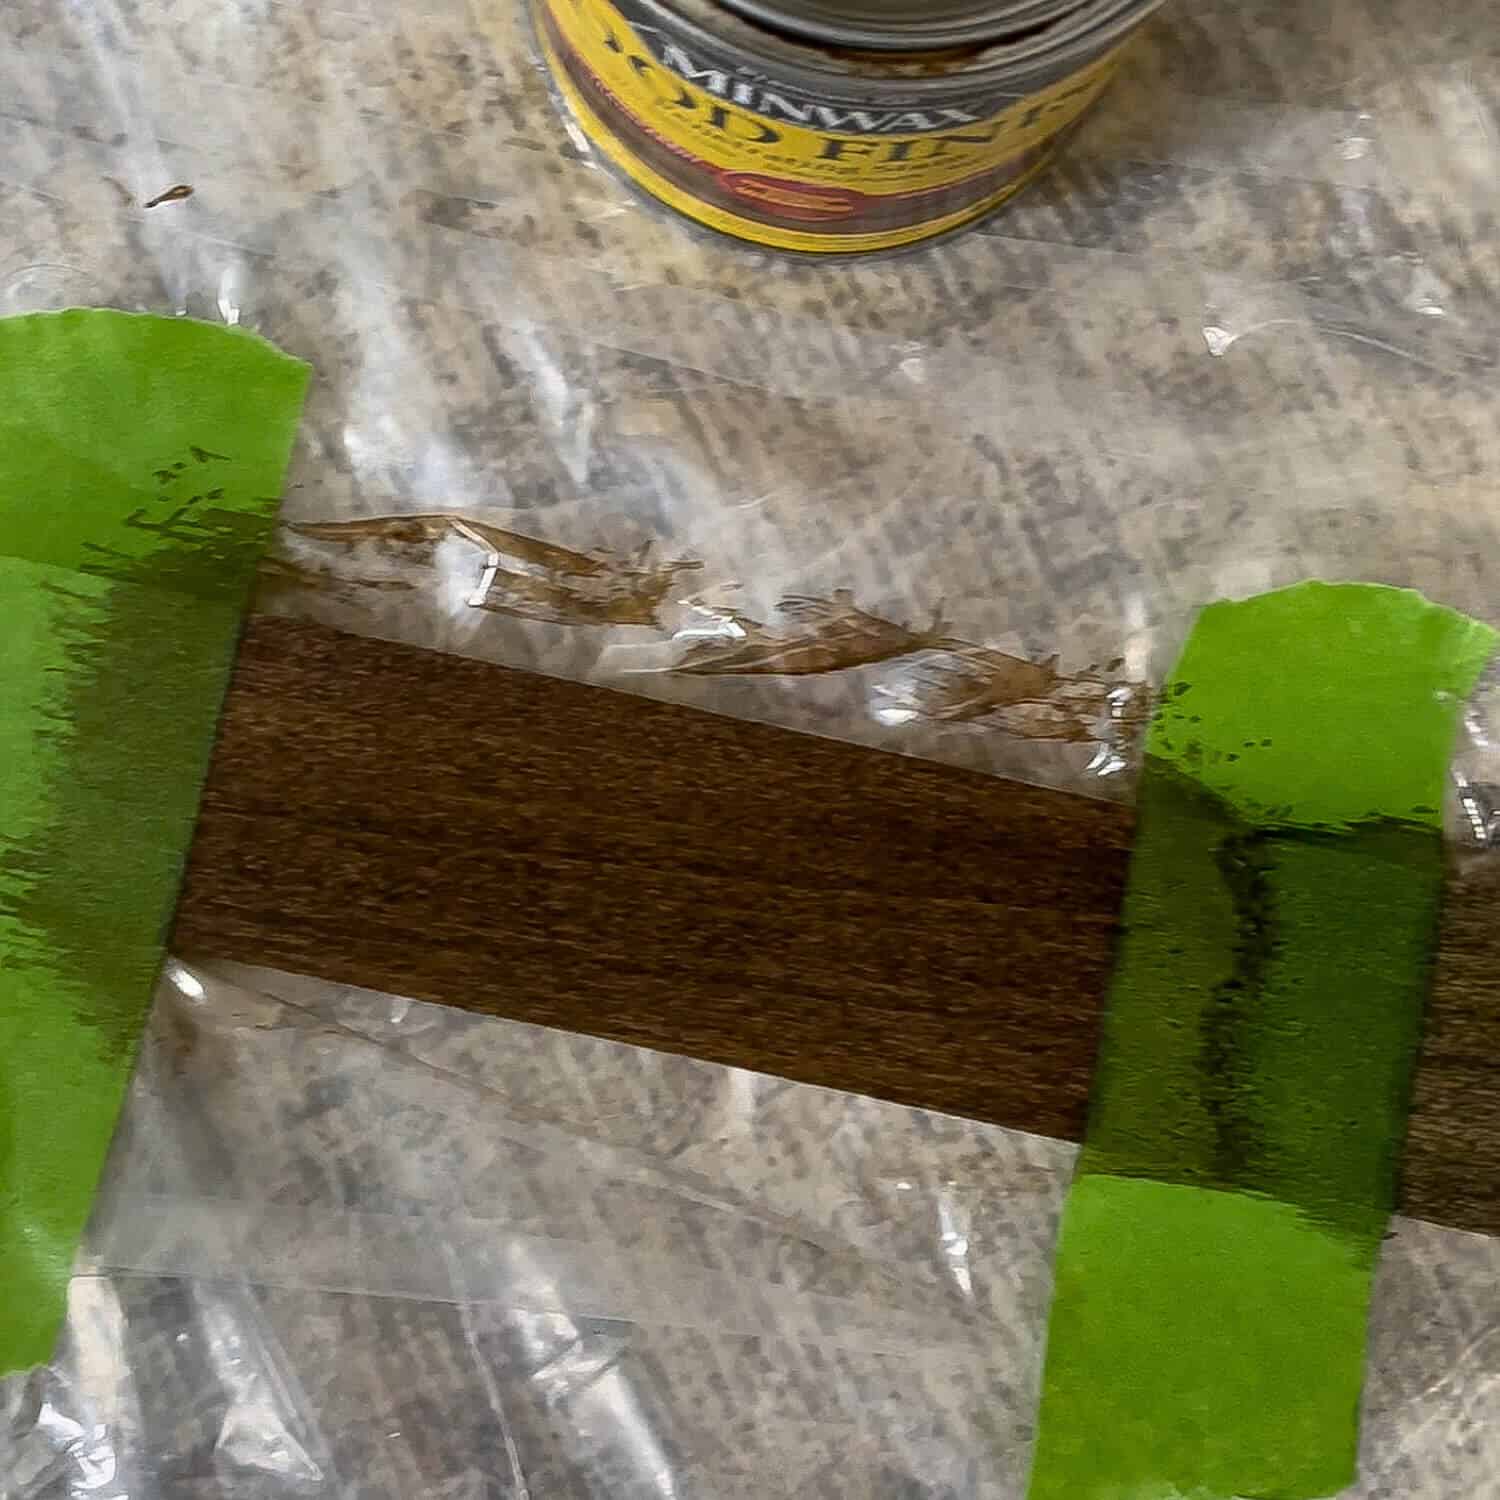
After that, get to staining your wood DIY floating shelves! I insisted on Dark Walnut. Be sure to ventilate the room properly, and apply the stain using a rag. Don’t use a paintbrush or the color will apply too dark. I did two coats, and let the stain dry overnight each time.
You can achieve a high-end customized look for your DIY floating wood shelf by picking the paint or stain of your choice. Using dark colors will help you create a moody interior design but you can also create a more minimalist interior design by making use of light colors.
That’s something a store-bought shelf won’t allow you to do!
You can also do this step after installing the shelf but I highly suggest staining the wood first. Just make sure to rip the wood to size first and make sure it all fits. I’ve found that doing it this way is easier this way than staining/painting after the shelf has been installed.
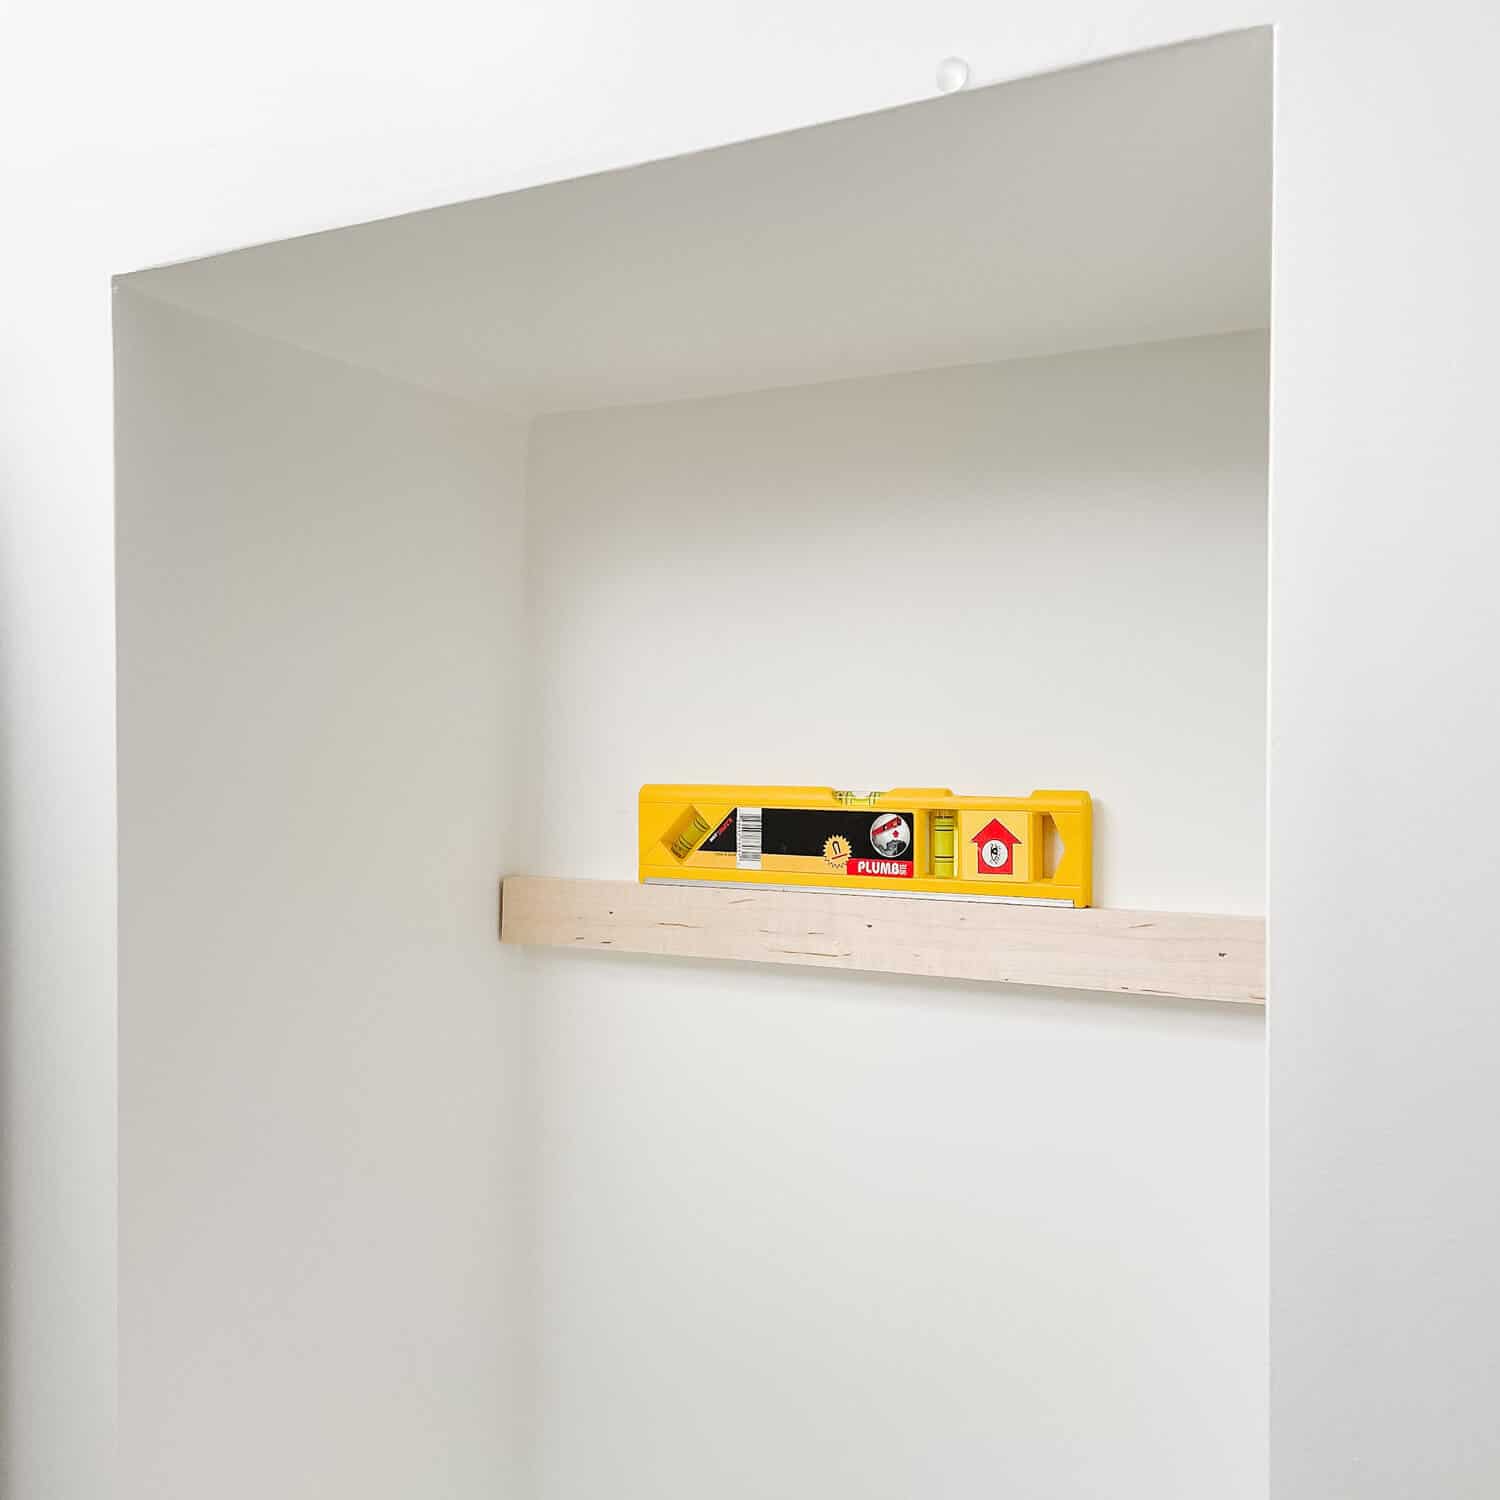
6. Assemble Your Shelf
Simply wait for your paint or stain to dry. Once dry you can begin assembling and hanging your float shelf. Map out the region where you will be installing your shelf using a level as your guide.
You need to make it straight. You can also use frog tape to help visualize the scale and proportions. I love to do this just to confirm.
7. Install the Shelf
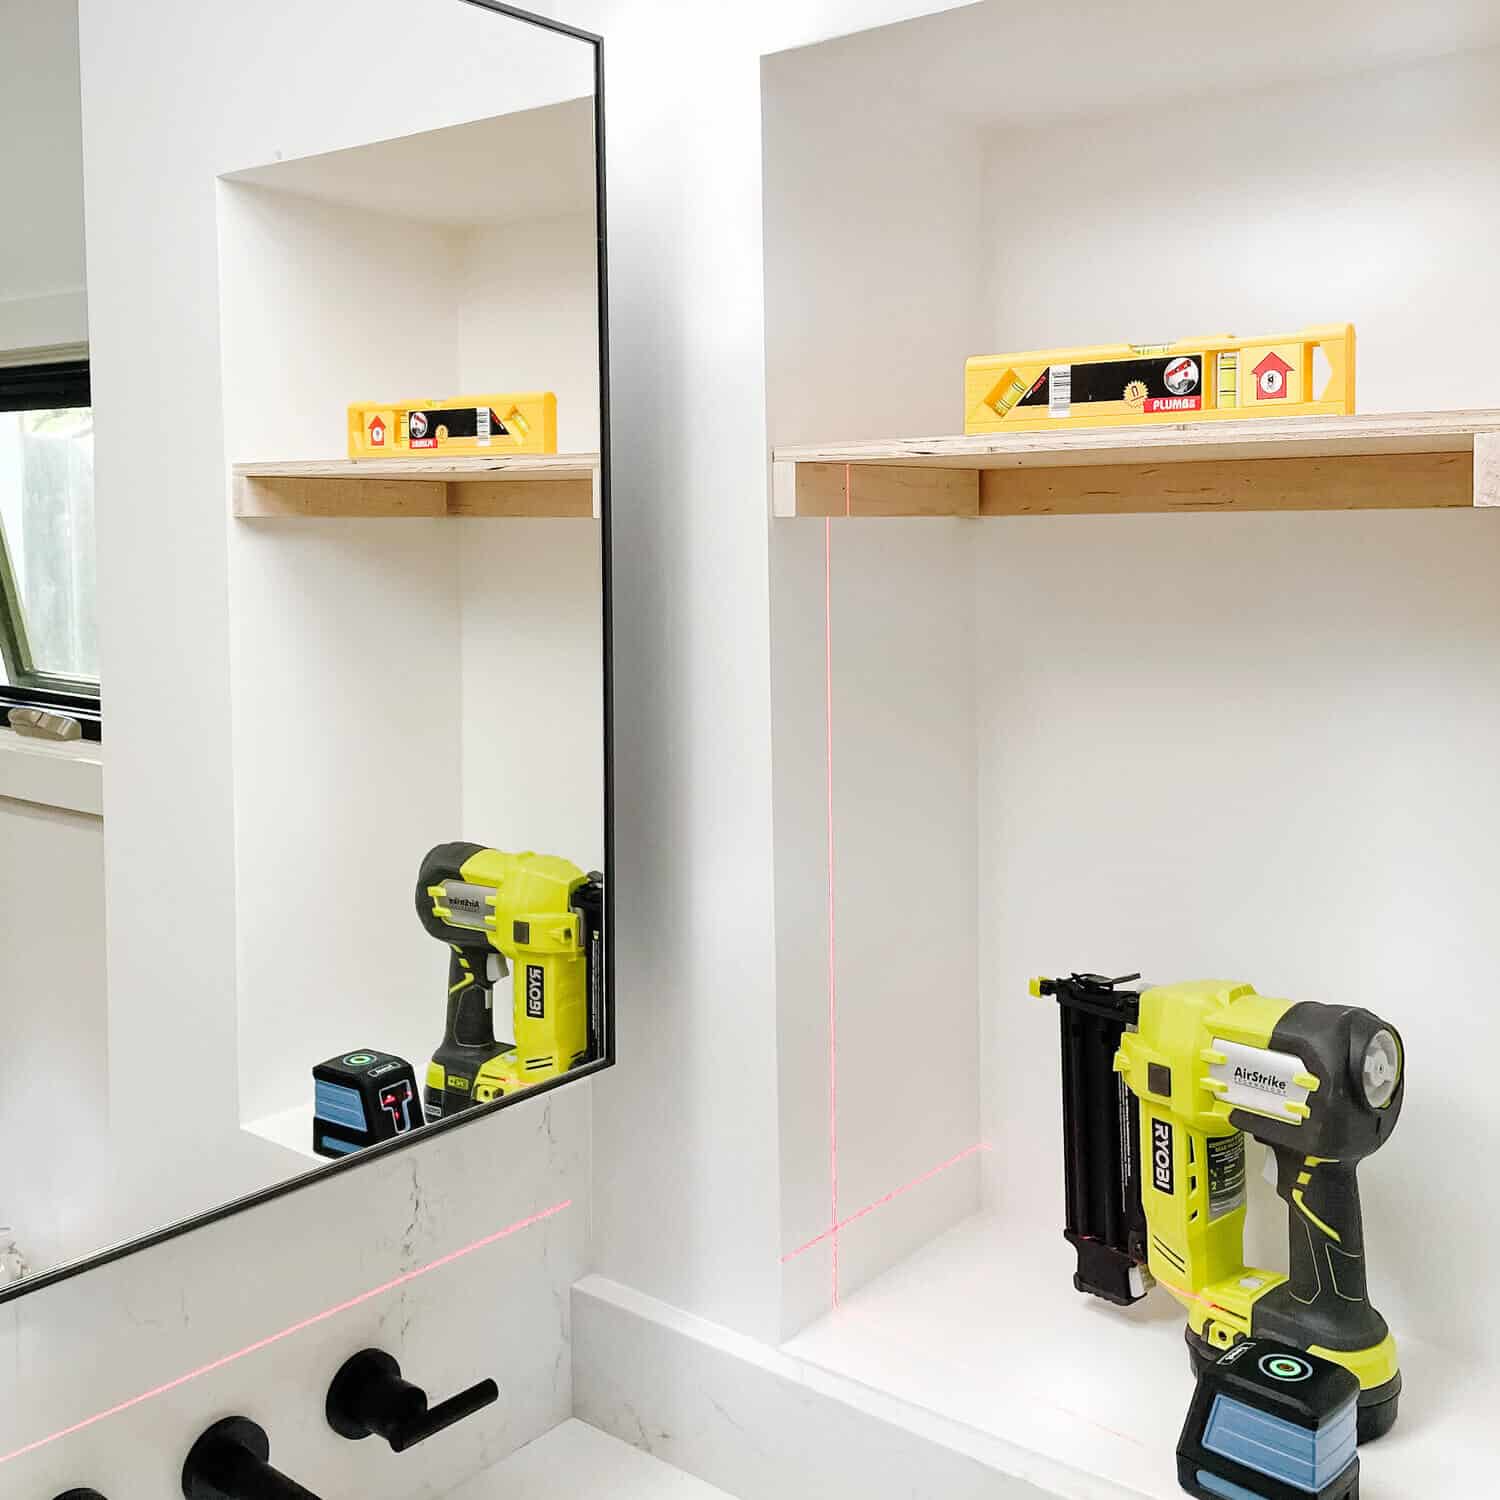
If you are feeling good about the placement and scale, nail the support pieces of wood in place and make sure they are evenly spaced. I use three nails per board. If you can nail into a stud all the better.
Depending on the size and weight you want this shelf to support, you may need to nail your shelf into a stud. Fortunately, these wooden shelves are a perfect fit for a lot of weight. Mine was small so it didn’t matter. For 12 inch pieces or longer, I would suggest locating at least one stud.
Secure the back support first, then move to the sides (if in an alcove) or simply the edge pieces (if your DIY floating wood shelf is an exposed float). Since this is an alcove you won’t need side pieces. You can also hold the wood in place more firmly after nailing by using wood glue.
8. Apply the Finishing Touches
Don’t forget to caulk the edges with a paintable caulk and smooth them out with a wet finger. Once the caulk dries, you can attach the front piece with nails or wood glue. Just be sure to use wood putty to cover up any nail holes and make sure it covers the top piece.
Then, sand down the nails and re-apply any stain needed. After that, all you have to do is apply a clear topcoat—if desired—to protect the finishing touches (and the rest of the shelf in general).
That’s all there is to it. Not so hard right? I am over the moon at how this DIY turned out. It was easy enough to do – and the look really took my entire space up a notch. Will you give it a try?
Floating Shelves vs. Cabinets
While floating cabinets tend to make more of a statement, cabinets may pose a better option if you’re in need of sufficient storage. Both types of shelves have their pros and cons, so let’s compare them to see which works better where.
The Look
In general, floating shelves just look better than cabinets. They can be hidden away in a tight area or prominently featured along an open wall. Either way, they end up looking sleek and modern! Cabinets, on the other hand, attract a lot of attention but tend to rely on their paint job—rather than their design—to make a positive impression.
That said, since cabinets do tend to look a bit more traditional, they may fit your particular living space. This all comes down to your current decor, style, and layout!
The Location
As mentioned above, floating wall shelves can be placed pretty much anywhere! Cabinets, on the other hand, may look out of place if you’re using the “wrong type”.
In my opinion, freestanding cabinets can be placed in most rooms, so long as they complement the rest of the room’s design. However, I don’t generally like the look of wall-mounted cabinets outside of the kitchen. Having cabinets above your head—the kind you would typically find in the kitchen—just looks so out of place in the living room!
That said, this ultimately comes down to personal preference, so if you think you can make it work then perhaps it may be worth a shot.
The Limitations
While floating shelves may have the advantage when it comes to looks, practically speaking, they can’t quite compare. A floating shelf is always supported from the back of the shelf; some shelves are also supported from the side and/or underside, but this isn’t always the case.
Although this design certainly helps create the sleek and modern look we’re after, it doesn’t do any favors when it comes to providing support. For this reason, I don’t really recommend putting much weight on floating shelves.
Considering that they don’t generally feature sides either, it’s fairly obvious why placing large, non-stable objects on a floating shelf is a bad idea!
On the other hand, while they may not be as sightly, cabinets are excellent at providing both support for heavier objects and preventing things from falling down (particularly if the cabinet has doors). This is something you’ll want to keep in mind as you consider your storage solutions.
Setting Realistic Expectations
When preparing for your upcoming DIY floating wood shelf project, it’s always important to set realistic expectations. This means considering not only the price of the project and the time it will take to complete, but also thinking about your personal craftsmanship skills!
Pricing
If you already have most of the materials and tools on hand, doing this type of project can be extremely cheap. Alternatively, if you’ll need to buy every tool before you can start, the budget can quickly get out of hand. On the plus side, any tools you do buy can be used for future projects (so think of it as more of an investment!).
Of course, you could technically complete the project with an extremely small budget if you’re willing to use the hand tools you have on hand, rather than buying power tools. However, I wouldn’t really recommend doing this unless you’re after the “handcrafted” feel, as using hand tools will easily take twice as long.
Time
Making a single wood shelf shouldn’t take too long. In fact, the majority of your time will be spent waiting on the wood to stain! Still, it does take a bit of time to gather the supplies and set your area up.
For this reason, I would suggest making multiple DIY floating shelves at once (if desired), rather than trying to do each shelf separately. While you will have more materials to manage at one time, you’ll definitely save a lot of time compared to treating each shelf as a separate project!
Skill
You’ll need basic woodworking skills—measuring, cutting, and sanding—for this project. You’ll also be the only one in charge of the finish work like painting or staining, so the final outcome of the project is completely up to you.
While none of this is overly challenging, it’s helpful to have at least a rough idea of what you’re doing before you get started. If you’ve never done this type of thing before, I recommend just using some spare wood to get some practice in.
Doing this will allow you to get the hang of things before you start, giving you a better chance at producing a final product you love (rather than one you’ll merely settle for!).
Commonly asked questions about DIY floating shelves
How much weight can a floating shelf carry?
A floating shelf can hold around 45-50 pounds for every wall stud that your floating shelf bracket is attached to. For instance, a 3′ shelf that’s attached to two wall studs can safely support ~100 pounds. Likewise, a 2′ shelf bracket attached to two wall studs can easily support the same ~100 pounds. If you make mine I would stick to around 40 pounds.
What’s the best wood for a floating shelf?
The best wood types for floating shelves are solid, sustainable hardwoods that will resist warping or bowing. Alder, Walnut, Cherry, and White Oak are popular options for modern decor. For a more classic look, try Maple or Mahogany. For an affordable mix of both, consider poplar!
How thick should I make floating shelves?
Ideally, you want a floating shelf to be around two inches thick. Like depth, the thickness of a shelf can affect its ability to hold your precious items.
Do floating shelves have to go into studs?
You don’t necessarily need to use a stud. Wall studs are the most sturdy way to hang up heavy shelves. But, you can also use drywall anchors to install your shelf correctly.
Do floating shelves sag?
Floating shelves are great shelving options to add extra storage space to your vertical space. Using support brackets, these are perfect for showing off or highlighting your prized possessions. Still, depending on the type of floating shelf you use, your floating shelves could eventually sag or deform.
Is it safe to hang a shelf on drywall?
Drywall — especially the commonly used 1/2-inch-thick size — supports heavy weights when the shelving is properly installed. You can install heavy shelves with confidence that they will remain stable and secure, by using brackets.
Is it cheaper to make or buy floating shelves?
Generally, it’s cheaper to complete DIY projects yourself, rather than purchasing the finished product(s). However, while the DIY approach can potentially be a good way to save money, it’s not always guaranteed to be cheaper.
If you have to purchase tools—such as a nail gun, a drill bit set, or even painter’s tape—then this will immediately cut into any potential savings. If you don’t have a local hardware store and are forced to order materials online, shipping costs can also cut into your savings.
On the plus side, making DIY floating shelves gives you complete control over the size, shape, style, and materials used in the shelves. On the other hand, if you’re looking for something specific (like a particular style of shelf brackets or a certain type of wood), then a lack of local availability may increase the DIY costs to a point where buying pre-made shelves could be cheaper.
In Conclusion
Remember, that home takes time – and the details matter. This little detail makes all the difference, and I know that a floating shelf in your home can make the difference too. Plus, it gives you plenty more styling options for your living space!
Let me know your thoughts in the comments below. What are you waiting for? Give it a go and good luck. Til next time. Love ya. xoxo