As I sip my homemade flat white coffee drink starting my office window, I can’t help but be grateful for all the cabin bathroom progress we have made in the past few weeks. Remember when the flood required us to remove all the hardwood floors and do mold remediation? Restoring “historic” homes isn’t for the faint of heart.

I am still so relieved that insurance came through. I had so many sleepless nights and worries, asking myself, “Was purchasing this dream cabin a mistake?” Did we bite off more than we can chew?” and “Do I have what it takes to tackle a very remote renovation?” But I am here to say it’s all worth it (so far) and not to give up. Your dreams are possible, and anything worth having won’t come easy. Plus, the results are starting to make it all worth it!

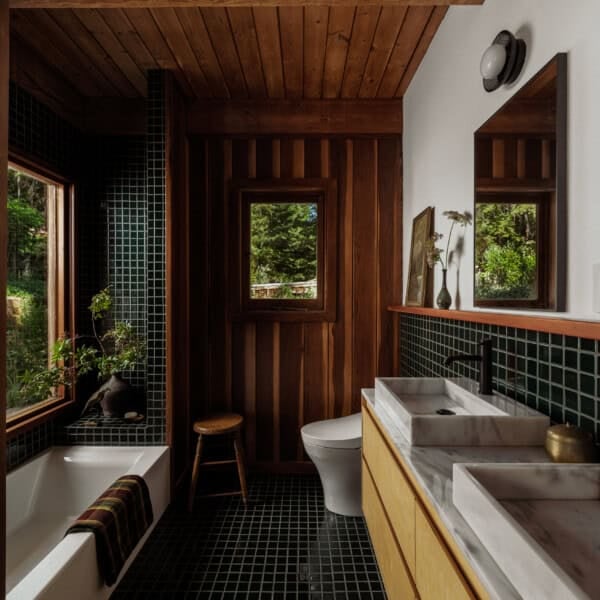
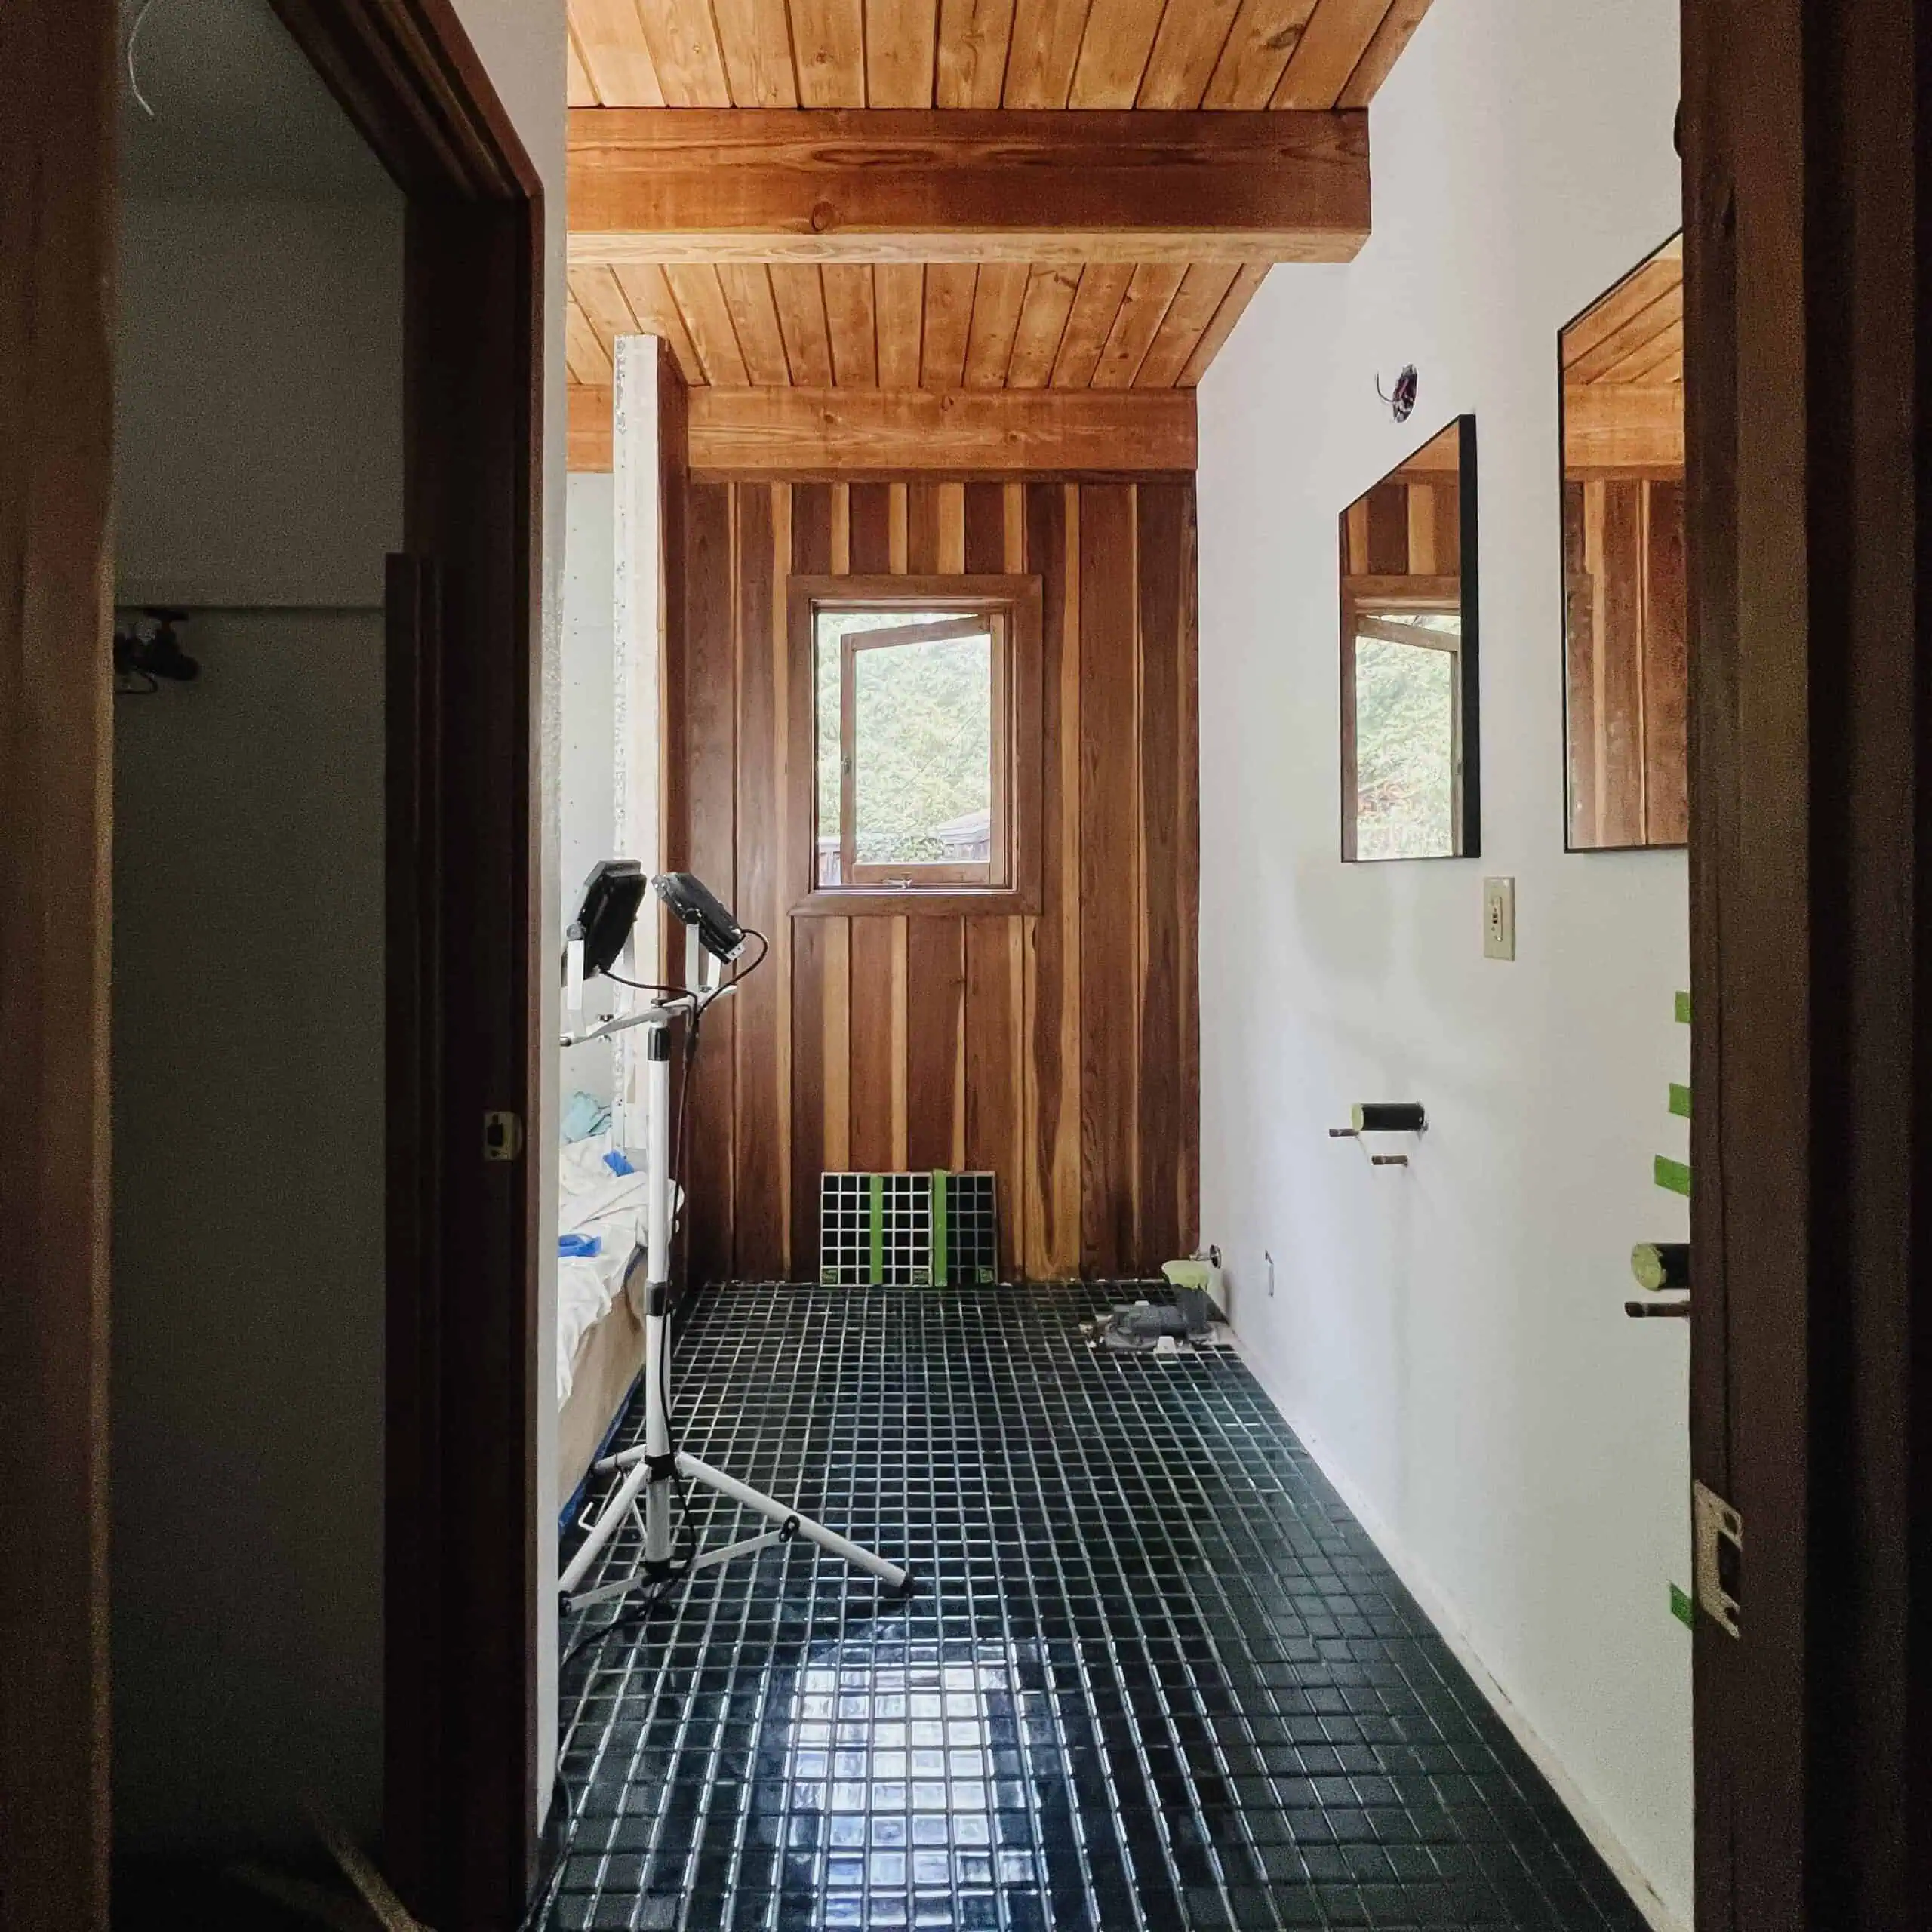
As of last week, we completely finished installing our heated flooring system we got on Amazon, and you guys – it works so well! I can’t believe how much more affordable heated floor systems are nowadays. They used to be such a splurge! The secret to getting an even installation is utilizing this backer board and seamlessly running the wires in a pattern that covers the entire floor’s square footage.

We didn’t have a ton, as the bathroom isn’t colossal, measuring just around 10×7. You then encase those included cords in a thin set and then install hardwood floors on top or 2×2 evergreen tiles by Fireclay as we did.


Even with just the orange backer board and thins set on top of it, the cabin bathroom is starting to be a room again. Remember, we have already completed the electrical work for the light and heated tile switches, vent, and new sconces. Sadly, our turmeric-yellow mushroom-inspired lights weren’t compatible with our system, so we pivoted to these milk glass orb matte black mesh sconces! I might find a home for them elsewhere. Again, you gotta roll with the punches.

But as I said, we really have made progress, and after much debate, we decided to go with dusk grey grout versus white marble. You guys were so helpful in helping me decide on which color grout to go with. In the end, floor grout is a pain to keep clean – and usually, I don’t make design decisions because of cleaning. But grey grout is practical, moody, and cohesive, and it feels more sophisticated than high-contrast “white” grout.

Oddly enough, I can’t imagine having gone with white now. I love the dusk grey so much. Just look at where we are now. Also, peep our new 18 x 27 recessed medicine cabinets. We have the same ones in our home in San Franciso. They are just that good.

And for anyone that missed it, we compltelte resotred all the wood in this space. The only part left are both doors and a custom bookcase that hides the water heater – I know it’s so cool and I can’t wait to fill it full of apothocary amber jars and plants. Stay tuned for that! We deated on the sealer, after a miticiulous 80. 120, 220 sanding process that removed decades of grim, dings, and gunk down to a smooth glass finsih.

I wanted a matte finish with little to no shine. The beauty, IMHO, of historic homes with a ton of character, like stained glass windows, wood paneling, marble, etc., really comes from the finishes. It’s not the rugs, lamps, or a perfect height and size kitchen table. So invest in restoring surfaces and finishes like our redwood ceiling and wall. Those elements become the star! Just look how dingy they were before we restored them below.

In the end, Old Masters gave us the desired finish – no shine and sealed it all like a glove. Sometimes, I just stand and stare at this paneling. It’s so good, and I couldn’t be more thrilled with how everything is finally coming together.

So stay tuned. Next week, we are looking to make fast progress with installing the vanity, sinks, and plumbing fixtures! We are so close to the bathroom finish line – it’s crazy. Thanks for cheering me on. I feel you all! Remember. Home takes time, and in this case, a lot of it. xoxo – Ant