When it comes to home improvement, design and DIY, there are an endless array of possibilities you can tackle to improve your space. Some require a big investment in time and budget – some even requiring a contractor or a city permit.
But forget about all that I have the perfect, 1 hour DIY that is guaranteed to take any boring hallway or ceiling from drab to fab in an instant. It’s so easy and affordable. I don’t know why I didn’t do it sooner!
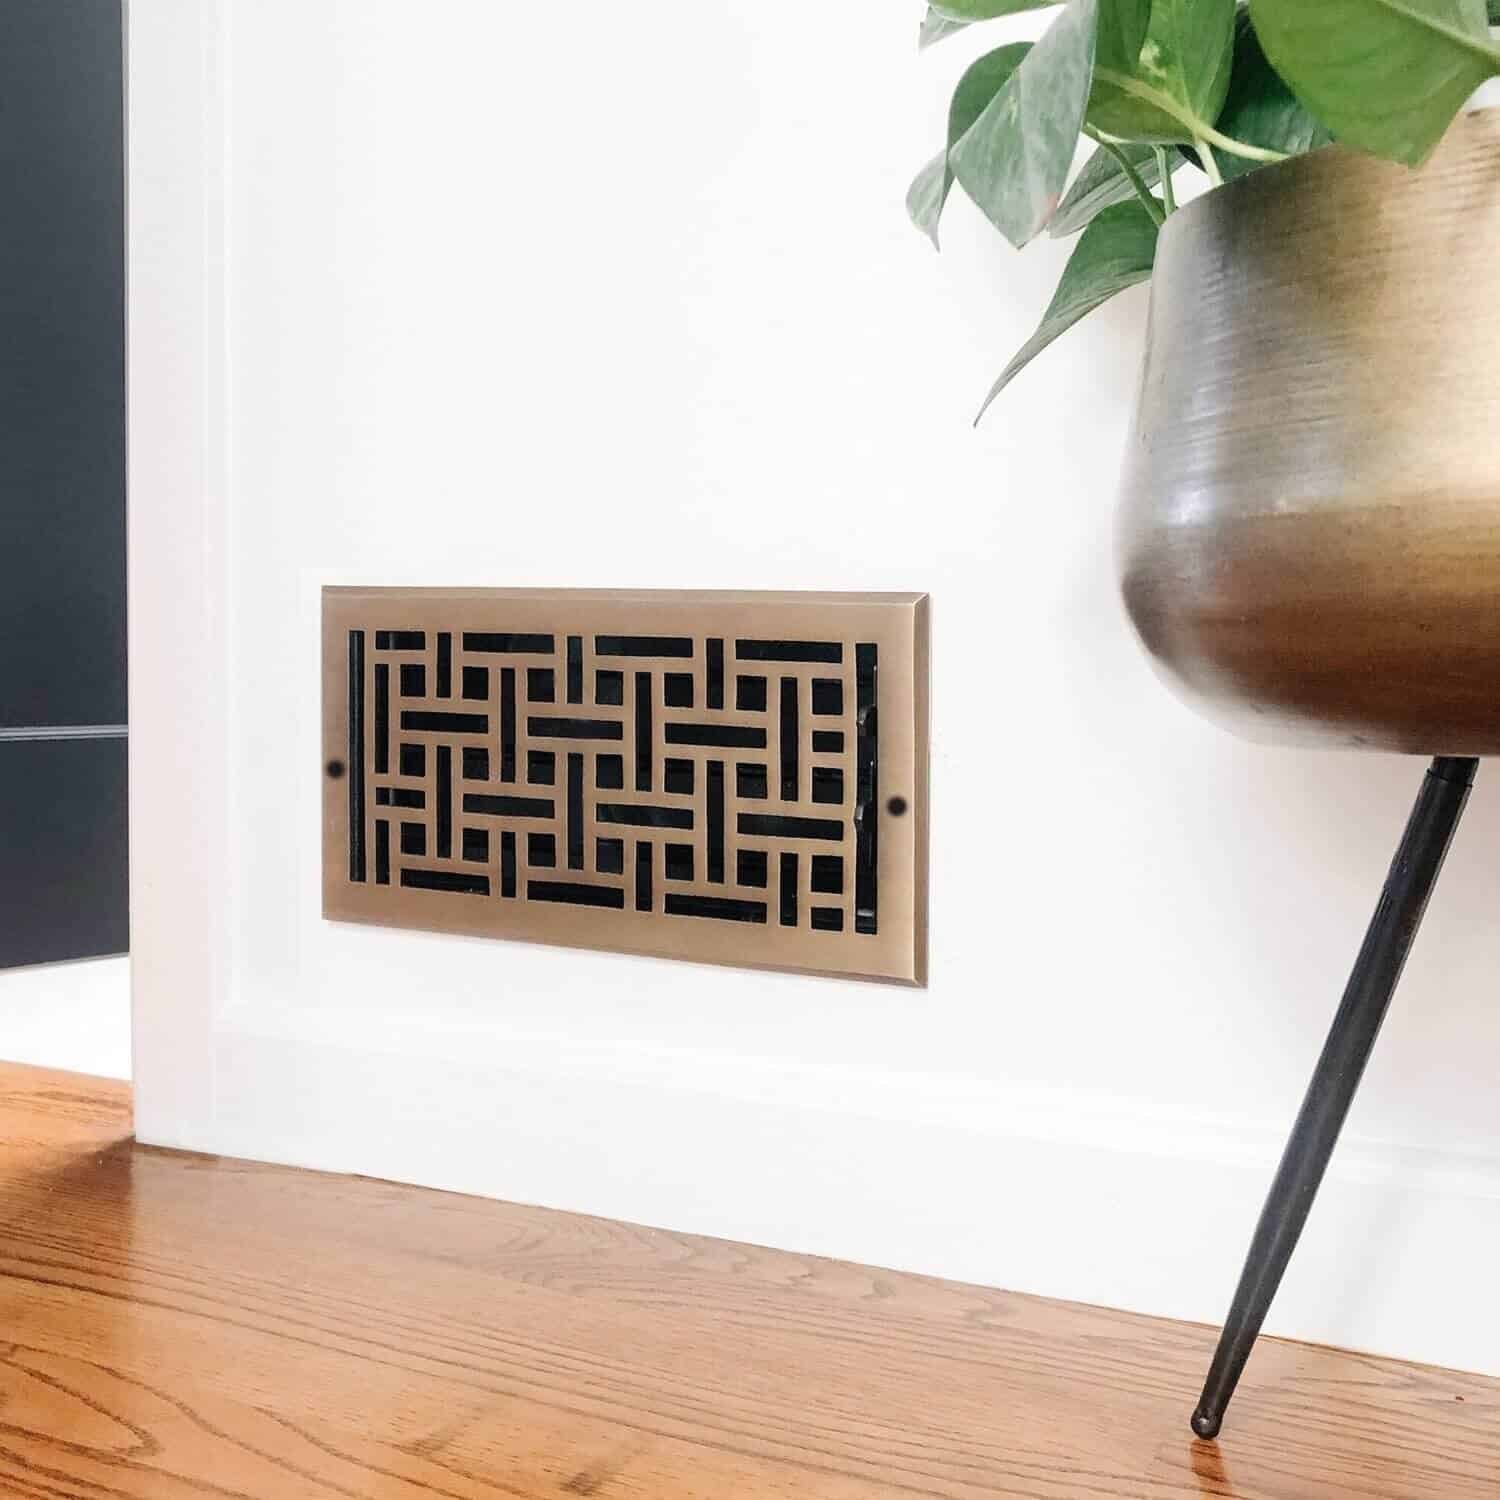
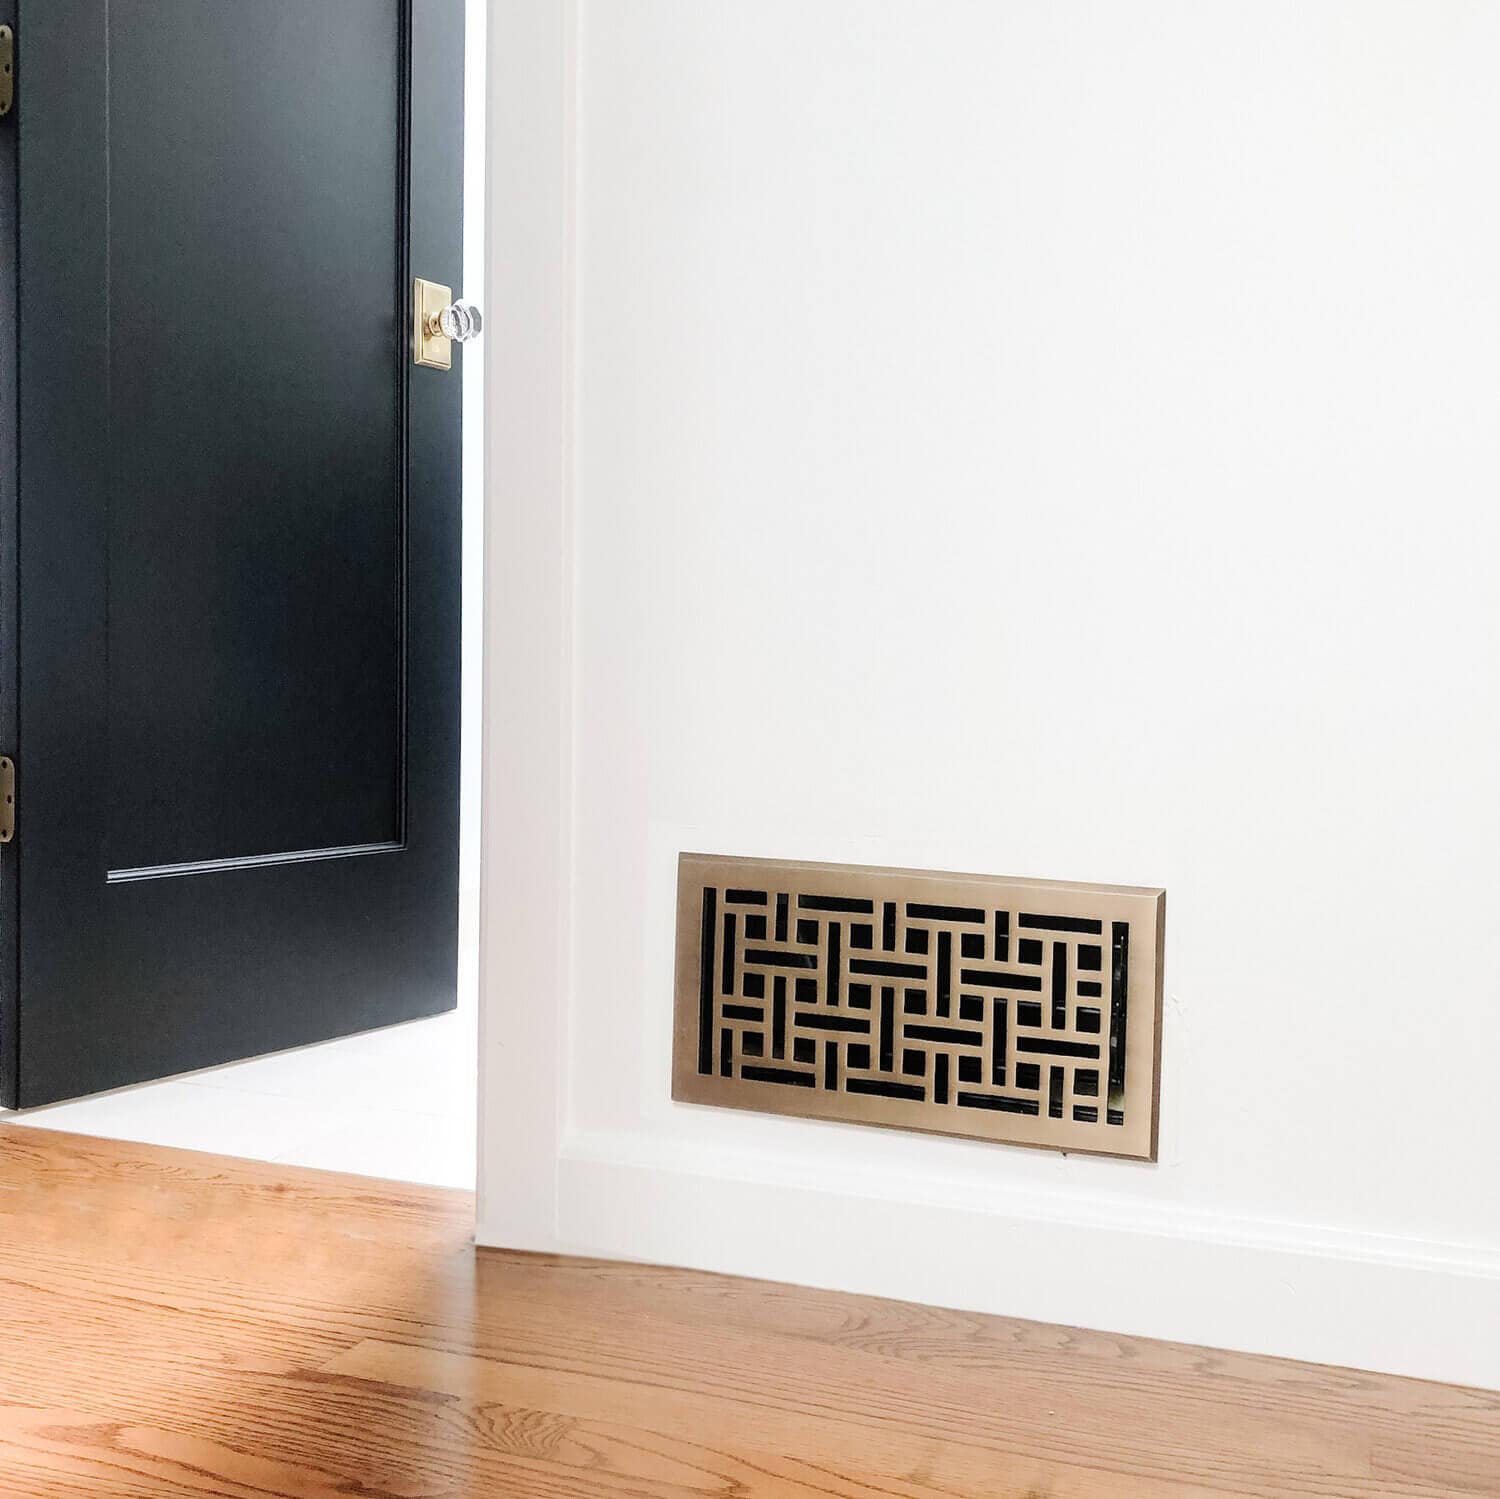
To get a bold and beautiful hallway look try swapping out your tired builder-grade vents with a brass vent register. This is my most popular and asked about DIY – I think because it’s easy enough for anyone to do, low cost, and results in a big impact. Check out how I did it in my Instagram Stories here.
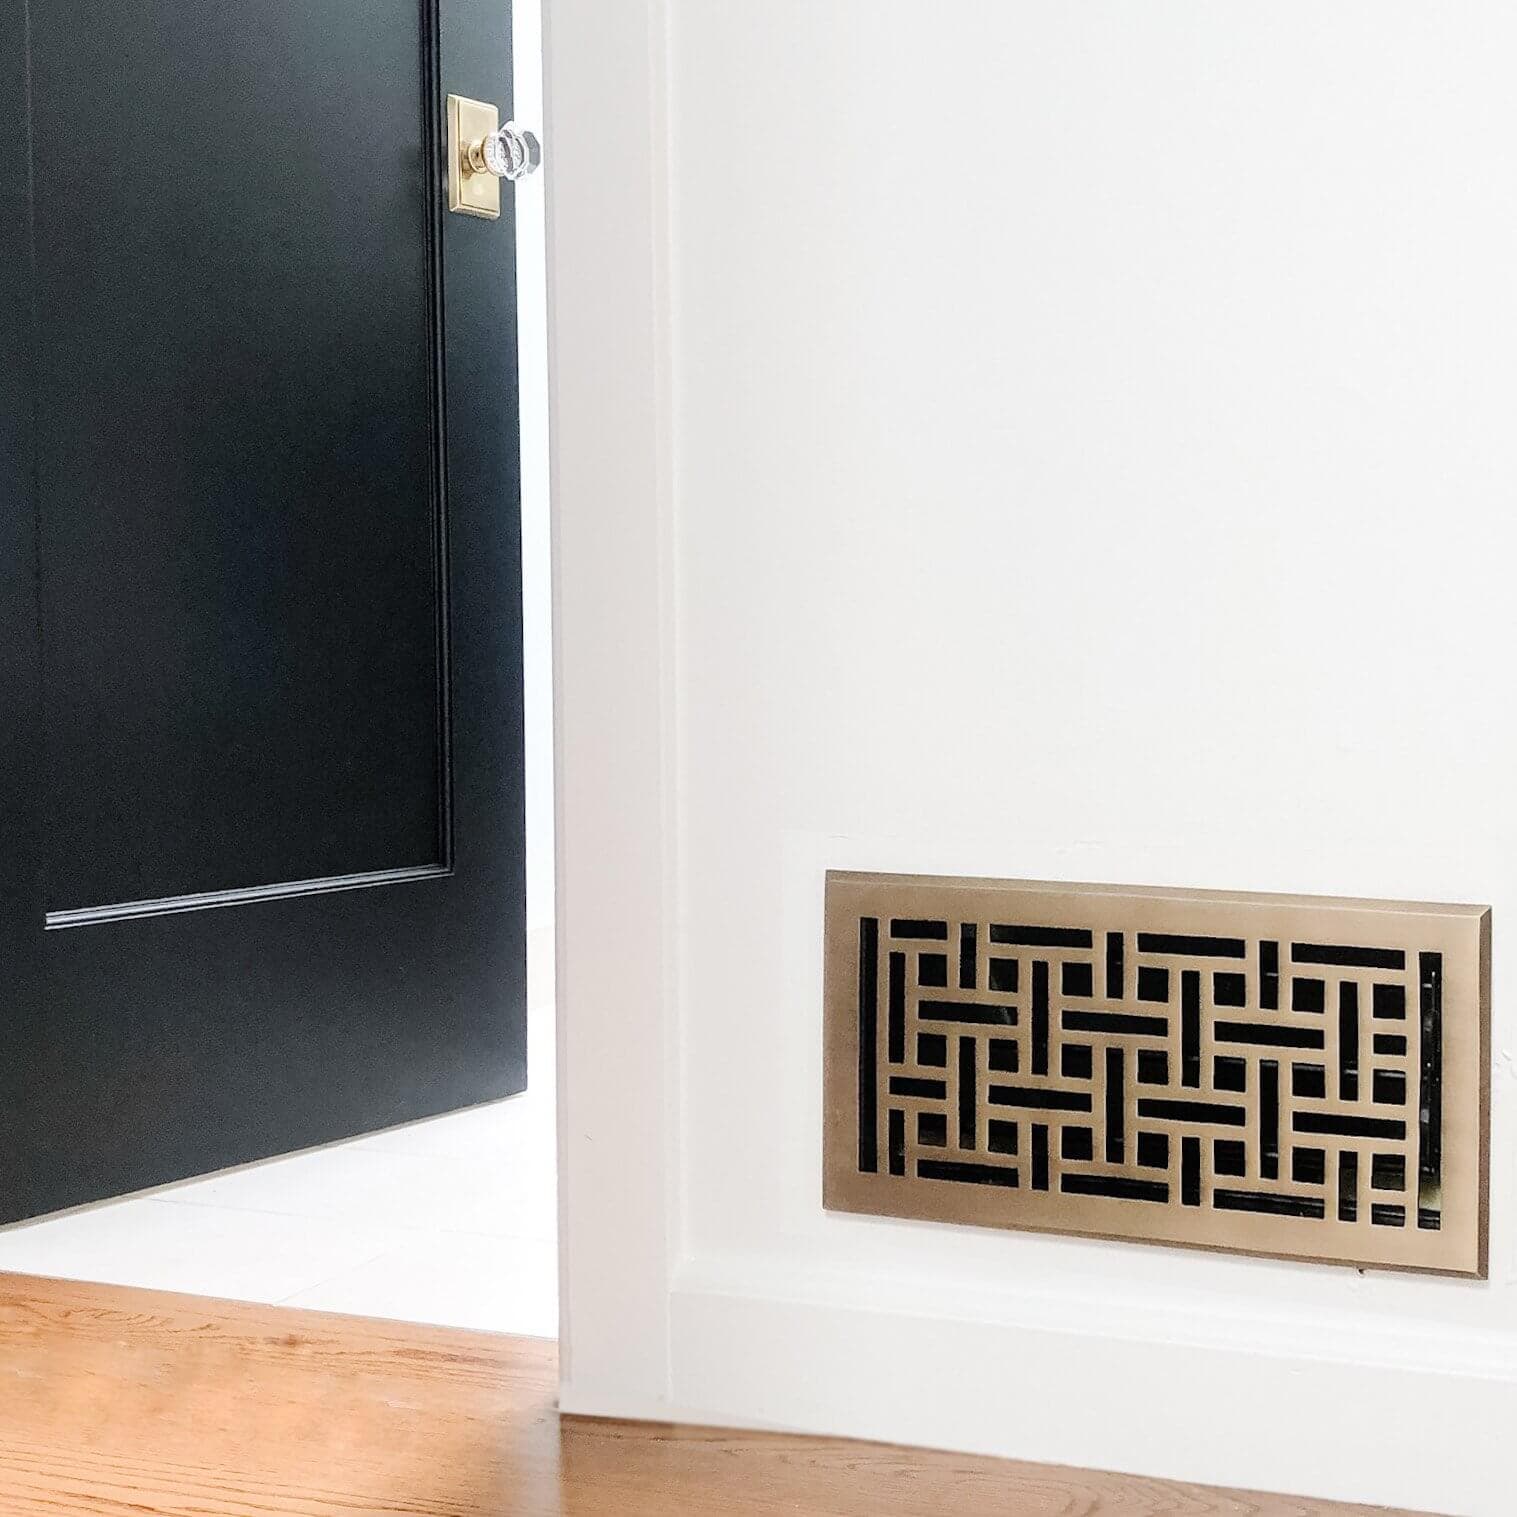
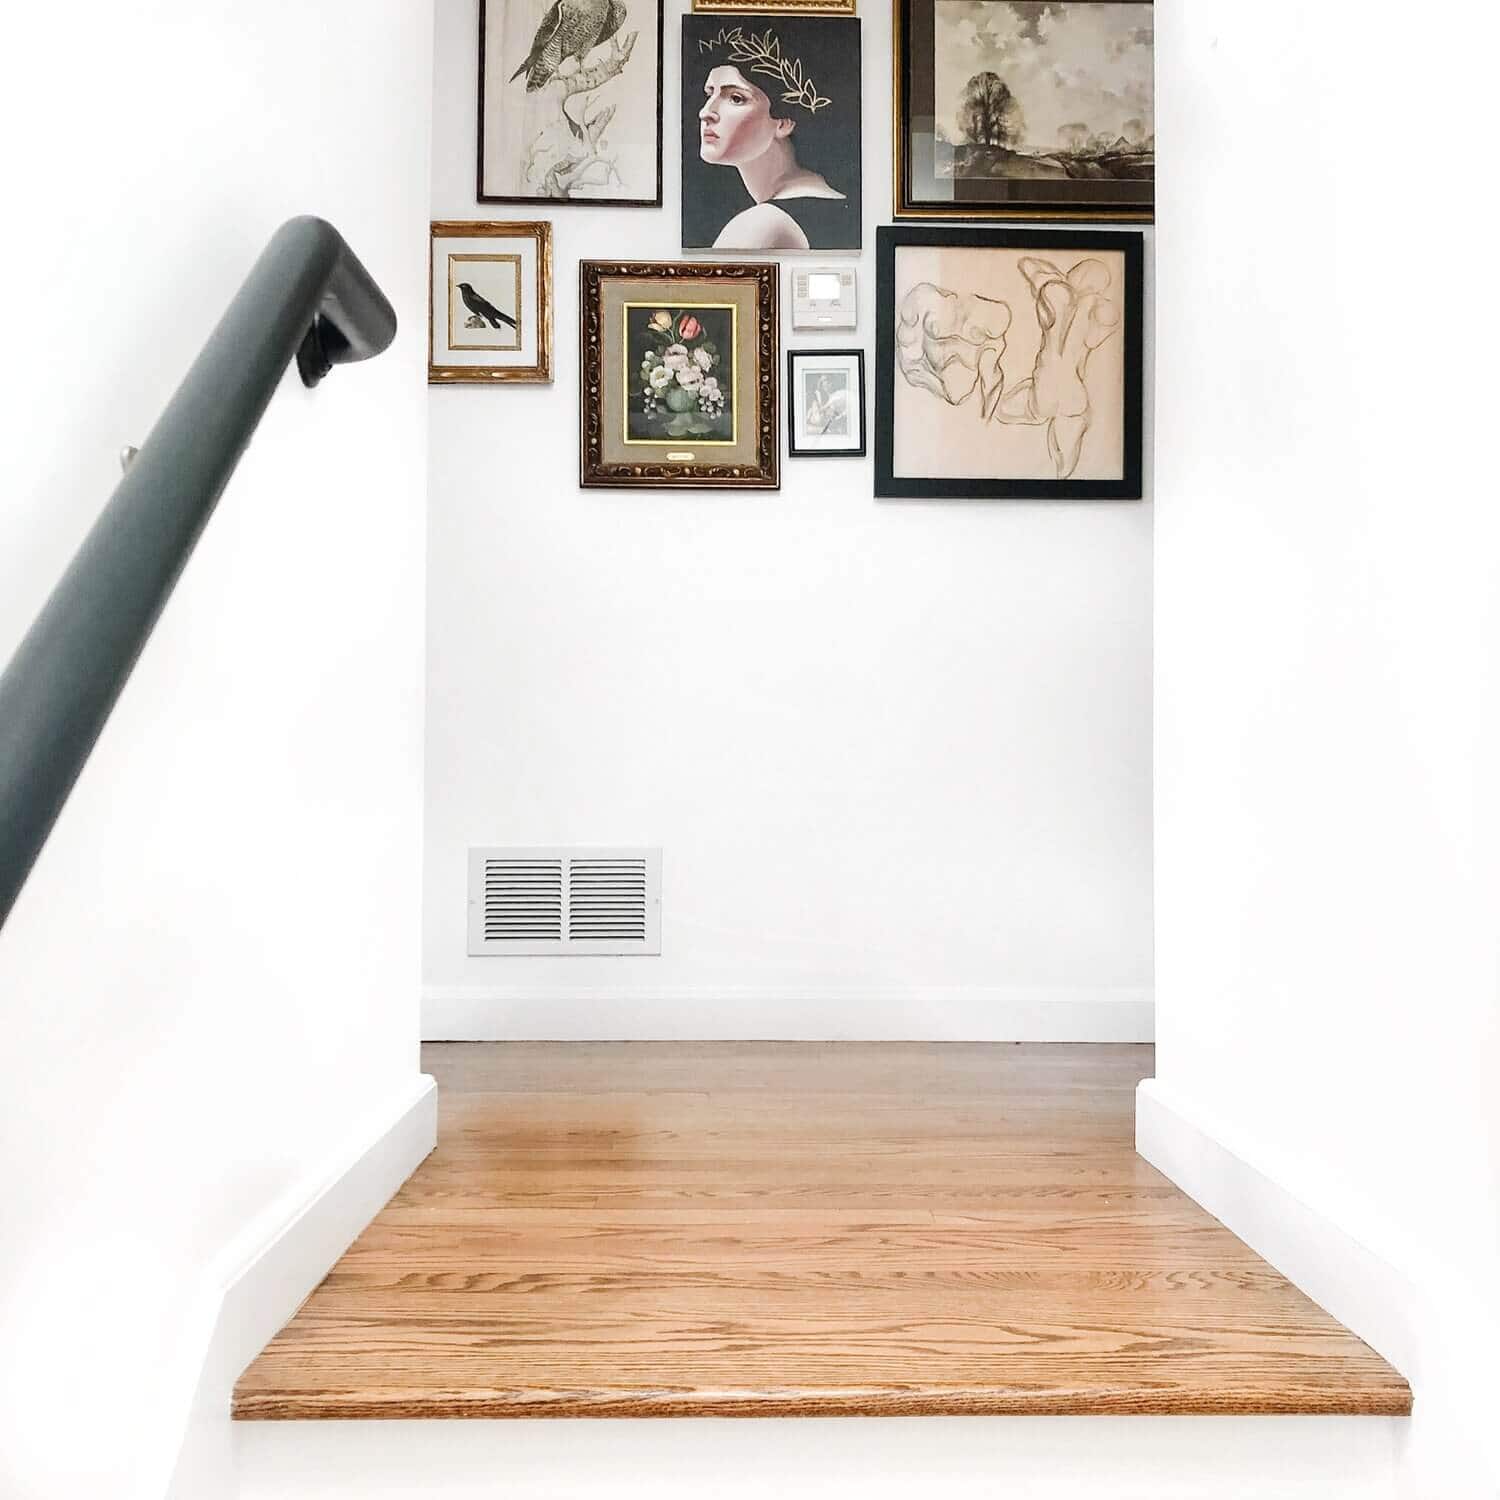
Here’s the thing – most homes come with those white builder-grade vents that add nothing to the design of your home. In fact, most of the time they take away. I know mine did until I swapped them out. See the before image below.
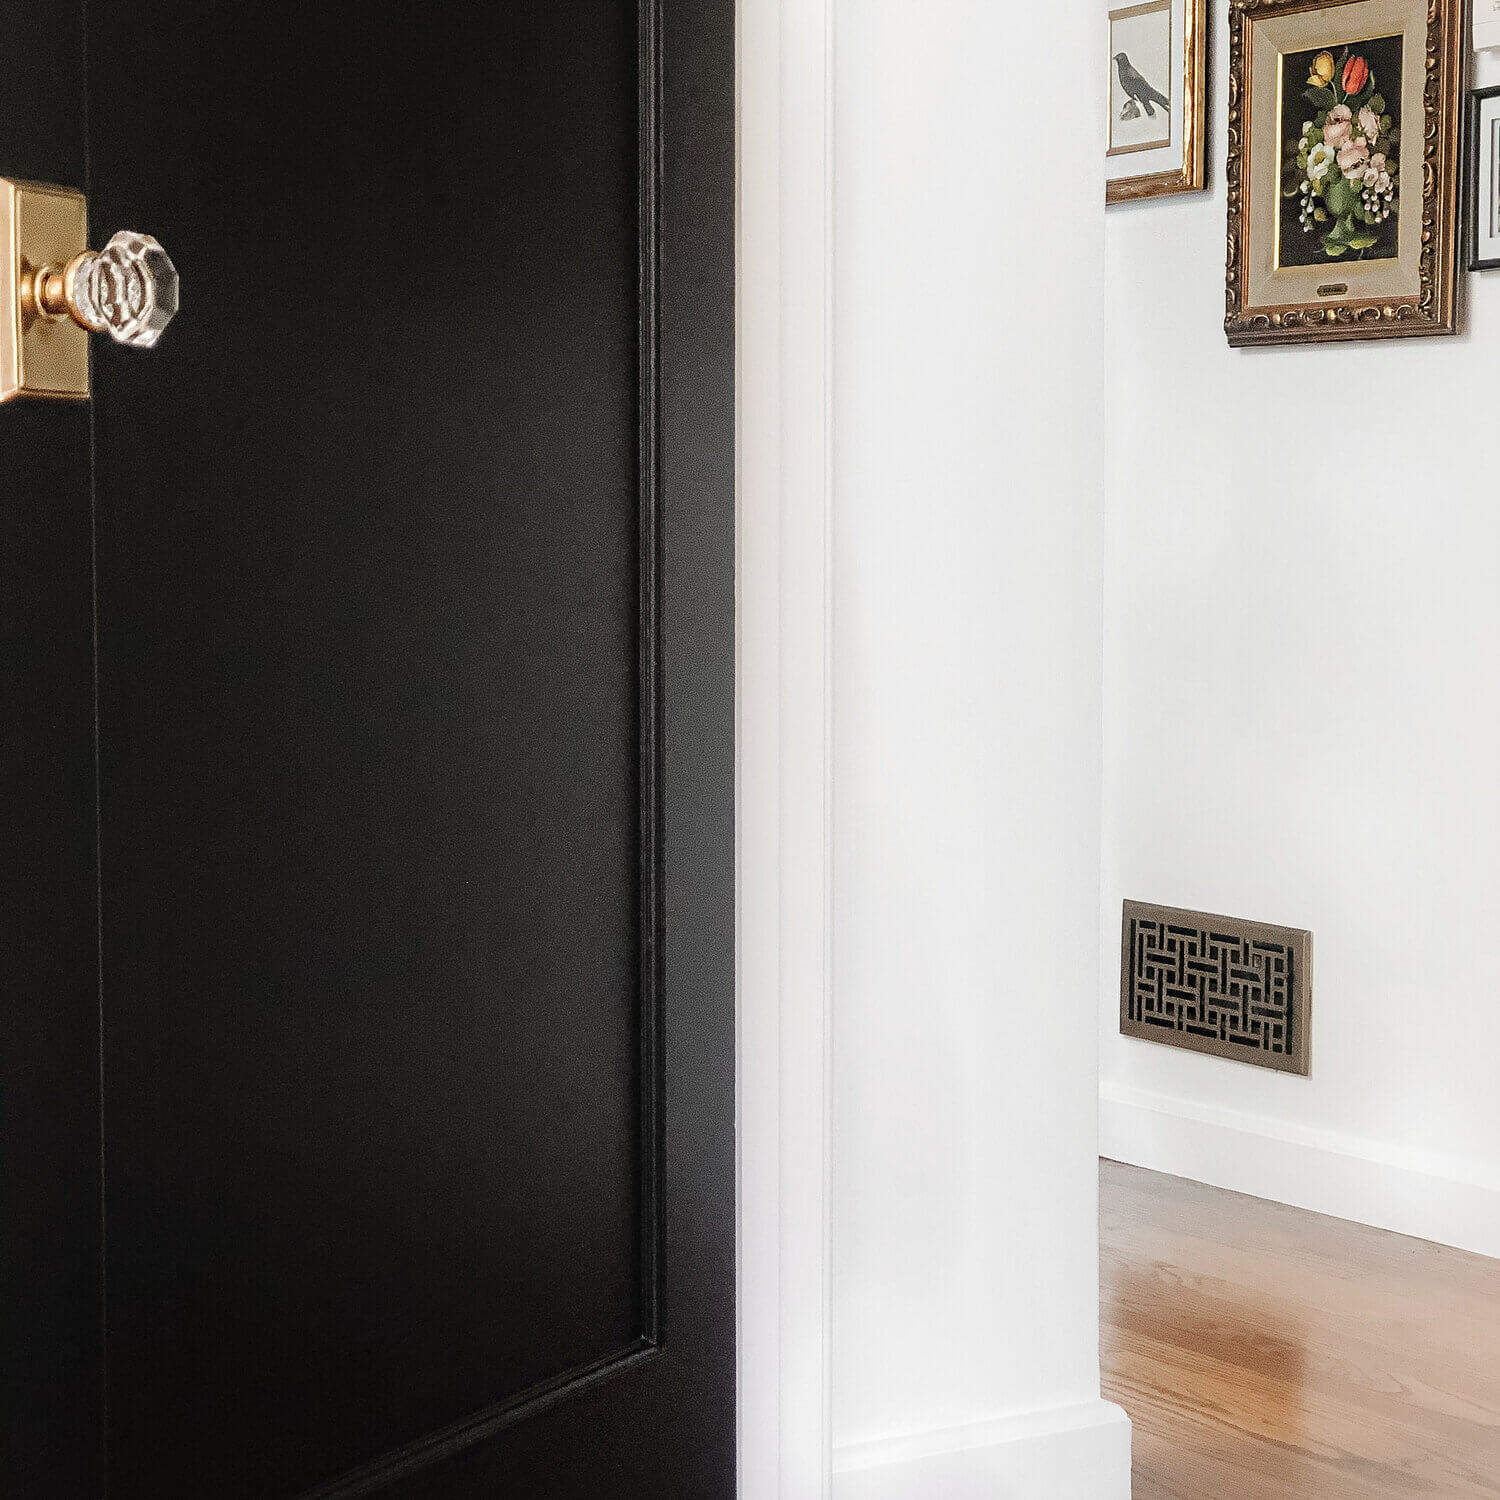
l also had a builder-grade white vent at the top of my stairs. It also just happened to be at the base of my favorite hallway gallery wall. I just love this space so much but the vent was really taking away from the magic. More troubling was that, ascend the stairs to the second floor you literally are at one point ye level with it. The vent just had to go.
I got to work, trying to figure out a beautiful and affordable way to upgrade. Of course this being 136home I knew my new vent register had to be vintage-inspired and brass.
I fell absolutely in love with this wicker style almost art deco brass vent register from @signaturehardware. But, if you are looking to save a few dollars I found this nearly identical brass vent register, at literally half of the price for just seventeen dollars. In the end, I decided to go with the Signature Hardware version for the hallway, but I used the Amazon version in my closet and it looks amazing too!
The kicker? It only takes an hour to do this DIY and required just a screwdriver and some caulk. If I can do it so can you. Here’s how I did it in one afternoon:
- Order your Brass Vent
- When ordering your brass vent register be sure to get the proper measurements. You want to order a vent that will fit over your opening while having the interior vent fitting snuggly in the wall opening. You should have the inside vent that moves open and close the same size as the cut opening in your wall but the perimeter a few inches wider than the wall so it can close up space seamlessly. Measure before ordering!
- Remove Old Vent
- Use either a Phillips or Flat Head screwdriver. Whichever matches your current vents screws. loosen counterclockwise until they release. Be sure to hold the vent in-place when you are removing the final screw. You don’t want the vent to fall on you if it’s on the ceiling or down the vent if it’s on a wall.
- If your vent has a small spring that adds tension to hold it in place – simply press it in until it lays flat and can be slid out without the spring catching the wall.
- Dust + Clean
- Guys, this DIY is so quick. Take a moment to dust the inside of the vent with these and clean the area underneath the vent. Seize the day. Who knows when you will make it back in here again. I know I haven’t been back and it’s been over a year now. Don’t tell anyone.
- Install Vent
- Guys, it’s so easy. Grab the included screws and your screwdriver if you are installing the dupe from Amazon or caulk gun if ya wanna use mine from Signature Hardware. For my vent simply place the vent over the opening, ensuring the tension spring is inserted and that the interior vent fits inside the wall opening and that your vent register covers up the wall opening completely. Don’t worry if your wall is not completely flat. I have a trick to seal up any minor gaps next. Jump to Seal any Gaps.
- After the vent is “dry fitted” in place, get those screws in if you use the Amazon Dupe. If you don’t have any small gaps then you are already done! Sit back and pat yourself on the back. Can you believe how easy that was? Also, doesn’t it look amazing? It’s incredible how this little DIY has such a big impact.
- Seal any gaps
- If your wall (like mine) wasn’t totally flat – don’t worry! Simply take paintable caulk – this is my go-to and apply a small bead all along each side of the vent. Don’t use it too much! Just a bit where the wall meets the vent register and smooth with a wet finger quickly to seal it in. I did this twice. Let dry between each application – about 30 minutes. Believe it or not, I didn’t even have to paint over the caulk after because this caulk matches my favorite Chantilly Lace White paint so well.
- Pro Tip: When applying caulk I use to use a gun – this is mine. Cut the tip of the caulk at an angle to help manage the distribution amount and insert a small nail into the tip when done to prevent dry out! Check out my stories to see the full DIY in action and a few tips on the caulking process.
That’s it, guys. Can you guys believe the wow factor? This simple DIY takes literally no time and I get so many compliments on it. You can take an eyesore and turn it into a wow. Remember the best design is in the details. I just love how easy this is to do and how it can be done with any amount of experience cheaply. Give it a shot. I know you won’t regret it.
If I can do it, you can too! I promise you will love it.
For more DIY’s like creating your own gallery wall, cooking up a delicious one-pot pasta, and more, stay tuned here or visit me on Instagram for more fun all day every day. Love ya. xo