

Key Takeaways
- Hanging drapes transforms a room by making ceilings appear taller and windows look larger.
- Use budget-friendly yet high-quality materials for a polished look without overspending.
- Follow key principles for hanging drapes: mount rods high, extend beyond windows, and ensure fullness for an elegant appearance.
- Choosing pinch pleat curtains and using drapery hooks elevates the overall design.
- Steaming and training pleats greatly enhance the final presentation of your window treatments.
Estimated reading time: 22 minutes
People ask me all the time why the rooms in our homes feel taller, brighter, and more finished, even when I’m decorating on a budget. The answer is simple. I hang drapes.
The funny thing is, they usually assume it’s the vintage furniture, layered lighting, or my signature paint colors. More often than not, it’s the properly hung curtains.
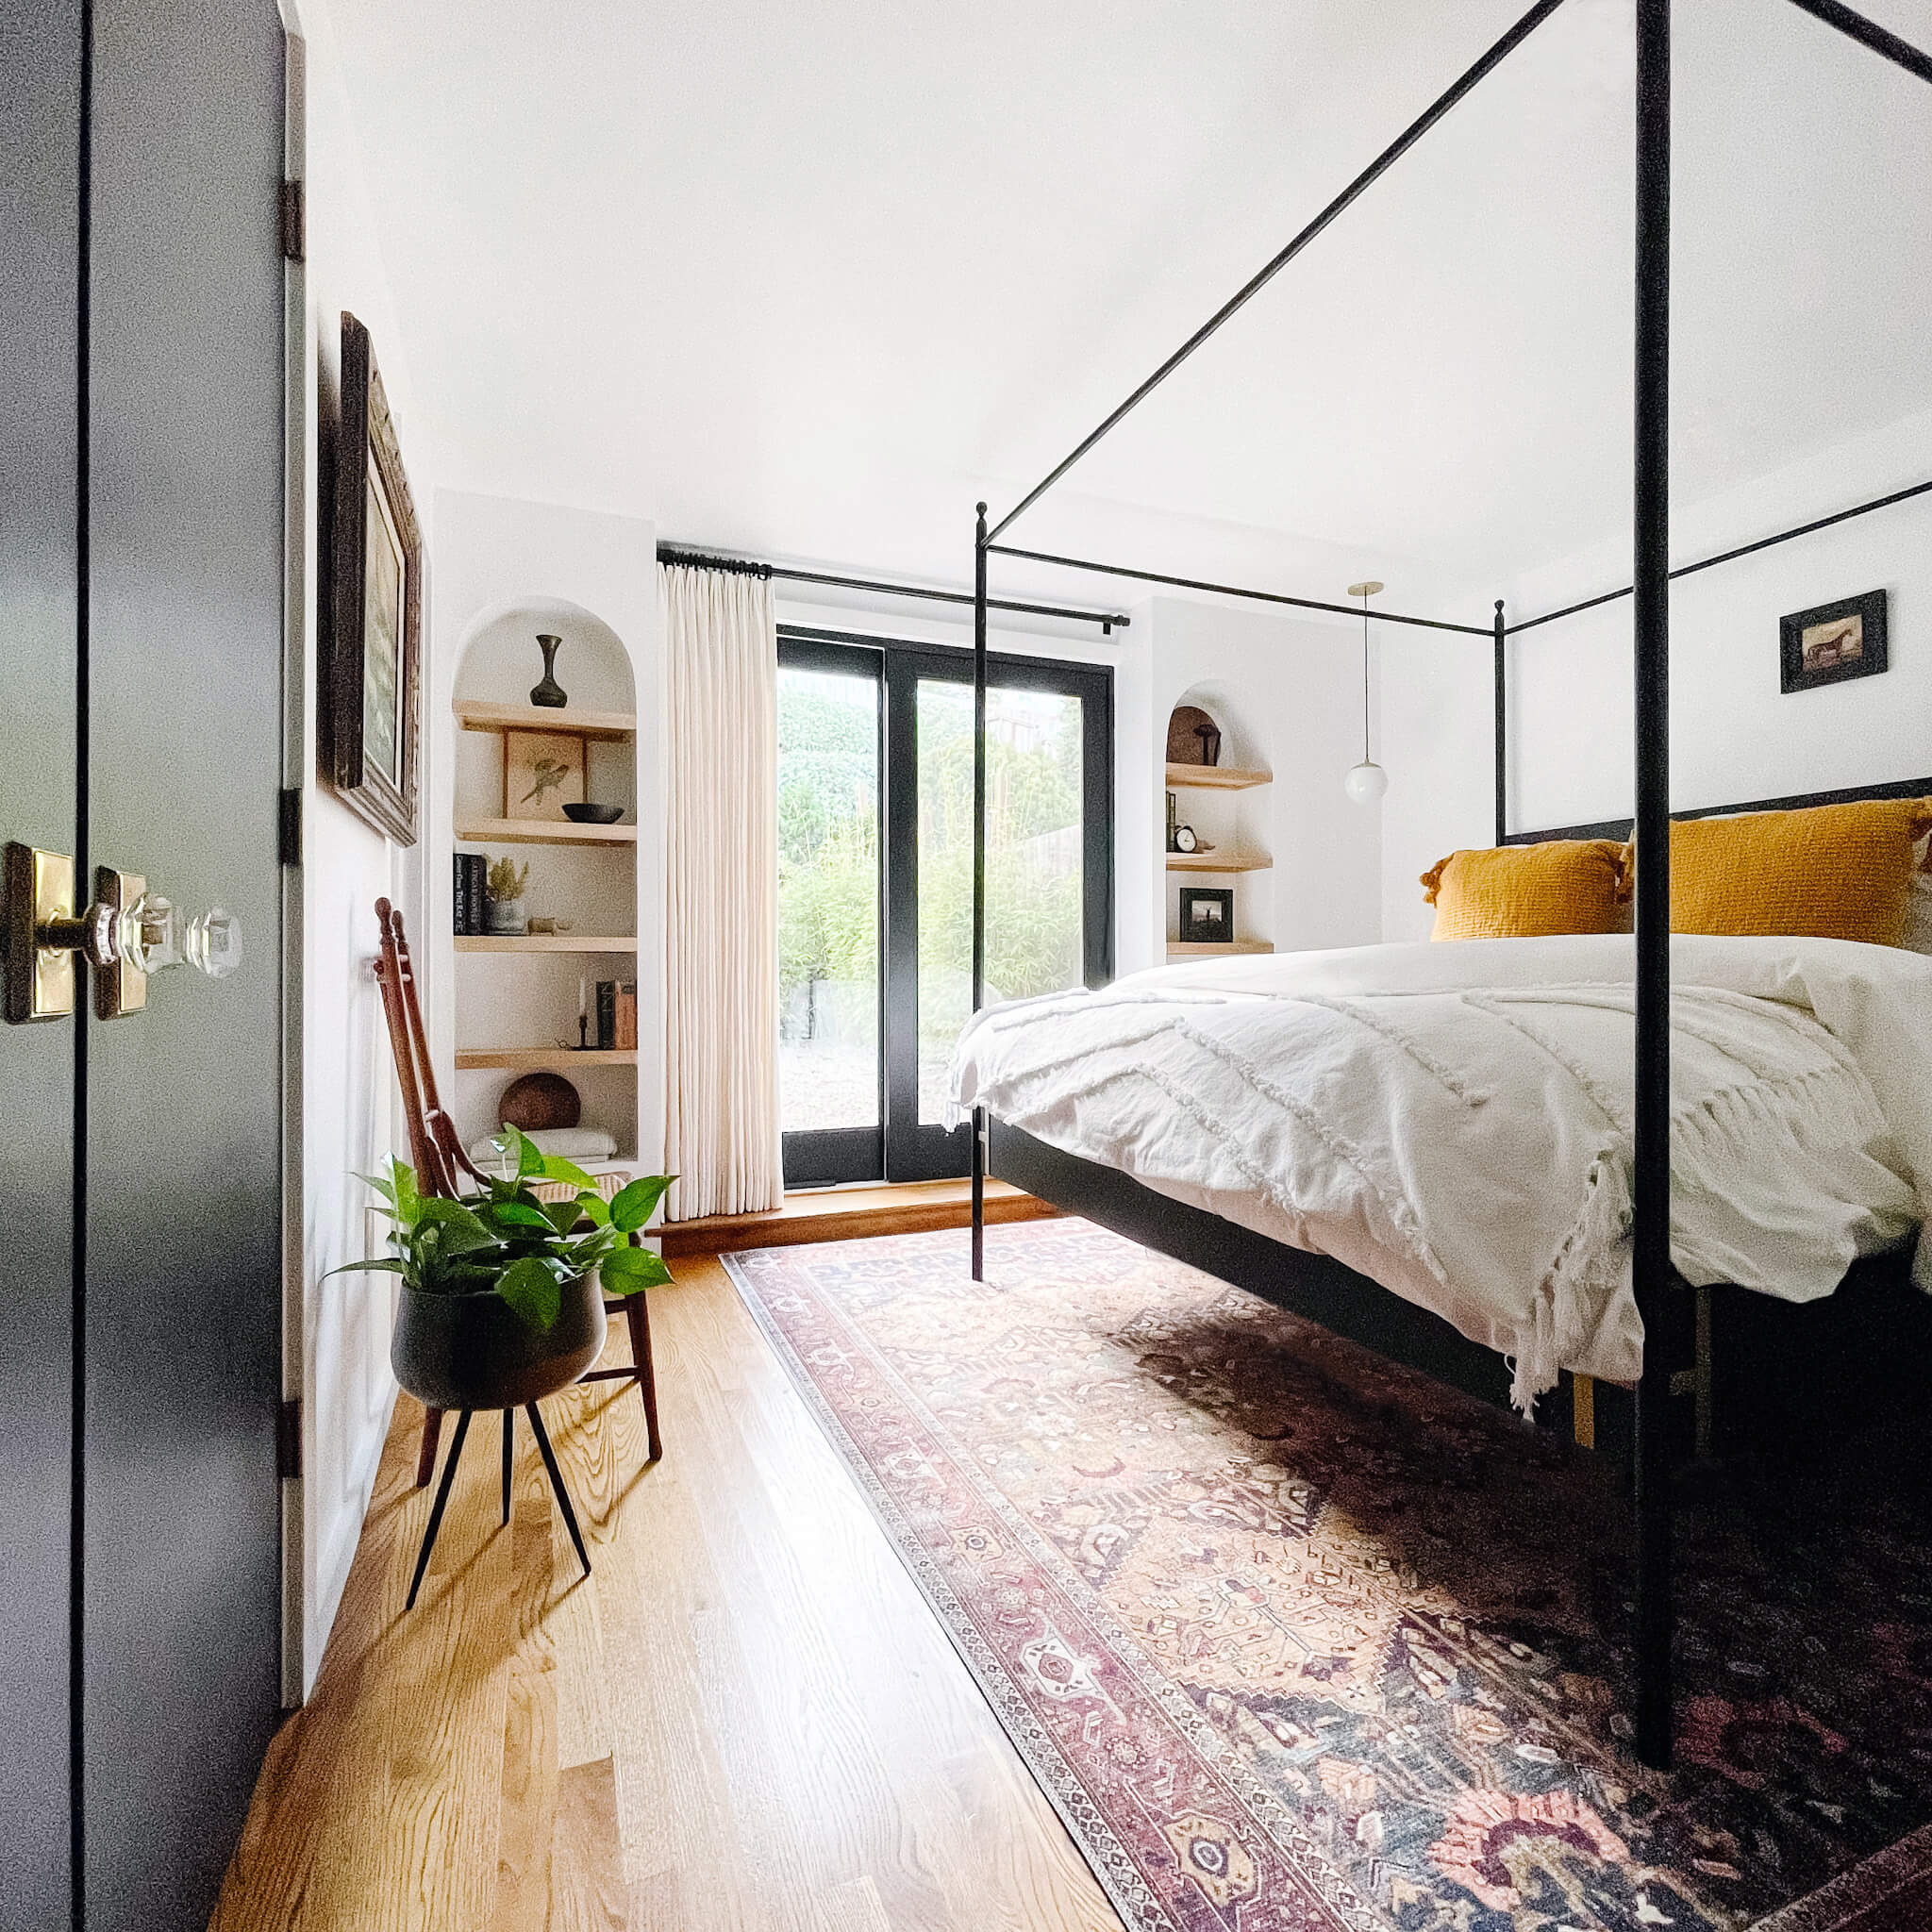
Window treatments are one of the most overlooked design elements in a home, yet they’re one of the biggest opportunities to make a room feel polished. Trust me. Hang them the wrong way and even a beautifully decorated room can feel awkward or unfinished. Hang them the right way and suddenly the ceilings feel taller, the windows look larger, and the entire room feels pulled to together. Don’t sleep on drapes – they are almost always a must!
Table of Contents
- Key Takeaways
- I’ve Got the Experience When it Comes to Hanging Drapes
- Why I Hang Drapes and Why It Matter More Than You Might Think
- My Philosophy on Window Treatments
- What It Costs to Hang Curtains Like a Designer
- Supplies You’ll Need to Hang Drapes
- Before You Measure Anything or Hang Drapes
- The Seven-Step Method I Use in Every Home When I Hang Drapes
- Step 1: Start with the Right Curtain Hardware
- Step 2: Hang Your Curtain Rod Higher Than the Window
- Step 3: Hang Drapes Like This to Make Your Windows Look Larger
- Step 4: Buy More Curtain Width Than You Think
- Step 5: Choose Pinch Pleat Curtains
- Step 6: Consider Skipping Clip Rings When you Hang Drapes
- Step 7: Steam the Curtains
- Step 8: Train the Pleats
- Step 9: Layer Your Window Treatments
- My Favorite Curtain Fabrics When I Hang Drapes
- Designer Checklist Before You Call the Project Finished
- 15 Curtain Mistakes I See Over and Over Again (And How to Avoid Them)
- My Favorite Curtain Combinations
- Where I Save vs. Where I Splurge
- More Great Interior Design + Decor Posts
- Frequently Asked Questions
- Final Thoughts
- More Great Drape and Curtain Tips:

I’ve Got the Experience When it Comes to Hanging Drapes
After renovating our 1930s San Francisco row house, restoring our weekend cabin on California’s northern coast, and decorating dozens of spaces for family and friends over the years, I’ve honestly lost count of how many curtain rods I’ve installed. I’ve made every mistake you can imagine, buying curtains that were too short, hanging rods too low, choosing the wrong hardware, and wasting money replacing everything a year later.
Those mistakes taught me something valuable. Beautiful curtains aren’t about buying the most expensive fabric.
They’re about proportion.
They’re about choosing the right hardware.
And they’re about understanding how designers think about a window.
So let’s hang curtains like a pro! Here’s my exact process I use in every room I decorate. Whether you’re hanging curtains in a rental apartment or building your forever home, these are the same principles I come back to every single time.
Why I Hang Drapes and Why It Matter More Than You Might Think
Curtains aren’t just there to block sunlight. They influence nearly every part of how a room feels.
Done well, they can:
- Make ceilings appear significantly taller.
- Make windows look larger than they actually are.
- Add softness to hard architectural lines.
- Improve acoustics.
- Create privacy while preserving natural light.
- Introduce texture without overwhelming a room.
- Help inexpensive furniture look more intentional.
I often tell people that curtains are like the frame around a beautiful piece of artwork. I hang drapes to help a room feel complete.
Like good wall art. You rarely notice the frame itself.
You notice how much better everything inside it looks.
My Philosophy on Window Treatments

One thing you’ll notice throughout our homes is that I rarely let curtains become the star of the room.
Instead, I think of them as architectural elements.
Their job is to frame beautiful windows, soften natural light, and make the architecture itself feel stronger. When someone walks into a room, I don’t necessarily want them to think: “Wow, those are beautiful curtains.” I want them to think: “This room just feels really good.”
That’s the difference. Good design often isn’t about what people notice. It’s about what they feel.
What It Costs to Hang Curtains Like a Designer

One of the biggest misconceptions is that designer-looking curtains require custom drapery.
They don’t. The biggest difference between a $300 window and a $3,000 window usually isn’t the fabric. It’s the measurements and the installation.
Here’s what you can realistically expect to spend.
| Item | Budget | Mid-Range (My Recommendation) |
| Curtain rod | $40–80 | $90–180 |
| Curtain rings | $15–30 | $30–50 |
| Drapery hooks | $8–15 | $10–20 |
| Linen curtain panels | $80–150 | $180–350 |
| Anchors & screws | $10 | $10 |
| Steamer (optional) | $40 | $70 |
Total Project Cost
- Budget-friendly designer dupe curtains: approximately $175–250
- Most rooms I design: approximately $300–600
- Custom drapery: often $2,000–5,000+ per room
That’s one of the reasons I love this project so much.
If you understand the principles I’m about to show you, you can often create a look that’s remarkably close to custom for a fraction of the price.
Supplies You’ll Need to Hang Drapes

Before you begin, gather everything you’ll need.
Tools
- Tape measure
- Pencil
- Drill
- Level
- Stud finder
- Ladder
- Steamer
Materials
- Curtain rod
- Curtain rings
- Drapery hooks
- Curtain panels
- Wall anchors
- Screws
Before You Measure Anything or Hang Drapes
This is the biggest mindset shift I can give you. Most people measure the window.
Designers measure the wall.
The goal isn’t simply covering glass. The goal is creating balance across the entire room. That’s why you’ll often notice my curtain rods extend well beyond the window frame and sit much closer to the ceiling than people expect.
Those two decisions alone can completely transform a room.
The Seven-Step Method I Use in Every Home When I Hang Drapes
Whenever I’m installing curtains, I follow the exact same process. All you need is a drill, its the easiest first timer DIY ever. Trust me. Below I cover all the designer tips you need to know. A simple Youtube will help with how to use a drill.
Whether it’s a tiny bedroom or a large living room, these seven steps never change.
- Choose timeless hardware.
- Mount the rod higher than you think. Just an inch or two below the ceiling.
- Extend the rod beyond the window. About 10-16 inches.
- Buy wider (ideally french pleat) curtain panels.
- Use rings with drapery hooks.
- Steam and train the pleats.
- Layer with woven shades or Roman shades.
Simple. Consistent. Timeless. Now let’s walk through each step in detail.
Step 1: Start with the Right Curtain Hardware

If there’s one place I never cut corners, it’s the hardware.
Beautiful curtains hung on flimsy hardware almost always look inexpensive.
On the other hand, even relatively affordable curtain panels can feel elevated when they’re paired with substantial, well-proportioned hardware.

If you don’y like a stop edge, French return curtain rods work well too.
Unlike traditional rods that stop with decorative finials, French return rods curve back toward the wall.
That simple detail does three things:
- It creates a sleek architectural look.
- It blocks more light from entering around the sides of the curtains.
- It makes the rod itself almost disappear so your eye focuses on the fabric rather than the hardware.
For finishes, I tend to stick with timeless options that work across a variety of decorating styles:
- Matte black
- Antique brass
- Oil-rubbed bronze
I generally avoid overly ornate finials or trendy hardware that competes with the room. The goal is for the curtains to complement your home’s architecture – not steal the spotlight.
Tip
If your budget is limited, spend a little more on the rod and save on the curtain panels. I hang drapes to help make a room look complete and lux. Upgrading the hardware often has a bigger visual impact than upgrading the fabric.
Step 2: Hang Your Curtain Rod Higher Than the Window
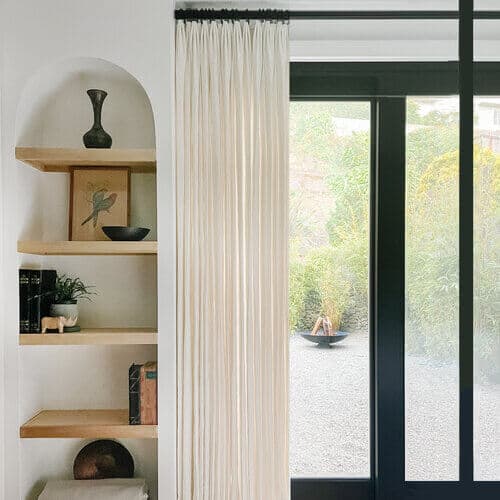
If there’s one design trick that’s made the biggest difference in every home I’ve decorated, it’s this one.
Don’t hang your curtain rod directly above the window.
It’s probably the most common mistake I see, and it’s one I made myself years ago.
When the rod sits just a few inches above the trim, your eye naturally stops there. The entire room suddenly feels shorter, the windows feel smaller, and the curtains look like an afterthought.
Instead, think about drawing the eye upward.
My Rule to Hang Drapes
Whenever possible, I mount the curtain rod:
- 8 to 12 inches above the window trim, or
- 4 to 6 inches below the ceiling or crown molding, whichever is higher.
In rooms with lower ceilings (8 feet), I’ll often push the rod even closer to the ceiling because every extra inch creates the illusion of height.
This simple change can make a room feel dramatically larger without moving a single wall.
How to Hang Drapes, From My Experience

When we renovated our 1930s San Francisco row house, the living room ceilings weren’t particularly tall. Raising the curtain rods nearly to the ceiling completely changed how the room felt. Friends regularly comment that the ceilings seem much higher than they actually are, and the curtains are a big reason why.
Step 3: Hang Drapes Like This to Make Your Windows Look Larger
The second biggest mistake people make is buying a curtain rod that’s only as wide as the window. It seems logical. When you hang drapes, you want to maximize the windows sense of scale.
It’s also one of the fastest ways to make your windows feel undersized. Instead, I want the curtains to frame the window, not cover it.
My Hang Drapes Formula
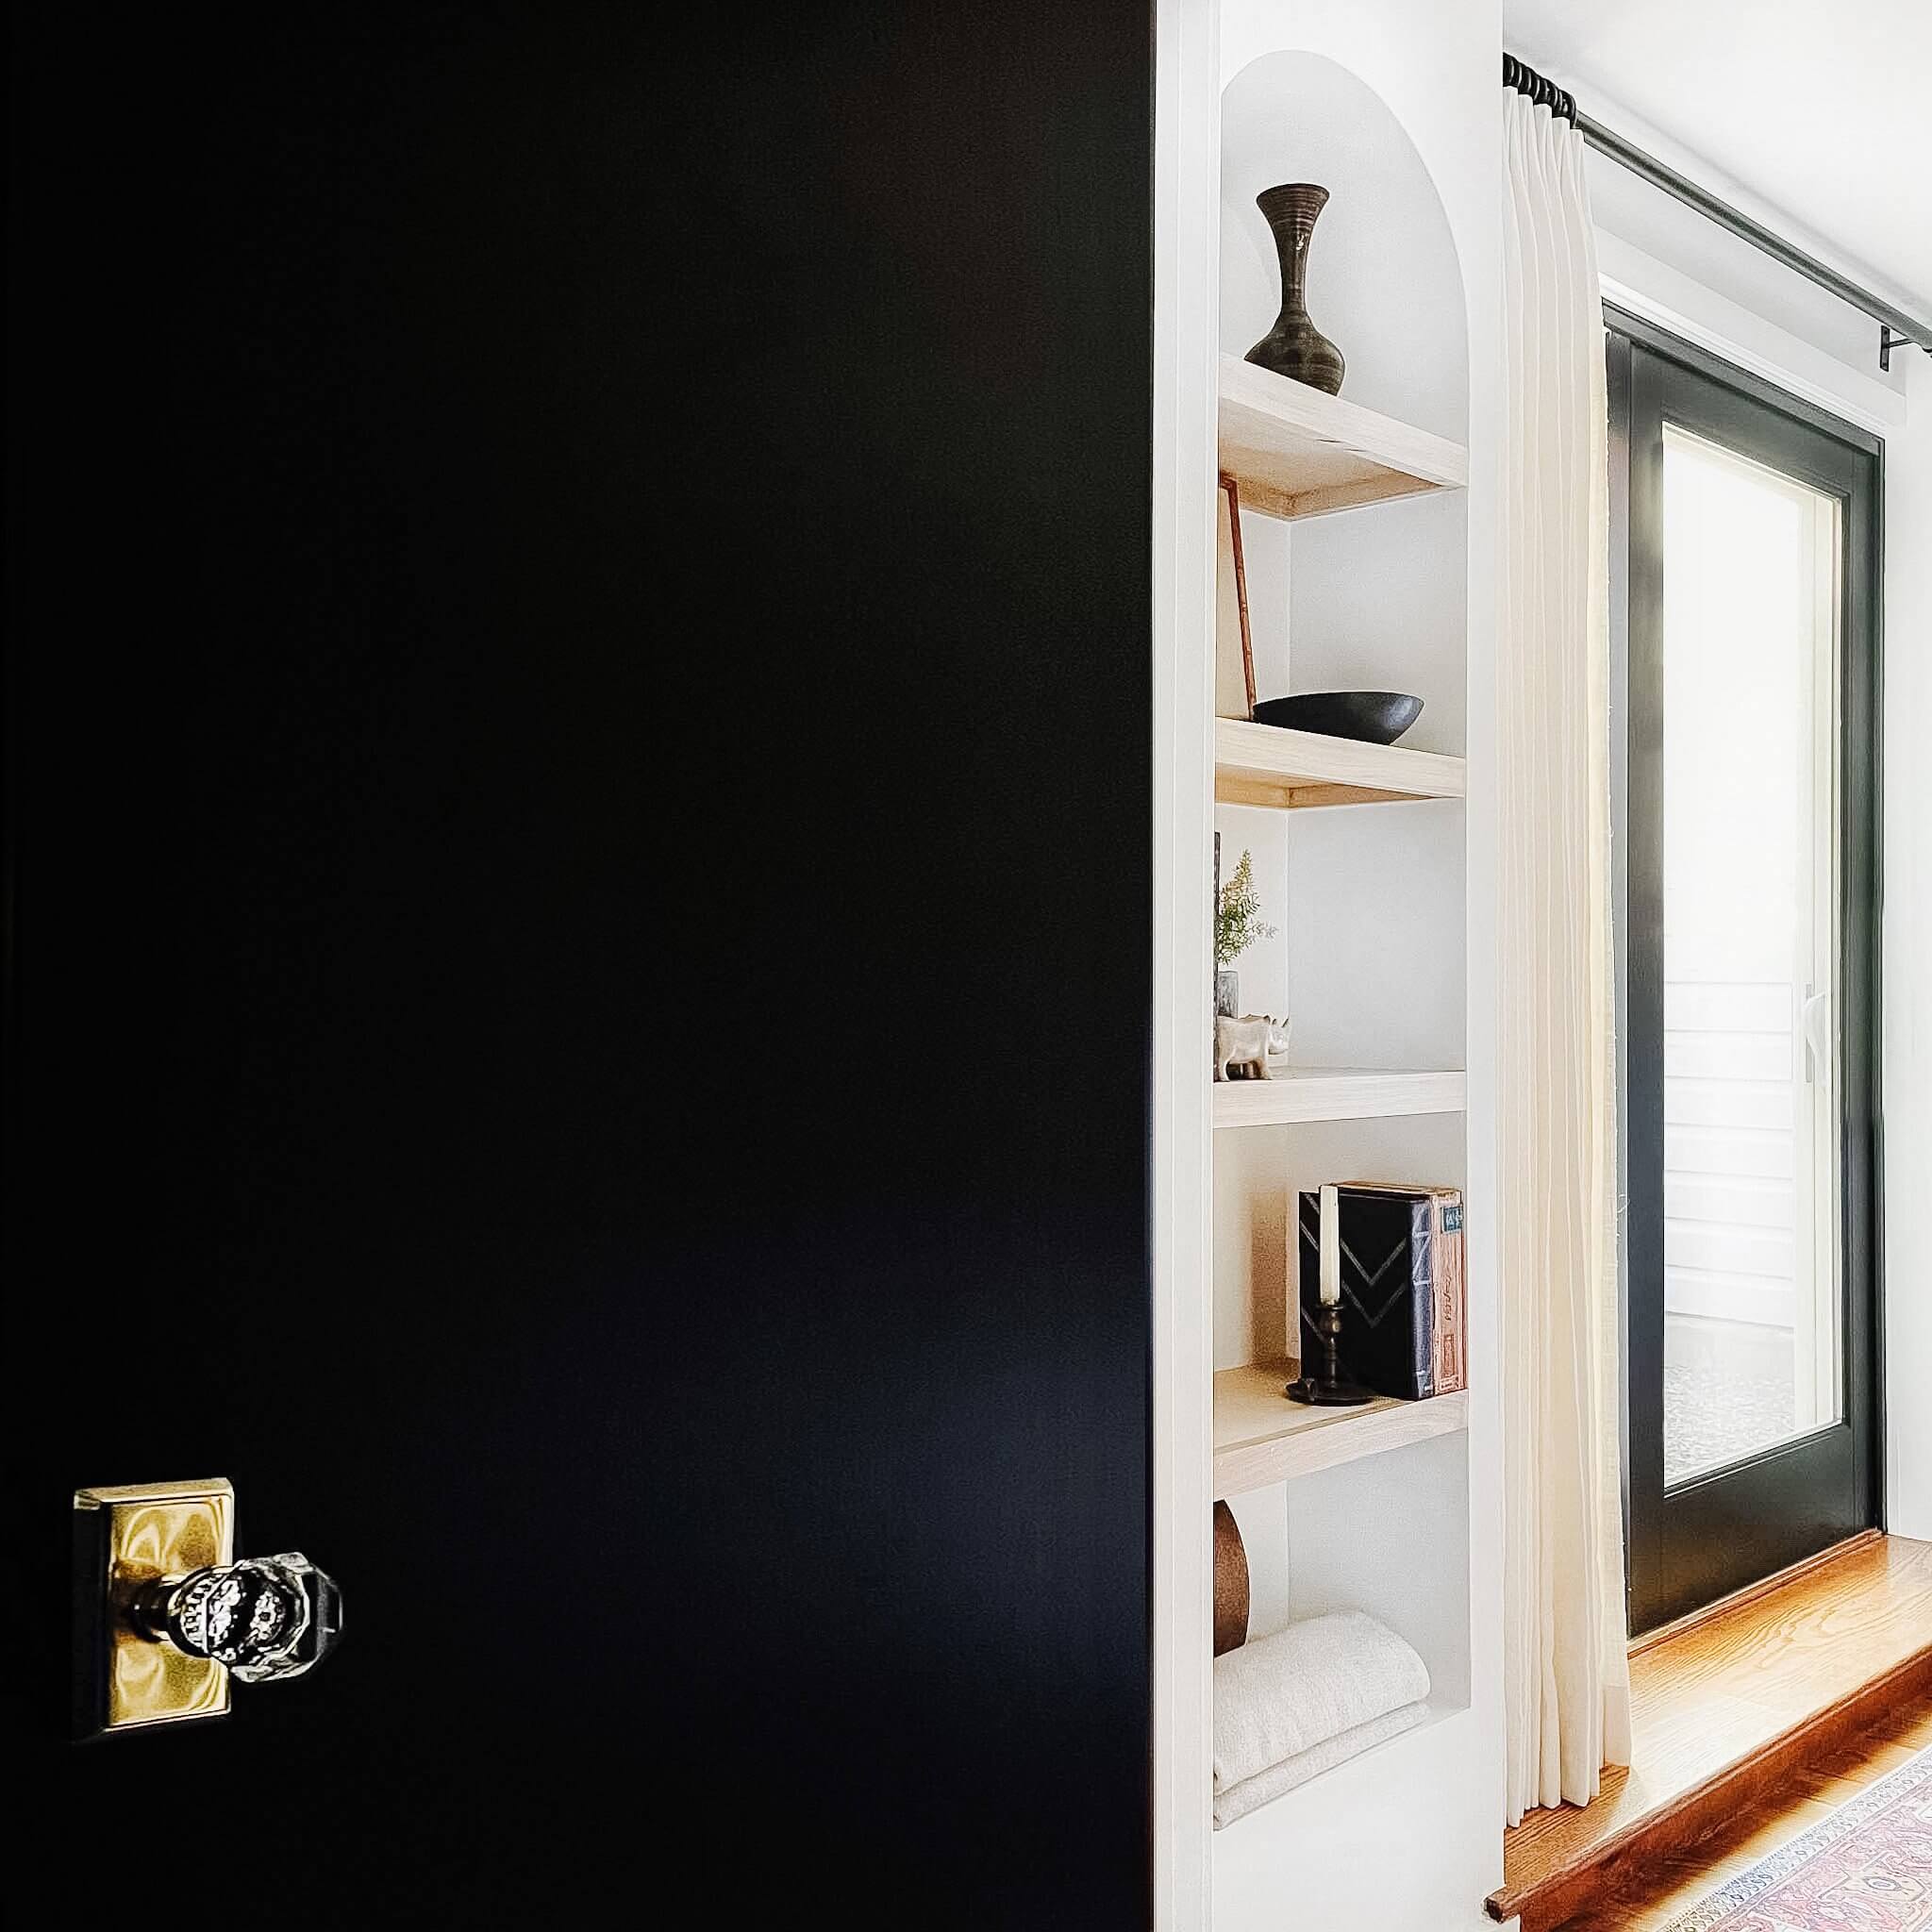
Extend the curtain rod:
- 10–16 inches beyond each side of the window. This is key when you hang drapes for a a pro look.
On especially large walls or picture windows, I sometimes extend it even farther if it helps balance the proportions.
Why?
Because when the curtains are open, the fabric stacks mostly outside the glass instead of covering it.
That means:
- More natural light.
- Bigger-looking windows.
- Better views.
- A room that feels significantly more open.
It’s one of those tricks that’s almost invisible until you compare before-and-after photos.
Step 4: Buy More Curtain Width Than You Think

Here’s something I’ve learned after hanging what honestly feels like hundreds of curtain panels:
Fullness is luxury when you hang drapes.
Flat curtains almost never look expensive. Even beautiful linen panels lose their charm if they’re stretched tightly across the rod. Instead, I always buy enough fabric to create generous folds.
My Rule of Thumb When I Hang Drapes
The total width of your curtain panels should equal:
2 to 2.5 times the width of your window.
For example:
Window width: 60 inches
Curtain width:
- Minimum: 120 inches
- Ideal: 150 inches
Those extra folds are what create that soft, relaxed look you see in designer homes.
If You’re Between Sizes When You got to Hang Drapes…
Buy the extra panel. Every single time. I’ve never stood back from a finished room and thought, “I wish these curtains were flatter.” Ya know what I mean? Like never.
I have absolutely looked at rooms and wished I had added more fullness.
Step 5: Choose Pinch Pleat Curtains
People often ask me if expensive curtains are worth it. Honestly?
Sometimes.
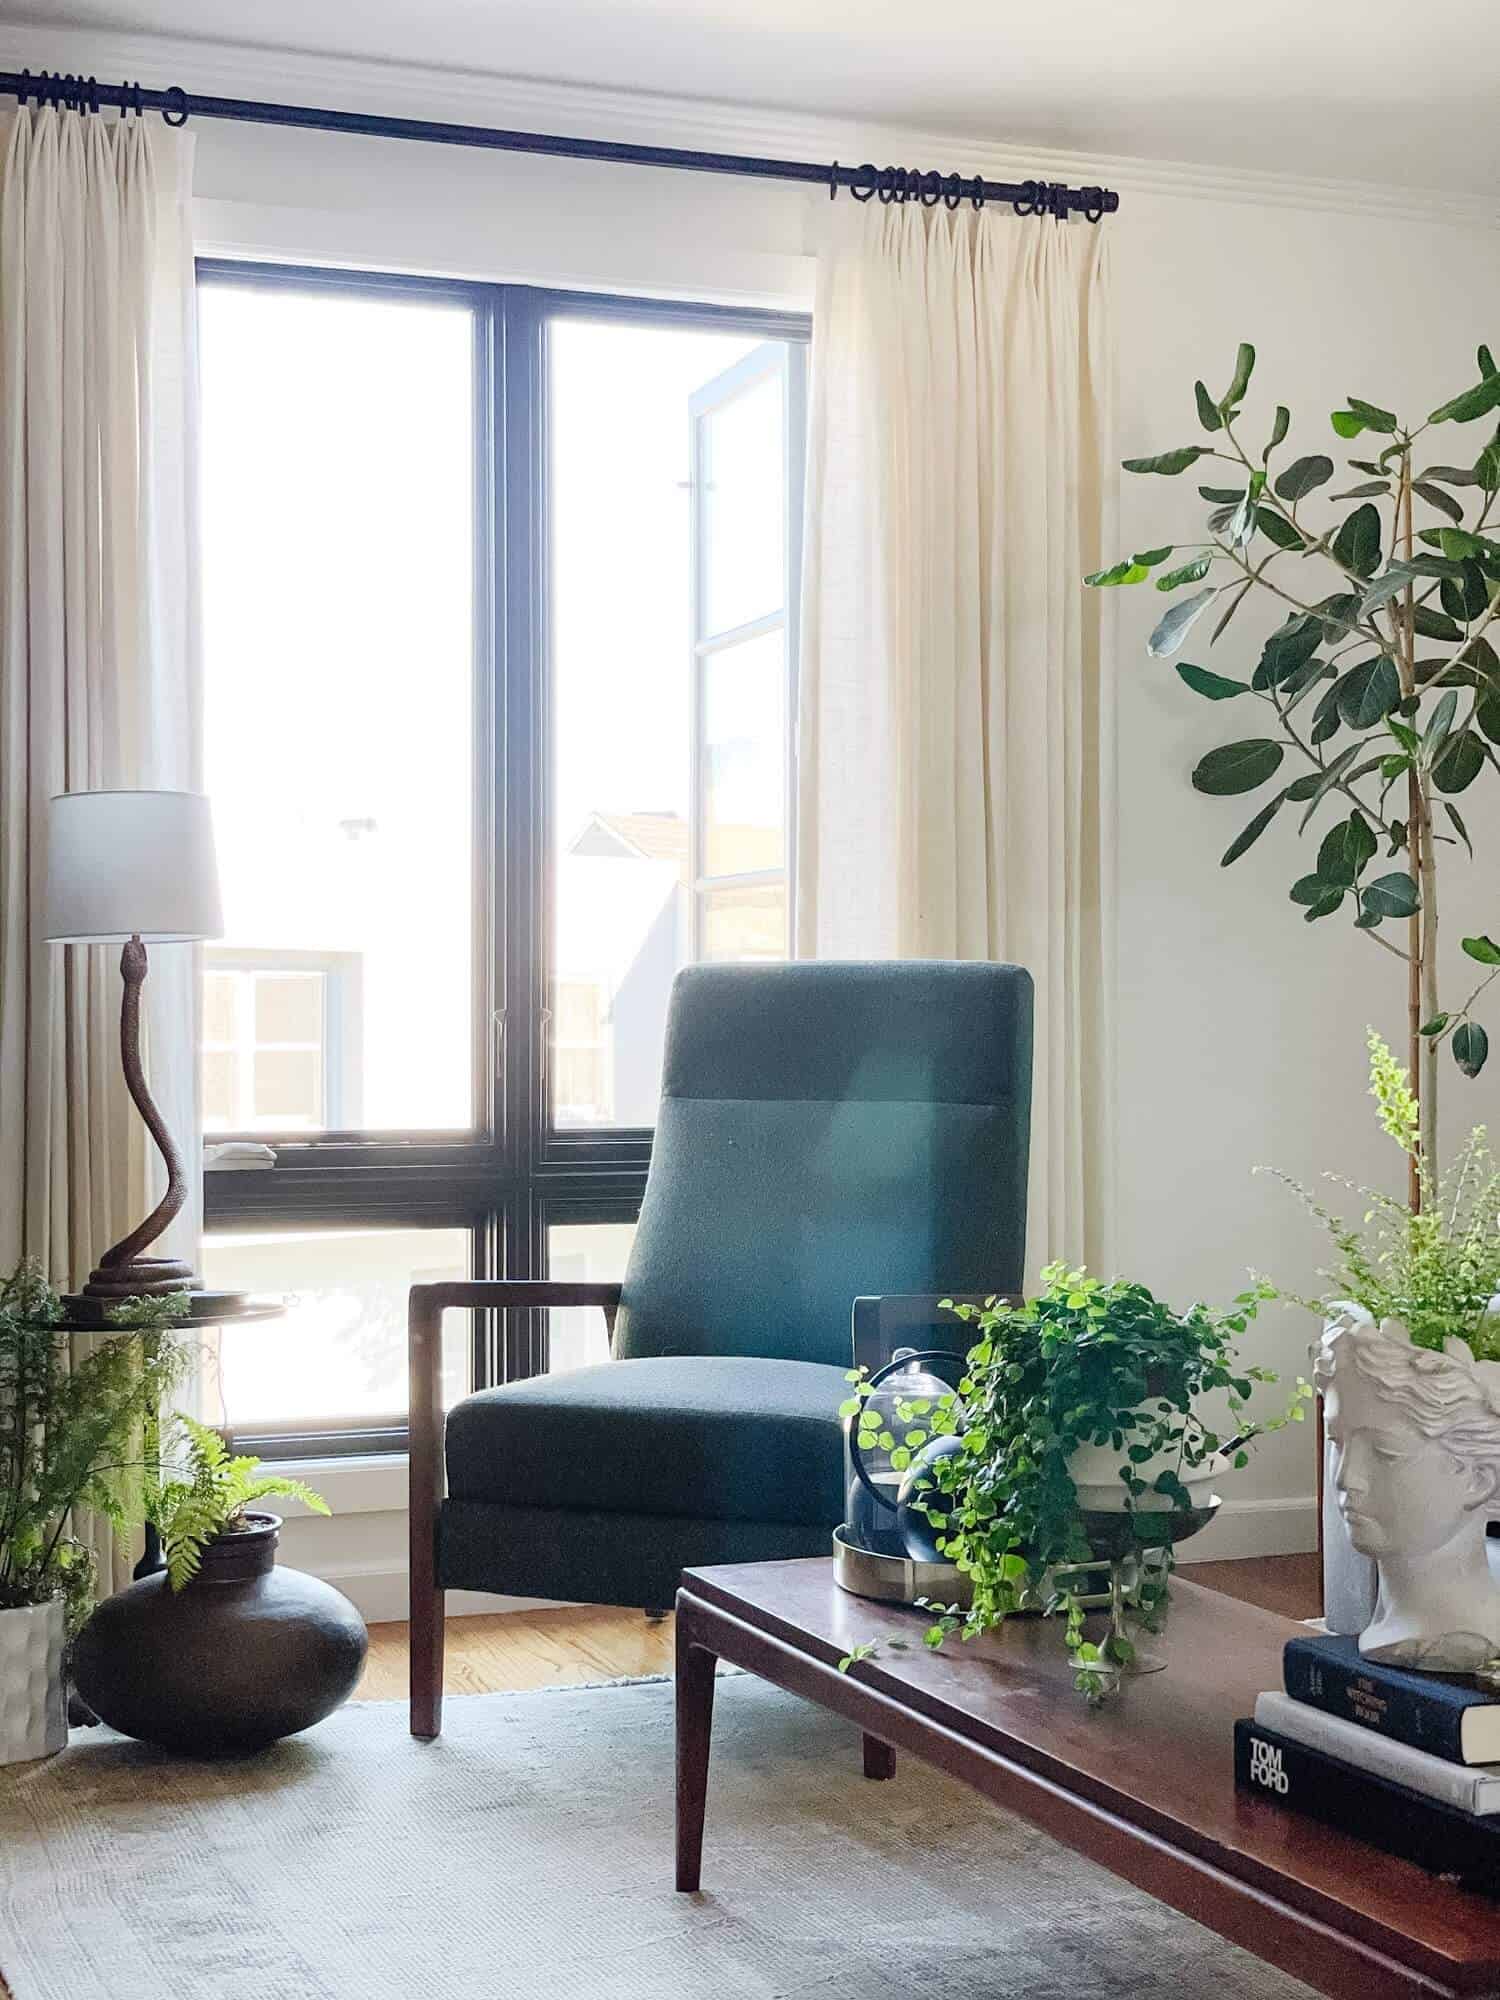
But if I had to choose between expensive fabric and the right curtain style, I’d pick the style every time. For me, pinch pleat curtains are one of the easiest ways to elevate a room. Mine are in oyster from the Shade Store. But, pinch pleat dupe for less curtains are a great alternative when you are ready to hang drapes in your own space.
Why?
Because they naturally hang in soft, even folds. The fabric falls straighter. The pleats stay consistent. The entire window immediately feels tailored.

Compare that to:
- Grommet curtains
- Rod-pocket curtains
- Tab-top curtains
Those styles tend to bunch unpredictably and often look more casual.
There’s nothing wrong with them if that’s the look you’re after, but if your goal is timeless, custom-looking drapery, pinch pleats are hard to beat.
Don’t Want Custom Curtains?
The good news is you don’t need them.
There are excellent ready-made pinch pleat panels available today, many of which look surprisingly close to custom drapery once they’re properly installed.
Step 6: Consider Skipping Clip Rings When you Hang Drapes

Pin this article
Pin It NowThis is one of those little details most people never think about.
I used clip rings for years. They were easy. They were inexpensive. Sometimes, for folks on a budget I still do it. But, they also constantly pinched the fabric and made my curtains hang unevenly.
Eventually I switched to drapery hooks paired with curtain rings.
I’ll never go back. Because the hooks attach behind the fabric, you don’t see them.
Instead you get perfectly spaced folds that slide effortlessly across the rod. It feels subtle. Until you see it in person. Then it’s hard to unsee.
My Recommendation to hang drapes. my way.
Use:
- Metal curtain rings
- Drapery pins or adjustable hooks
- Pinch pleat curtains
This combination creates one of the biggest visual upgrades in the entire project.
Step 7: Steam the Curtains
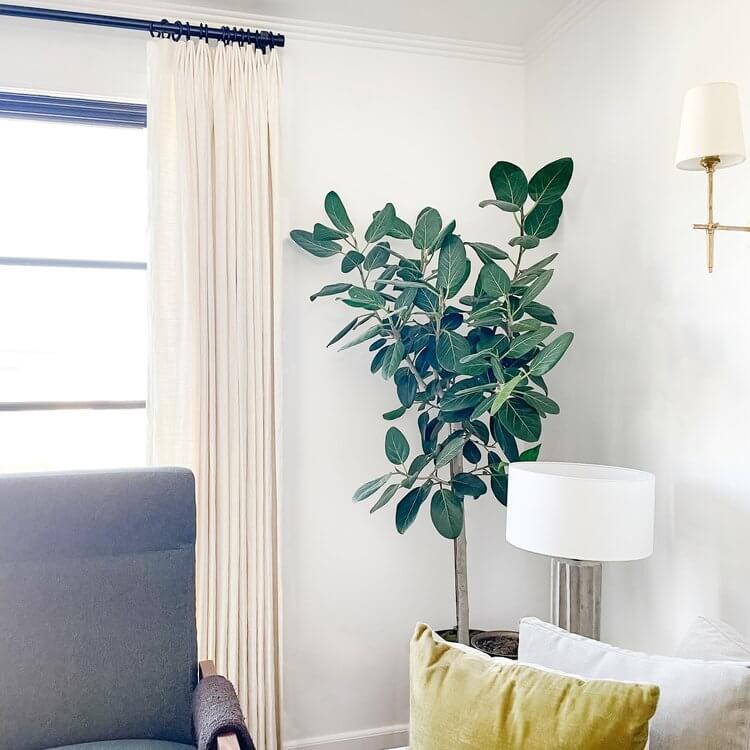
I cannot tell you how many people skip this step. Please don’t. Steam your curtains with my favorite affordable steamer.
Even expensive linen curtains arrive folded inside a package. If you hang them immediately, every crease catches the light. The room instantly looks unfinished I always steam my curtains after they’re installed.
Not before.
Gravity helps the fabric relax naturally while you steam. It usually takes about 10–15 minutes per window, and the difference is remarkable.
My Experience
I’ve never opened a package of curtains that didn’t benefit from steaming. Not once. It’s one of the fastest ways to make inexpensive curtains look significantly more expensive.
Step 8: Train the Pleats

Here’s a trick professional installers use that almost nobody talks about.
Once the curtains are hanging, gently fold the pleats together and loosely tie them with strips of ribbon or soft fabric.
Leave them that way for 24 to 72 hours.
This helps “teach” the fabric where to fold.
Afterward, remove the ribbon and the curtains naturally fall into beautiful, consistent pleats every time you open and close them.
It’s a tiny step that makes a huge difference over the long term.
Step 9: Layer Your Window Treatments

One thing you’ll notice throughout our homes is that I rarely use curtains by themselves when I hang drapes. Layering adds depth, texture, and flexibility.
My favorite combinations include:
Woven Wood Shades + Linen Curtains
Probably my favorite combination. The woven texture adds warmth while the linen softens the room.
Roman Shades + Curtains
Perfect if you want to introduce pattern or color while keeping the drapery relatively neutral.
Blackout Shades + Linen Curtains
Ideal for bedrooms where you want complete darkness at night but soft, filtered light during the day.
Layering also gives you more control over privacy without making the room feel heavy.
My Favorite Curtain Fabrics When I Hang Drapes
I almost always recommend fabrics with texture. Texture photographs beautifully, filters light softly, and tends to feel timeless. I prefer a slightly off shite, like Oyster from the share store.
Some of my favorites include:
- Linen
- Linen blends
- Heavy cotton
- Belgian-style linen
- Cotton-linen blends
I generally avoid shiny polyester whenever possible because it often reflects light in a way that feels less natural.
If you’re decorating on a budget, a good linen blend usually offers the best balance of price, durability, and appearance.
Designer Checklist Before You Call the Project Finished
Before I pack up my tools, I always ask myself these questions:
- Is the rod mounted as high as possible?
- Does the rod extend beyond the window?
- Do the curtains lightly kiss the floor?
- Do the panels have enough fullness?
- Have the curtains been steamed?
- Have the pleats been trained?
- Do the curtains open completely off the glass?
- Does the entire wall, not just the window, feel balanced?
If the answer to all of those is yes, the room almost always feels finished.
15 Curtain Mistakes I See Over and Over Again (And How to Avoid Them)
I’ve hung enough curtain rods to know that almost every disappointing result comes down to one of a handful of simple mistakes. The good news? They’re all easy to fix before you ever drill the first hole.

1. Hanging the Rod Too Low
This is by far the most common mistake.
Mounting the rod directly above the window visually shortens your walls and makes the ceiling feel lower than it actually is.
Instead, install the rod as high as your room allows. Even raising it six or eight inches can dramatically change how spacious a room feels.
2. Buying Curtains That Are Too Short
Curtains should never look like they’re waiting for a flood.
I almost always recommend curtains that just barely touch the floor. Designers often call this “kissing the floor.”
That tiny touch creates a tailored, custom appearance.
If your floors are uneven, as they often are in older homes like our San Francisco row house measure both sides of the window before ordering.
3. Using a Rod That’s Too Narrow
One of the easiest ways to make a window feel cramped is using a rod that’s only the width of the window itself.
Whenever possible, extend the rod well beyond the trim so the curtains stack outside the glass when they’re open.
You’ll gain natural light and make the window appear much larger.
4. Buying Curtains That Aren’t Full Enough
Nothing cheapens a window faster than curtains stretched flat across the rod. I always recommend generous fullness. When in doubt, buy another panel.
5. Forgetting to Steam the Fabric
This is one of those details people often skip because they’re eager to finish the project.
Don’t.
Every wrinkle catches sunlight differently. Steaming takes just a few minutes and makes a dramatic difference.
6. Choosing the Wrong Fabric
Some fabrics fight against the look you’re trying to achieve. If you’re after a timeless home, choose fabrics with texture rather than shine.
I love:
- Linen
- Linen blends
- Cotton
- Belgian-style linen
These fabrics filter light beautifully and age gracefully.
7. Ignoring the Architecture
Every room tells you how the curtains should be installed. Sometimes that means centering them on the wall instead of the window. Sometimes it means extending the rod farther than expected.
Always step back and look at the entire room, not just the opening in the wall.
8. Buying Decorative Finials That Compete With the Room
Hardware should support the design, not steal the show. Simple hardware almost always ages better than ornate designs.
9. Not Training the Pleats
This is one of the easiest upgrades you’ll ever make. Train the pleats once. Enjoy beautiful drapery for years.
10. Choosing the Wrong Color
I almost always begin with neutral curtains.
- Cream
- Linen oyster
- Natural flax
- Warm white
- Soft oatmeal
These colors allow the architecture, furniture, artwork, and lighting to become the focus.
11. Hanging Curtains Without a Level
It sounds obvious…
Until you finish the room and realize one side is half an inch lower than the other. Measure twice. Level every bracket.
12. Using Weak Wall Anchors
Curtains are heavier than most people realize. Invest in quality anchors whenever you can’t mount directly into studs.
Future you will appreciate it.
13. Buying the Cheapest Curtain Rod
This is where I recommend spending slightly more. A sturdy rod keeps long panels from sagging and feels substantially better every time you open the curtains.
14. Forgetting About Light Control
Think about how you actually use the room. Living room? Filtered light.
Bedroom? Blackout shade hidden behind linen curtains.
Office? Enough light to reduce glare while keeping the room bright.
Beautiful homes balance style and function.
15. Decorating the Window Instead of Framing It
This might be my biggest philosophy. Curtains shouldn’t compete with your room. They should quietly make everything else look better.
My Favorite Curtain Combinations
People ask me all the time what combinations I use throughout our homes. Here are the ones I come back to again and again.
Living Room
- Linen pinch pleat curtains
- Woven wood shades
- Matte black or antique brass French return rod
This combination feels timeless, layered, and relaxed.
Bedroom
- Linen curtains
- Hidden blackout roller shade
- French return rod
Beautiful during the day.
Dark when it’s time to sleep.
Dining Room
I usually keep things simple. Textured linen curtains mounted high with plenty of fullness create an elegant backdrop without distracting from the dining table.
Home Office
Natural light is everything. I prefer light-filtering linen panels that soften harsh afternoon sun while keeping the room bright enough to work comfortably.
Where I Save vs. Where I Splurge

One thing decorating dozens of rooms has taught me is that not every purchase deserves the same budget.
I Splurge On
- Curtain rods
- Linen fabric
- Good curtain rings
- Woven wood shades
These pieces are used every day and have the biggest visual impact.
I Save On
- Decorative finials
- Basic drapery hooks
- Installation hardware
- Ready-made pinch pleat curtains
Today’s ready-made options have improved dramatically.
Most guests can’t tell the difference once everything is installed correctly.
More Great Interior Design + Decor Posts



Frequently Asked Questions

Curtains should generally be hung 8–12 inches above the window trim. I go as high as I can. When ceiling height allows, position the rod about 4–6 inches below the ceiling to make the room and windows appear taller.
Yes, curtains should lightly touch – or “kiss” – the floor for a clean, tailored appearance. Avoid panels that stop several inches above the floor, as they can make the curtains look too short.
A curtain rod should typically extend 8–12 inches beyond each side of the window frame. This allows the panels to sit mostly outside the window when open, making the window appear wider and letting in more natural light.
Yes, pinch pleat curtains are worth it when you want a polished, custom-looking window treatment. Their structured pleats create a fuller, more tailored appearance without requiring fully custom drapery.
Yes, you can hang curtains without drilling directly into wall studs. Use high-quality drywall anchors that are rated to support the combined weight of the curtain rod, brackets, and curtain panels.
Final Thoughts

After decorating homes for years, I’ve realized that beautiful rooms rarely come from expensive furniture or following every design trend. They come from getting the fundamentals right.
Curtains are one of those fundamentals.
They’re one of the first things your eye notices, even if you don’t realize it.
When they’re hung high, wide, and with enough fullness, they completely change the way a room feels. The ceilings seem taller. The windows appear larger. Natural light fills the space more beautifully. Everything feels more intentional.
It’s one of the highest-impact projects you can tackle in a weekend, and unlike many home improvements, it’s something you can take with you if you move.

Whether you’re decorating your very first apartment, renovating an older home like our 1930s San Francisco row house, or putting the finishing touches on a forever home, I hope this guide gives you the confidence to tackle your windows like a designer.
And remember: great curtains aren’t about perfection. They’re about creating a home that feels warm, welcoming, and unmistakably yours.
More Great Drape and Curtain Tips:












One thing I’ll always preach: hang them high, go wider than you think, and never skimp on fullness. It’s the fastest way to make a room feel taller, brighter, and way more custom.